JeepParts
My Garage
My Account
Cart
OEM Dodge Sprinter 3500 TPMS Sensor
Tire Pressure Monitoring System Sensor- Select Vehicle by Model
- Select Vehicle by VIN
Select Vehicle by Model
orMake
Model
Year
Select Vehicle by VIN
For the most accurate results, select vehicle by your VIN (Vehicle Identification Number).
1 TPMS Sensor found

Dodge Sprinter 3500 Tire Pressure Sensor Part Number: 68038945AA
Dodge Sprinter 3500 TPMS Sensor
Choose OEM TPMS Sensor that meet Dodge factory standards. Dodge designs and tests every component for precision and durability. Each TPMS Sensor follows strict manufacturing steps to lock in quality and fit. If your Dodge Sprinter 3500 matters to you, OEM parts make the smart choice. You'll get the exact look, feel, and performance you expect. Shop genuine Sprinter 3500 parts at the highly competitive prices online. Enjoy a manufacturer's warranty, a hassle-free return policy, and rapid delivery. No more guesswork with off brands. Get genuine parts with exact fit and true factory performance. Shop with confidence today at JeepPartsDeal.com.
Dodge Sprinter 3500 TPMS Sensor Parts and Q&A
- Q: How to Install a TPMS Sensor on Dodge Sprinter 3500?A:The first step of installing a tire pressure sensor is to replace the valve cap, valve core and sensor seal to make sure everything seals correctly. Wash the area near the sensor/valve stem mounting point in the wheel and be sure the surface is intact. Put the sensor through the wheel, touching the back of the metal valve stem, so that the potted side is not damaged. Start by pushing the sensor down into place, then hand tighten the sensor nut until the housing is level and press it down to 6 Nm (53 in. lbs.). As tight as you go, make sure it's not so much as to pull the sensor off the valve stem; if that happens, you should repair it right away. If you have a rotating wheel tire changer, place the sensor valve stem about 180° from the head; if you have a rotating tool tire changer, place it opposite the installation end. Remember to keep the sensor away from the lower bead breaker area. Once the tire is mounted, check the Tire Inflation Pressure Label on the driver's side B-pillar and follow the air pressure shown there. Then, place the original valve stem cap securely to keep moisture out of the sensor. Then, put the wheel and tire assembly onto the vehicle and lower it to the ground.

Related Dodge Sprinter 3500 Parts
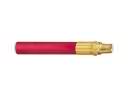 Dodge Sprinter 3500 Air Hose
 Dodge Sprinter 3500 Antenna Mast
 Dodge Sprinter 3500 Brake Light Switch
 Dodge Sprinter 3500 Clock Spring
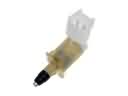 Dodge Sprinter 3500 Door Jamb Switch
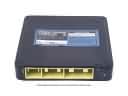 Dodge Sprinter 3500 Engine Control Module
 Dodge Sprinter 3500 Ignition Coil
 Dodge Sprinter 3500 Oil Pressure Switch
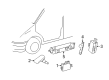
 Dodge Sprinter 3500 Parking Assist Sensor
 Dodge Sprinter 3500 Seat Belt
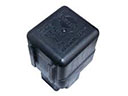 Dodge Sprinter 3500 Starter Relay
 Dodge Sprinter 3500 Windshield Washer Pump