JeepParts
My Garage
My Account
Cart
OEM Dodge Stratus Clutch Fork
Release Fork- Select Vehicle by Model
- Select Vehicle by VIN
Select Vehicle by Model
orMake
Model
Year
Select Vehicle by VIN
For the most accurate results, select vehicle by your VIN (Vehicle Identification Number).
2 Clutch Forks found


Dodge Stratus Release Fork Part Number: MD749671


Dodge Stratus Release Fork Part Number: 4796664
Dodge Stratus Clutch Fork
Choose OEM Clutch Fork that meet Dodge factory standards. Dodge designs and tests every component for precision and durability. Each Clutch Fork follows strict manufacturing steps to lock in quality and fit. If your Dodge Stratus matters to you, OEM parts make the smart choice. You'll get the exact look, feel, and performance you expect. Shop genuine Stratus parts at the highly competitive prices online. Enjoy a manufacturer's warranty, a hassle-free return policy, and rapid delivery. No more guesswork with off brands. Get genuine parts with exact fit and true factory performance. Shop with confidence today at JeepPartsDeal.com.
Dodge Stratus Clutch Fork Parts and Q&A
- Q: How to Service and Repair a Clutch Fork on Dodge Stratus?A:First, take out the transaxle from the car before servicing and repairing the clutch release fork. Hold the lever and bearing group in upright position, use both hands to get a grip on the release lever in the pivot stud opening and pull steadily to remove the lever from the pivot stud, not relying on a screwdriver or pry bar to protect the spring clip from breakage. Lift the lever out of the bearing thrust plate and make sure you don't damage the retention tabs while doing so. Peek inside the pre-lubricated and sealed bearing, making sure it doesn't get wet during inspection; it should show easy turning under a little push, with resistance from the sealant considered normal. Should the bearing be making noise, feel rough or has dried, you need to change the full bearing assembly. On the back of the clutch release lever, make sure the pivot stud spring clips are not broken before replacing the whole lever. Do not remove the release lever pivot ball unless it is stuck, using slide hammer C-3752 and remover/installer 6891 to take it off. For installation, add new release lever pivot ball(s) using the same tools if you have removed the old one. First, grease the pivot ball pocket in the lever and the lever arms, then add the arms to the bearing with the small pegs placed over the arms. Attach the assembly of the bearing and lever to the transaxle along with the input shaft bearing retainer, snap the clutch release lever onto the pivot ball and then lower the assembly into the car.

Related Dodge Stratus Parts
 Dodge Stratus Automatic Transmission Shift Levers
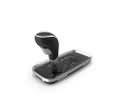 Dodge Stratus Automatic Transmission Shifter
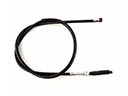 Dodge Stratus Clutch Cable
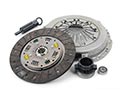 Dodge Stratus Clutch Disc
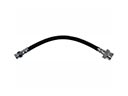 Dodge Stratus Clutch Hose
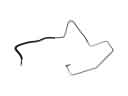 Dodge Stratus Clutch Hydraulic Lines
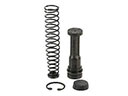 Dodge Stratus Clutch Master Repair Kit
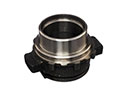 Dodge Stratus Clutch Release Bearing
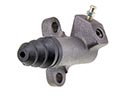 Dodge Stratus Clutch Slave Cylinder
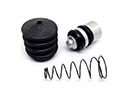 Dodge Stratus Clutch Slave Repair Kit
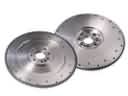 Dodge Stratus Flywheel
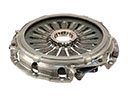 Dodge Stratus Pressure Plate