JeepParts
My Garage
My Account
Cart
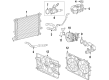
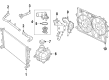
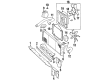
OEM Jeep Cherokee Cooling Fan Assembly
Engine Cooling Fan- Select Vehicle by Model
- Select Vehicle by VIN
Select Vehicle by Model
orMake
Model
Year
Select Vehicle by VIN
For the most accurate results, select vehicle by your VIN (Vehicle Identification Number).
Filter by Part Type
Filter by Part Type
8 Cooling Fan Assemblys found


Jeep Cherokee Fan Shroud, Front Part Number: 68437465AB
$436.48 MSRP: $659.00You Save: $222.52 (34%)Ships in 1-2 Business Days
Jeep Cherokee Fan - Radiator Cooling Part Number: 52014621AH
$733.72 MSRP: $1110.00You Save: $376.28 (34%)Ships in 1 Business Day
Jeep Cherokee Fan - Radiator Cooling Part Number: 68164091AI
$703.89 MSRP: $1070.00You Save: $366.11 (35%)


Jeep Cherokee Fan Blade Part Number: J3236658


Jeep Cherokee Fan Blade Part Number: 52028337AC

Jeep Cherokee Fan Clutch Part Number: 52002593

Jeep Cherokee Fan Assembly Part Number: 52079444AB
Jeep Cherokee Fan Assembly Part Number: 52005748AB
Jeep Cherokee Cooling Fan Assembly
Choose OEM Cooling Fan Assembly that meet Jeep factory standards. Jeep designs and tests every component for precision and durability. Each Cooling Fan Assembly follows strict manufacturing steps to lock in quality and fit. If your Jeep Cherokee matters to you, OEM parts make the smart choice. You'll get the exact look, feel, and performance you expect. Shop genuine Cherokee parts at the highly competitive prices online. Enjoy a manufacturer's warranty, a hassle-free return policy, and rapid delivery. No more guesswork with off brands. Get genuine parts with exact fit and true factory performance. Shop with confidence today at JeepPartsDeal.com.
Jeep Cherokee Cooling Fan Assembly Parts and Q&A
- Q: How to Service a Cooling Fan Assembly on Jeep Cherokee?A:You should first remove the battery negative cable before servicing the electric cooling fan module. Tap the hose a bit to disconnect it from the filler neck, then draw the hose through the loops in the shroud. Pull the Power Steering Reservoir away from the fan shroud and keep it ready for installation. Take off the four viscous fan/drive assembly mounting nuts from the Water Pump and remove the whole viscous fan assembly. Take off the cooling fan connections and unscrew the four mounting screws on top of the shroud. Take out the fan and shroud assembly and separate its fan harness from the shroud. Remove the Phillips screws in the shroud under the four fan module and then remove the module. To install, set the fan module into the shroud so that the harness comes out of the motor at the 12 o'clock point, screw in and tighten the fan module to the shroud for 3 Nm (31 inch lbs.). Put the fan harness through the shroud and secure it as you should. Set the fan and shroud below the motherboard where the shroud alignment tabs fit into the radiator's slots below. Screw and tighten together the upper fan shroud using a 3 Nm (31 inch lbs.) torque when all is well-positioned. Install the fan its electrical connector, mount the power steering reservoir back on the shroud and connect the viscous fan drive assembly to the water pump hub, tightening the nuts to 27 Nm (20 ft. lbs.). Complete your work by fixing the negative cable onto the battery.

Related Jeep Cherokee Parts
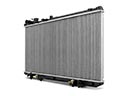 Jeep Cherokee Radiator
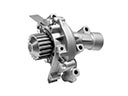 Jeep Cherokee Water Pump
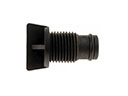 Jeep Cherokee Radiator Drain Plug
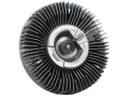 Jeep Cherokee Fan Clutch
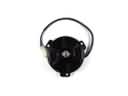 Jeep Cherokee Fan Motor
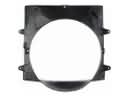 Jeep Cherokee Fan Shroud
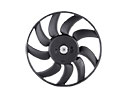 Jeep Cherokee Radiator fan
 Jeep Cherokee Thermostat Gasket
 Jeep Cherokee Thermostat Housing
 Jeep Cherokee Coolant Pipe
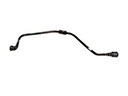 Jeep Cherokee Coolant Reservoir Hose
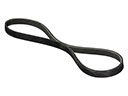 Jeep Cherokee V-Belt