JeepParts
My Garage
My Account
Cart
OEM 2000 Dodge Durango Starter Motor
Starter Ignition- Select Vehicle by Model
- Select Vehicle by VIN
Select Vehicle by Model
orMake
Model
Year
Select Vehicle by VIN
For the most accurate results, select vehicle by your VIN (Vehicle Identification Number).
2 Starter motors found


2000 Dodge Durango Starter Part Number: R6027702AC
$188.42 MSRP: $275.00You Save: $86.58 (32%)Product Specifications- Other Name: Starter - Engine; Starter Motor; Starter Engine
- Replaces: 56027702AB, 56027702AC
- Item Weight: 9.80 Pounds
- Item Dimensions: 5.3 x 7.2 x 10.9 inches
- Condition: New
- Fitment Type: Direct Replacement
- SKU: R6027702AC
- Warranty: This genuine part is guaranteed by Mopar's factory warranty.
2000 Dodge Durango Starter Part Number: R6028715
Product Specifications- Other Name: Starter - Engine; Starter Motor; Starter Engine
- Replaces: 56028715
- Item Weight: 9.50 Pounds
- Item Dimensions: 10.5 x 7.2 x 5.0 inches
- Condition: New
- Fitment Type: Direct Replacement
- SKU: R6028715
- Warranty: This genuine part is guaranteed by Mopar's factory warranty.
2000 Dodge Durango Starter Motor Parts and Q&A
- Q: How to Effectively Service and Repair a Starter Motor on 2000 Dodge Durango?A: Disconnect the negative cable from the battery first and then safely raise and hold the car in place for the repairs. Remove the nut and lock washer holding the lower mounting flange of the starter motor to the socket on the torque converter housing. Linking both hands, lift the housing and removing the screw that keeps the upper mounting flange in place. Pull the automatic transmission cooler tube bracket ahead on the pipes so you can remove the lower mounting stud from the starter motor mounting flange. Depress the starter motor so that its bottom supports its weight and you can safely remove the battery positive cable eyelet terminal screw from the solenoid B(+) terminal. Take out the positive battery cable eyelet terminal from the solenoid B(+) terminal stud and untie the battery positive cable solenoid terminal connector from the starter solenoid. Eliminate the starter motor from inside the automatic transmission torque converter housing. When you are installing, place the starter motor onto the housing and fix the battery terminal wire from the solenoid to the place on the starter solenoid. Screw the positive battery cable terminal into the stud (B+) on the solenoid, secure it with a nut to 13.6 Nm (120 in. lbs.) and check that the starter motor is held in place. Put the hole on the starter motor lower flange over the stud in the housing and then slide the automatic transmission cooler tube bracket back over the starter motor upper flange. Work the upper and lower mounting flanges together, sandwiched with the washer and nut on the lower attachment and the screw and washer group on the upper attachment. After securing them at specified pressure, lower the car and connect the battery's negative lead.
Related 2000 Dodge Durango Parts
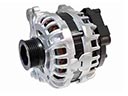 2000 Dodge Durango Alternator
 2000 Dodge Durango Alternator Bracket
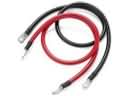 2000 Dodge Durango Battery Cable
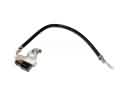 2000 Dodge Durango Battery Sensor
 2000 Dodge Durango Battery Tray
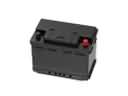 2000 Dodge Durango Car Batteries