JeepParts
My Garage
My Account
Cart
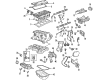
OEM 2000 Dodge Stratus Crankshaft
Crank Shaft- Select Vehicle by Model
- Select Vehicle by VIN
Select Vehicle by Model
orMake
Model
Year
Select Vehicle by VIN
For the most accurate results, select vehicle by your VIN (Vehicle Identification Number).
1 Crankshaft found

2000 Dodge Stratus Crankshaft Part Number: 4621917
Product Specifications- Other Name: Crankshft; Crankshaft, Machined
- Item Weight: 50.80 Pounds
- Item Dimensions: 23.3 x 8.8 x 8.4 inches
- Condition: New
- Fitment Type: Direct Replacement
- SKU: 4621917
- Warranty: This genuine part is guaranteed by Mopar's factory warranty.
2000 Dodge Stratus Crankshaft Parts and Q&A
- Q: How to Remove and Replace a Crankshaft on 2000 Dodge Stratus?A: You must take off the engine from the car before you can replace or remove the crankshaft. After that, take the oil filter and adapter off the bedplate and remove the oil pan. After that, remove the crankshaft sprocket and the oil pump and unscrew every bedplate bolt within the engine block. Use a mallet to tap the bedplate free from the engine block dowel pins, so that you don't accidentally push one side up and damage the cylinder block or bedplate alignment. Ease the bedplate off the dowel pins of the cylinder block evenly and once that is done, lift the crankshaft out, paying attention not to harm the main bearings or journals. Five main bearings keep the crankshaft from turning unevenly and all of the upper bearing shells in the crankcase have oil grooves, while the bottom bearing shells in the bedplate main bearing cap are left plain. A flanged bearing on the number three main bearing journal sets how much end play appears on the crankshaft. Due to revision, upper and lower main bearing shells cannot be used together because they are not interchangeable. Check the crankshaft journals for large wear, taper or scoring and make sure that the taper or roundness does not go beyond 0.025 mm (0.001 inch) and that the maximum grinding is not more than 0.305 mm (0.012 inch) from the standard diameter (Check the crankshaft journals for large wear, taper or scoring and see to it that the taper or roundness stays below 0.025 mm (0.001 inch) and that journal grinding remains less It is important not to grind the thrust faces on the number 3 main bearing and to be careful not to nick the crank pin or bearing fillets. Following grinding, file the edges around the crankshaft oil holes and clean every passage so that the polish after journal regrind moves in the same way rotated during engine use. Because they have flanges, the upper and lower final drive bearings carry the thrust from the crankshaft and cannot be used interchangeably with other engine bearings. Oil and clean each bearing cap bolt before you fit them and realize that bearing shells have standard as well as undersized options which should never be used if they lead to less clearance than required by the specs. To install, insert the bearing shells into the cylinder block with their lubrication groove facing outwards and then install the O-ring in the recess in the block, so that the oil holes from the block fit with those from the bearings and all bearing tabs slide into the block tab slots. Be careful not to oil the bedplate mating surface, since this will keep the sealer from properly making a seal between the bedplate and cylinder block. Apply lubricant to the bearings and journal, after install the crankshaft and O-ring into the cylinder block using only the correct anaerobic sealant on the bedplate. Cover any openings in your engine where the plate will touch by Mopar Bed Plate Sealant, fit the main bearings into the main bearing cap/bedplate so the tabs stay in the slots and place the main bearing/bedplate into the cylinder block. Before you fit the bolts, first apply some clean engine oil to the threads and wipe away any extra oil. Assemble the engine by placing the main bearing bedplate against the engine block and adding bolt 11, 17 and 20 finger tight. When the bedplate touches the block, attach them tightly by turning them to 30 Nm (22 ft. lbs.). Make sure main bearing bedplate bolts (1 - 10) are installed and then tighten each to 81 Nm (60 ft. lbs.), in the proper order before installing and fastening bolts (11 - 20), with baffle studs in positions 12, 13 and 16, to 30 Nm (22 ft. lbs.) in the proper order as well. After fitting the main bearing bedplate, check that the crankshaft turning torque does not go above 5.6 Nm (50 in. lbs.). In the end, place the oil pump, crankshaft sprocket, oil pan, oil filter adapter and oil filter and then attach the engine together again.
Related 2000 Dodge Stratus Parts
 2000 Dodge Stratus Timing Belt
 2000 Dodge Stratus Balance Shaft Chain
 2000 Dodge Stratus Cam Gear
 2000 Dodge Stratus Camshaft Seal
 2000 Dodge Stratus Crankshaft Seal
 2000 Dodge Stratus Dipstick Tube
 2000 Dodge Stratus Lash Adjuster
 2000 Dodge Stratus Oil Filler Cap
 2000 Dodge Stratus Oil Pan Gasket
 2000 Dodge Stratus Piston Ring Set
 2000 Dodge Stratus Rod Bearing
 2000 Dodge Stratus Timing Belt Idler Pulley