JeepParts
My Garage
My Account
Cart
OEM 2001 Dodge Ram 2500 Intake Manifold
Engine Intake Manifold- Select Vehicle by Model
- Select Vehicle by VIN
Select Vehicle by Model
orMake
Model
Year
Select Vehicle by VIN
For the most accurate results, select vehicle by your VIN (Vehicle Identification Number).
3 Intake Manifolds found

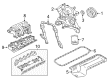
2001 Dodge Ram 2500 Intake Manifold Part Number: 53031583
Product Specifications- Other Name: Manifold - Intake; Manifold Intake
- Condition: New
- Fitment Type: Direct Replacement
- SKU: 53031583
- Warranty: This genuine part is guaranteed by Mopar's factory warranty.

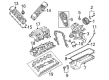
2001 Dodge Ram 2500 Intake Manifold, Upper Part Number: 53031580
Product Specifications- Other Name: Manifold - Intake; Engine Intake Manifold, Lower, Upper; Manifold Intake
- Position: Upper
- Item Weight: 29.00 Pounds
- Condition: New
- Fitment Type: Direct Replacement
- SKU: 53031580
- Warranty: This genuine part is guaranteed by Mopar's factory warranty.

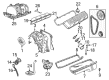
2001 Dodge Ram 2500 Intake Manifold Part Number: 4897490AC
Product Specifications- Other Name: Manifold - Intake; Engine Intake Manifold; Manifold Intake
- Condition: New
- Fitment Type: Direct Replacement
- SKU: 4897490AC
- Warranty: This genuine part is guaranteed by Mopar's factory warranty.
2001 Dodge Ram 2500 Intake Manifold Parts and Q&A
- Q: How to Remove and Install an Intake Manifold on 2001 Dodge Ram 2500?A: Removing the intake manifold starts with disconnecting the negative cable on the battery and releasing pressure from the cooling system. After that, remove the air conditioner compressor, generator, accessory drive bracket and air cleaner. Release the pressure in the fuel system and then unplug the fuel lines. Remove the accelerator linkage, speed control and kickdown transmission cable, if your vehicle has them and then take out the return spring from the fastener. Unscrew or lift out the distributor cap and the distributor wires, separate the coil wires, send the wire to the heat indicator, remove the two heater hoses and remove the bypass hose. Left side: begin by getting rid of the closed crankcase ventilation and evaporation control systems and after that you'll need to get rid of the intake manifold bolts. Disconnect the intake manifold and throttle body unit and remove it, throwing away the flange gaskets and the front and rear crossover gaskets. Take out the bolts from the throttle body, then lift the throttle body free, removing any gasket along with it. In the event that rust is severe, take out the plenum pan and throw away the gasket. Once the new gasket is on, attach the plenum pan and screw all bolts to 5.4 Nm (48 in. lbs.), then 9.5 Nm (84 in. lbs.) and make sure all are at 9.5 Nm (84 in. lbs.). The vertical port alignment tab should rest on the block and the horizontal alignment tabs should be lined up with those on the cylinder head gasket, while the words Manifold Side are visible on all flange gaskets. Rub Mopar Gen Ii Silicone Rubber Adhesive Sealant or equivalent onto the four corner joints with about 5 mm (0.2 inch) thickness. Install both front and rear cross-over gaskets, then put on a new gasket and fasten the throttle body onto the intake manifold by tightening its screws until you reach 23 Nm (200 in. lbs.). Set the intake manifold into place above the cylinder block and cylinder heads, watching for any missed seal. Install all bolts for the intake manifold, first tighten bolts 1 through 4 in stages of 1.4 Nm (12 in. lbs.) to 8 Nm (72 in. lbs.), then loosen all bolts, tighten bolts 5 through 12 using 8 Nm (72 in. lbs.) and check all bolts are tightened to 8 Nm (72 in. lbs.). Finally, tighten the bolts from #1 to #12 in sequence to 16 Nm (12 ft. Attach both the closed crankcase ventilation and evaporation control systems, the coil wires, the wire for the heat indicator sent unit, the car's heating hoses and the bypass hose. Add the distributor cap and wires, fix the return spring in place and connect the accelerator linkage, speed control and transmission kickdown cables if they're part of the engine. Attach the fuel lines, accessory drive bracket and A/c compressor and then add the generator and drive belt. As the last step, tighten the generator mounting bolt to 41 Nm (30 ft. lbs.) torque. After that, put the air cleaner in place, fill your cooling system and reattach the negative cable to the battery.
Related 2001 Dodge Ram 2500 Parts
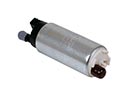 2001 Dodge Ram 2500 Fuel Pump
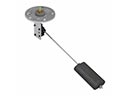 2001 Dodge Ram 2500 Fuel Sending Unit
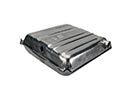 2001 Dodge Ram 2500 Fuel Tank
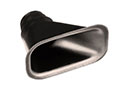 2001 Dodge Ram 2500 Air Duct
 2001 Dodge Ram 2500 Air Filter Box
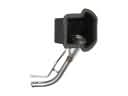 2001 Dodge Ram 2500 Fuel Filler Neck
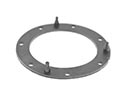 2001 Dodge Ram 2500 Fuel Pump Gasket
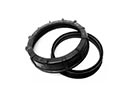 2001 Dodge Ram 2500 Fuel Pump Seal
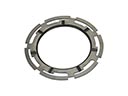 2001 Dodge Ram 2500 Fuel Tank Lock Ring
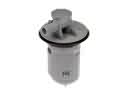 2001 Dodge Ram 2500 Fuel Tank Vent Valve
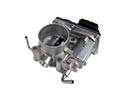 2001 Dodge Ram 2500 Throttle Body
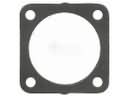 2001 Dodge Ram 2500 Throttle Body Gasket