JeepParts
My Garage
My Account
Cart
OEM 2002 Chrysler 300M Air Bag Control Module
SRS Airbag Module- Select Vehicle by Model
- Select Vehicle by VIN
Select Vehicle by Model
orMake
Model
Year
Select Vehicle by VIN
For the most accurate results, select vehicle by your VIN (Vehicle Identification Number).
2 Air Bag Control Modules found

2002 Chrysler 300M SDM Module Part Number: 4602406AB
$201.69 MSRP: $285.00You Save: $83.31 (30%)Ships in 1-2 Business DaysProduct Specifications- Other Name: Module - Air Bag Control; Air Bag Control Module; Diagnostic Unit
- Replaces: 4602406AA
- Item Weight: 1.20 Pounds
- Condition: New
- Fitment Type: Direct Replacement
- SKU: 4602406AB
- Warranty: This genuine part is guaranteed by Mopar's factory warranty.

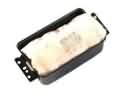
2002 Chrysler 300M Control Module Part Number: 4602274AG
Product Specifications- Other Name: Module - Air Bag Control; Side Sensor; Module; Module Air Bag Control
- Item Weight: 0.50 Pounds
- Item Dimensions: 3.7 x 3.5 x 1.6 inches
- Condition: New
- Fitment Type: Direct Replacement
- SKU: 4602274AG
- Warranty: This genuine part is guaranteed by Mopar's factory warranty.
2002 Chrysler 300M Air Bag Control Module Parts and Q&A
- Q: How to Replace the Air Bag Control Module in a Five-Passenger on 2002 Chrysler 300M?A: Open the hood, unplug the battery's negative cable from the remote post and then you can start replacing the Orc in a five-passenger vehicle. Whenever working on a Concorde, always take out the Instrument Panel first. Pull just one screw from the shift knob and from the shifter bezel, take out two screws and unplug the power outlet cable before you pull off the bezel. Lift off the left covering on the instrument panel, then free up the two screws on the steering column and pull it backwards to remove it from the clips. Lift up the cover on the door to the glove box and once it is open, you should see two screws in each corner of the bin. There are two screws on each side panel; remove them to take out the right and left console side panels. Once the Orc is revealed, pull the red Cpa tab backward, push down the latch and pull the 23-way connector free. Lift the module away from the car by first removing the two screws on the driver's side, loosening the top screw and loosening the screw on the passenger side if needed. For installation, line the arrow at the front of the Orc with the arrow on the mounting bracket and attach it with the supplied screws torqued to approximately 900 to 1200 in. lbs. Twist on the locking screw at the top and install the two side Orc mounting screws on the driver's side. Attach the Orc 23-way link and slide the big red plastic tab into the connector. If you are working on a Concorde, put in the Instrument Panel. First, fasten the left side panel side using two retaining screws. Then, set the right console side panel and fit the two screws through the upper and lower left corners of the glove box bin. Put the steering column cover and the two screws into place, then put the left instrument panel end cover on, reconnect the power outlet connector and finish by installing the center bezel. Then, attach the two shifter bezel screws and the single shift knob screw. Wait to attach the air bags' negative cable remote terminal after you have run Diagnostics.
Related 2002 Chrysler 300M Parts
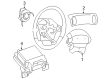
 2002 Chrysler 300M Air Bag
 2002 Chrysler 300M Brake Light Switch
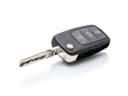 2002 Chrysler 300M Car Key
 2002 Chrysler 300M Clock Spring
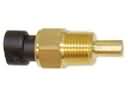 2002 Chrysler 300M Coolant Temperature Sensor
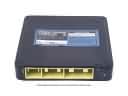 2002 Chrysler 300M Engine Control Module
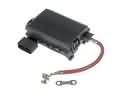 2002 Chrysler 300M Fuse Box
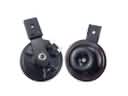 2002 Chrysler 300M Horn
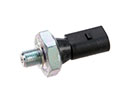 2002 Chrysler 300M Oil Pressure Switch
 2002 Chrysler 300M Oxygen Sensor
 2002 Chrysler 300M Transmitter
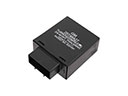 2002 Chrysler 300M Turn Signal Flasher