JeepParts
My Garage
My Account
Cart
OEM Chrysler 300M Air Bag Control Module
SRS Airbag Module- Select Vehicle by Model
- Select Vehicle by VIN
Select Vehicle by Model
orMake
Model
Year
Select Vehicle by VIN
For the most accurate results, select vehicle by your VIN (Vehicle Identification Number).
5 Air Bag Control Modules found

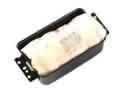
Chrysler 300M SDM Module Part Number: 4602406AB
$217.34 MSRP: $285.00You Save: $67.66 (24%)Ships in 1-2 Business Days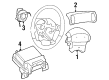
Chrysler 300M SDM Module Part Number: 4602350AC

Chrysler 300M Control Module Part Number: 4602274AG

Chrysler 300M SDM Module Part Number: 4602406AD
Chrysler 300M Control Module Part Number: 4602430AE
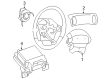
Chrysler 300M Air Bag Control Module
Choose OEM Air Bag Control Module that meet Chrysler factory standards. Chrysler designs and tests every component for precision and durability. Each Air Bag Control Module follows strict manufacturing steps to lock in quality and fit. If your Chrysler 300M matters to you, OEM parts make the smart choice. You'll get the exact look, feel, and performance you expect. Shop genuine 300M parts at the highly competitive prices online. Enjoy a manufacturer's warranty, a hassle-free return policy, and rapid delivery. No more guesswork with off brands. Get genuine parts with exact fit and true factory performance. Shop with confidence today at JeepPartsDeal.com.
Chrysler 300M Air Bag Control Module Parts and Q&A
- Q: How to Service an Air Bag Control Module for Side Impact on Chrysler 300M?A:Before servicing the Side Impact air bag Control Module, detach and isolate the negative battery cable. After that, wait two minutes to allow the system reserve capacitor to discharge. On the near side of the car, take off the B-pillar trim and pull out the side impact air bag control module electrical connector. After that, take out the Siacm retaining screws and pull the module out of the car. The Siacm should be placed in the B-pillar area and the retaining screws should be inserted and tightened to 12 N.m (105 in. lbs.). Join the Siacm connector to the electrical ring and secure the lower B-pillar trim once more. It is important to never attach the battery's negative cable remote terminal until the air bag system has been properly diagnosed and inspected.
- Q: How to Replace the Air Bag Control Module in a Five-Passenger on Chrysler 300M?A:In a five-passenger vehicle, pull out the negative Battery Cable from the remote battery post before opening the hood and waiting two minutes to let the system reserve capacitor discharge. Prior to working on a Concorde, take out the Instrument Panel. Disconnect a screw on the shift knob, two screws from the bezel and the connector from the power outlet before taking out the bezel. Take out the end cap on the left instrument panel, loosen the screws on the steering column cover and tug the cover backward to get the clips free. Pull the glove box door down and look for the screws in its upper and lower left corners of the bin. Open the panel on the right, take out the two screws from the left side and then remove the left panel. After exposing the ORC, push out the red CPA tab, press the locking latch and unplug the ORC 23-way connector. Remove the two screws under the driver's side module, loosen the top one, lift the module to withdraw the ORC and if the passenger side screw needs to be loosened, please do so. Put the ORC in place so the arrow faces ahead on the mounting bracket, then join it using the supplied screws, at a force of 88 to 124 in. lbs. (10 to 14 N.m.) and fasten the top screw and the two side screws on the driver's side of the chassis. Match the ORC with the 23-way CPA connector and then slide the red CPA tab in. If you are using a Concorde, finish installing the instrument panel before you check and test the air bag system. Attach the left side panel to the console by using two retaining screws, put the right panel back in place and screw the bin in the glove box before you close the door. Place the steering column cover and its two screws, the left instrument panel end cover, reattach the power outlet connector and mount the center bezel, shifter bezel and shift knob screw. You should not connect the negative battery cable before the air bag system has been properly diagnosed and tested.


Related Chrysler 300M Parts
 Chrysler 300M Airbag
 Chrysler 300M Antenna Mast
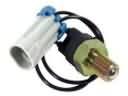 Chrysler 300M Back Up Light Switch
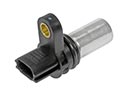 Chrysler 300M Camshaft Position Sensor
 Chrysler 300M Clock Spring
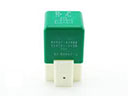 Chrysler 300M Cooling Fan Relay
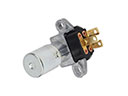 Chrysler 300M Dimmer Switch
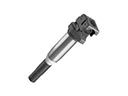 Chrysler 300M Ignition Coil
 Chrysler 300M Ignition Lock Cylinder
 Chrysler 300M Ignition Switch
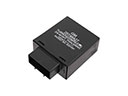 Chrysler 300M Turn Signal Flasher
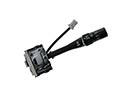 Chrysler 300M Windshield Wiper Switch