JeepParts
My Garage
My Account
Cart
OEM 2004 Dodge Neon Exhaust Manifold
Engine Exhaust Manifold- Select Vehicle by Model
- Select Vehicle by VIN
Select Vehicle by Model
orMake
Model
Year
Select Vehicle by VIN
For the most accurate results, select vehicle by your VIN (Vehicle Identification Number).
2 Exhaust Manifolds found

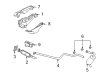
2004 Dodge Neon Exhaust Manifold Part Number: 4777619AC
Product Specifications- Other Name: Manifold - Exhaust; Manifold Exhaust
- Item Weight: 12.90 Pounds
- Item Dimensions: 15.6 x 14.3 x 6.6 inches
- Condition: New
- Fitment Type: Direct Replacement
- SKU: 4777619AC
- Warranty: This genuine part is guaranteed by Mopar's factory warranty.
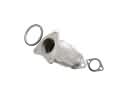
2004 Dodge Neon Exhaust Manifold Part Number: 4884070AA
Product Specifications- Other Name: Manifold - Exhaust; Manifold Exhaust
- Item Weight: 10.00 Pounds
- Condition: New
- Fitment Type: Direct Replacement
- SKU: 4884070AA
- Warranty: This genuine part is guaranteed by Mopar's factory warranty.
2004 Dodge Neon Exhaust Manifold Parts and Q&A
- Q: How to Service and Repair an Exhaust Manifold on 2004 Dodge Neon?A: Before you begin, take off the negative cable from the battery and lift the vehicle on a hoist. Remove the bolt connecting the wire harness heat shield to the exhaust manifold support bracket and then take off the exhaust manifold support bracket too. Remove the nuts or bolts that hold the exhaust system flex joint in place on the exhaust manifold flange and roll the exhaust backward so the flange studs clear the way when you lower the car. Withdraw the hose from the rear of the cylinder head cover and remove the oxygen sensor connector and its clip from the block. With the heat shield bolts removed, you can take off the upper heat shield. Grab the manifold bolts, remove them and pull the exhaust manifold out from the vehicle's top, between the cylinder head and cowl. If a gasket is installed, discard it and then clean all areas on the manifold and cylinder head. Look over the gasket surfaces of the manifold to ensure they are flat within 0.15 mm for every 300 mm and inspect the manifold for cracks or distortion, changing it as is appropriate. First, fit the exhaust manifold and gasket, next mount the exhaust manifold bolts and tighten them according to the order in the manual up to 23 Nm. Mount the heat shields at the outlet and outlet connections, place and tighten the heat shield bolts down to 11 Nm. Attach the oxygen sensor electrical harness clip to the connector and afterward attach the make-up air hose to the port on the cylinder head cover. After support lifts up the vehicle again, attach a fresh flex joint to the manifold gasket, link the exhaust to the manifold gasket and secure it with 28 Nm. Fit and tighten the exhaust manifold support bracket and then add the bolt that secures the wire harness heat shield to the bracket. Next, raise the car back to the ground and connect the negative cable to the battery.
Related 2004 Dodge Neon Parts
 2004 Dodge Neon Catalytic Converter
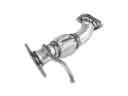 2004 Dodge Neon Exhaust Pipe
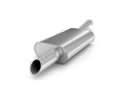 2004 Dodge Neon Muffler
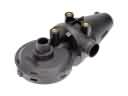 2004 Dodge Neon PCV Valve
 2004 Dodge Neon Air Injection Pump
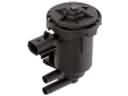 2004 Dodge Neon Canister Purge Valve
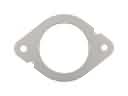 2004 Dodge Neon Catalytic Converter Gasket
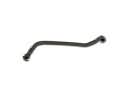 2004 Dodge Neon Crankcase Breather Hose
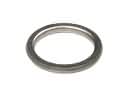 2004 Dodge Neon Exhaust Flange Gasket
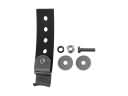 2004 Dodge Neon Exhaust Hanger
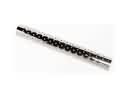 2004 Dodge Neon Exhaust Heat Shield
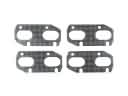 2004 Dodge Neon Exhaust Manifold Gasket