JeepParts
My Garage
My Account
Cart
OEM 2005 Dodge Durango Differential Cover
- Select Vehicle by Model
- Select Vehicle by VIN
Select Vehicle by Model
orMake
Model
Year
Select Vehicle by VIN
For the most accurate results, select vehicle by your VIN (Vehicle Identification Number).
3 Differential Covers found


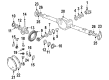
2005 Dodge Durango Differential Cover, Rear Part Number: 52111973AA
Product Specifications- Other Name: Cover - Differential; Differential Cover, Rear; Axle Cover; Cover Differential
- Position: Rear
- Item Weight: 10.90 Pounds
- Item Dimensions: 13.3 x 12.7 x 5.4 inches
- Condition: New
- Fitment Type: Direct Replacement
- SKU: 52111973AA
- Warranty: This genuine part is guaranteed by Mopar's factory warranty.


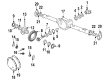
2005 Dodge Durango Differential Cover, Rear Part Number: 52111974AA
Product Specifications- Other Name: Cover - Differential; Differential Cover, Rear; Axle Cover; Cover Differential
- Position: Rear
- Item Weight: 12.20 Pounds
- Item Dimensions: 13.4 x 12.7 x 5.3 inches
- Condition: New
- Fitment Type: Direct Replacement
- SKU: 52111974AA
- Warranty: This genuine part is guaranteed by Mopar's factory warranty.


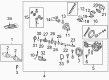
2005 Dodge Durango Differential Cover, Front Part Number: 52069713AB
Product Specifications- Other Name: Cover - Differential; Differential Cover, Front; Axle Cover; Housing Cover; Cover; Cover Differential
- Position: Front
- Item Weight: 4.10 Pounds
- Item Dimensions: 19.4 x 15.5 x 2.0 inches
- Condition: New
- Fitment Type: Direct Replacement
- SKU: 52069713AB
- Warranty: This genuine part is guaranteed by Mopar's factory warranty.
2005 Dodge Durango Differential Cover Parts and Q&A
- Q: How to Service and Repair an 8 1/4 Rear Axle Differential Cover on 2005 Dodge Durango?A: Start by disconnecting the watts link bell crank bolt (2) from the differential cover (1) and then remove the differential fill plug on the rear axle with an 8 1/4. After that, remove the differential cover bolts, take out the cover and drain the fluid inside. Wash the differential cover well and put a bead of orange Mopar Axle RTV Sealant on it or use a similar sealant. Within 3 to 5 minutes of stopping, the cover needs to be installed. If it isn't done within this time, the cover must be cleaned and new RTV needs to be applied to achieve proper adhesion. Following, tighten the bolts across the panel in a criss-cross pattern to 44 Nm (32 ft. lbs.). Pour 2.07 L (4.375 pts.) of gear lubricant in the differential, filling only by volume and not all the way to the bottom of the plug. After you have eliminated air, screw in the fill hole plug and the watts link bell crank bolt to 217 Nm (160 ft. lbs.) all the way. Remember the Loctite patch is there, so you need to use a new bolt; if there is none, clean the existing one and apply Loctite 242 on the threads.
Related 2005 Dodge Durango Parts
 2005 Dodge Durango Differential
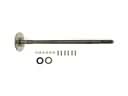 2005 Dodge Durango Axle Shaft
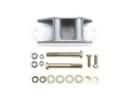 2005 Dodge Durango Carrier Bearing Spacer
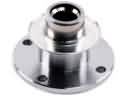 2005 Dodge Durango CV Joint Companion Flange
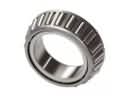 2005 Dodge Durango Differential Bearing
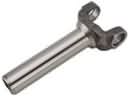 2005 Dodge Durango Driveshaft Yokes
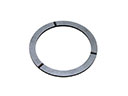 2005 Dodge Durango Mainshaft Washer
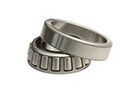 2005 Dodge Durango Pinion Bearing
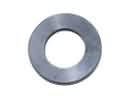 2005 Dodge Durango Pinion Washer
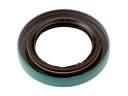 2005 Dodge Durango Transfer Case Seal
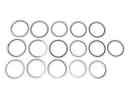 2005 Dodge Durango Transfer Case Shim
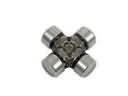 2005 Dodge Durango Universal Joint