JeepParts
My Garage
My Account
Cart
OEM 2006 Chrysler Pacifica Instrument Cluster
Speedometer Instrument Cluster- Select Vehicle by Model
- Select Vehicle by VIN
Select Vehicle by Model
orMake
Model
Year
Select Vehicle by VIN
For the most accurate results, select vehicle by your VIN (Vehicle Identification Number).
2 Instrument Clusters found

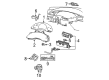
2006 Chrysler Pacifica Instrument Cluster Part Number: 56044979AF
Product Specifications- Other Name: Cluster - Instrument Panel; Cluster Assembly
- Replaces: 56044979AC, 56044979AD, 56044979AE
- Item Weight: 6.30 Pounds
- Item Dimensions: 21.5 x 13.0 x 13.2 inches
- Condition: New
- Fitment Type: Direct Replacement
- SKU: 56044979AF
- Warranty: This genuine part is guaranteed by Mopar's factory warranty.
2006 Chrysler Pacifica Instrument Cluster Part Number: 56044989AF
Product Specifications- Other Name: Cluster - Instrument Panel; Cluster Assembly
- Replaces: 56044989AC, 56044989AD, 56044989AE
- Item Weight: 5.50 Pounds
- Item Dimensions: 21.9 x 13.3 x 12.9 inches
- Condition: New
- Fitment Type: Direct Replacement
- SKU: 56044989AF
- Warranty: This genuine part is guaranteed by Mopar's factory warranty.
2006 Chrysler Pacifica Instrument Cluster Parts and Q&A
- Q: How to Install the Instrument Cluster Assembly on 2006 Chrysler Pacifica?A: With assistance, fit the instrument panel into the vehicle so that its pins line up with the body, then raise it to disconnect the ducting, position it on the HVAC housing to secure the ducts and place one bolt in the dash panel. After that, fit the two instrument panel side cowl bracket screws and then attach the instrument panel frame to the dash panel beneath the windshield. Link the connector at the A-pillar on the right side, the three electrical connectors found behind the cowl panel and the HVAC electrical connectors. Install the top cover and the glove box next, then, before pushing the glove box into place, link the glove box lamp with the cable that opens the compartment. Attach the air bag module electrical connector and the antenna lead connector and then put in both cowl side trim panels and front door sill scuff plates, so new end caps are installed properly. Attach new end caps for the instrument panel on each side, the trim at the left and right side A-pillar, the shift interlock and the steering column retaining nuts. Join the pieces of the brake light wiring, fit the instrument panel reinforcement and link the steering column pinch bolt and nut with the wiring connectors. Place the shrouds over the steering column, join the body control module wiring to their respective connectors and place the bulkhead wiring harness into the plugs on the dash. Affix the brake handle to the brake park release bracket with screws, press down on the instrument panel trim outlet plate to hold with the clips and add two screws for the instrument panel trim plate. Mount the knee blocker using four screws, the steering column opening cover and the nuts that secure the floor braces to the instrument panel. Afterward, place two screws for the front floor console L-brackets into the instrument panel, screw the front floor console brackets onto the instrument panel, install the center console closeout panels and link the battery negative cable.
Related 2006 Chrysler Pacifica Parts
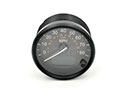 2006 Chrysler Pacifica Speedometer
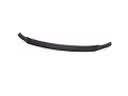 2006 Chrysler Pacifica Spoiler
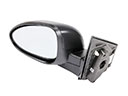 2006 Chrysler Pacifica Car Mirror
 2006 Chrysler Pacifica Door Lock Cylinder
 2006 Chrysler Pacifica Door Lock Switch
 2006 Chrysler Pacifica Exhaust Nut
 2006 Chrysler Pacifica Fuel Filler Housing
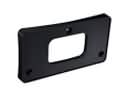 2006 Chrysler Pacifica License Plate
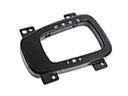 2006 Chrysler Pacifica Shift Indicator
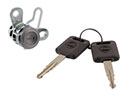 2006 Chrysler Pacifica Tailgate Lock
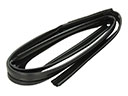 2006 Chrysler Pacifica Window Run
 2006 Chrysler Pacifica Windshield Wiper