JeepParts
My Garage
My Account
Cart
OEM 2006 Dodge Caravan Door Latch Assembly
Door Latch- Select Vehicle by Model
- Select Vehicle by VIN
Select Vehicle by Model
orMake
Model
Year
Select Vehicle by VIN
For the most accurate results, select vehicle by your VIN (Vehicle Identification Number).
13 Door Latch Assemblys found


2006 Dodge Caravan Lock, Front Driver Side Part Number: 5109863AB
$142.62 MSRP: $213.00You Save: $70.38 (34%)Ships in 1-3 Business DaysProduct Specifications- Other Name: Latch - Front Door; Door Latch Assembly, Front Left; Door Lock Actuator Motor; Door Lock Actuator; Door Lock
- Position: Front Driver Side
- Replaces: 4717803AC, 4717803AF, 4717803AG, 4717803AD, 4717803AE, 5109863AA
- Item Weight: 4.10 Pounds
- Item Dimensions: 7.7 x 4.5 x 4.6 inches
- Condition: New
- Fitment Type: Direct Replacement
- SKU: 5109863AB
- Warranty: This genuine part is guaranteed by Mopar's factory warranty.

2006 Dodge Caravan Lock, Front Passenger Side Part Number: 5109864AB
$132.51 MSRP: $198.00You Save: $65.49 (34%)Ships in 1-2 Business DaysProduct Specifications- Other Name: Latch - Front Door; Door Latch Assembly, Front Right; Door Lock Actuator Motor; Door Lock Actuator; Door Lock
- Position: Front Passenger Side
- Replaces: 4894516AB, 4894516AC, 5109864AA, 4894516AD
- Item Weight: 1.70 Pounds
- Item Dimensions: 6.4 x 3.9 x 3.5 inches
- Condition: New
- Fitment Type: Direct Replacement
- SKU: 5109864AB
- Warranty: This genuine part is guaranteed by Mopar's factory warranty.

2006 Dodge Caravan Latch, Driver Side Part Number: 68030817AA
$77.48 MSRP: $103.00You Save: $25.52 (25%)Ships in 1-2 Business DaysProduct Specifications- Other Name: Latch - Sliding Door Hold Open; Sliding Door Latch, Left; Door Latch Assembly; Door Lock Actuator; Door Lock; Latch Sliding Door Hold Open
- Position: Driver Side
- Replaces: 4894027AA
- Item Weight: 0.90 Pounds
- Item Dimensions: 5.6 x 4.8 x 3.2 inches
- Condition: New
- Fitment Type: Direct Replacement
- SKU: 68030817AA
- Warranty: This genuine part is guaranteed by Mopar's factory warranty.

2006 Dodge Caravan Lock, Driver Side Part Number: 5019053AE
$427.04 MSRP: $574.00You Save: $146.96 (26%)Ships in 1-2 Business DaysProduct Specifications- Other Name: Latch - Sliding Door; Left Sliding Door Latch; Door Lock Actuator Motor; Latch Assembly.; Latch; Latch Sliding Door
- Position: Driver Side
- Replaces: 5019053AC, 5019053AD
- Item Weight: 2.90 Pounds
- Item Dimensions: 10.4 x 6.3 x 6.7 inches
- Condition: New
- Fitment Type: Direct Replacement
- SKU: 5019053AE
- Warranty: This genuine part is guaranteed by Mopar's factory warranty.
2006 Dodge Caravan Lock, Passenger Side Part Number: 5019052AF
$460.29 MSRP: $672.00You Save: $211.71 (32%)Ships in 1-3 Business DaysProduct Specifications- Other Name: Latch - Sliding Door; Right Sliding Door Latch; Door Lock Actuator Motor; Latch Assembly; Lock Actuator; Latch
- Position: Passenger Side
- Replaces: 5019052AE, 5019052AC, 5019052AD
- Item Weight: 2.70 Pounds
- Item Dimensions: 10.4 x 6.3 x 6.6 inches
- Condition: New
- Fitment Type: Direct Replacement
- SKU: 5019052AF
- Warranty: This genuine part is guaranteed by Mopar's factory warranty.
2006 Dodge Caravan Lock, Passenger Side Part Number: 5093404AD
$614.38 MSRP: $928.00You Save: $313.62 (34%)Ships in 1-2 Business DaysProduct Specifications- Other Name: Latch - Sliding Door; Right Sliding Door Latch; Door Lock Actuator Motor; Latch Assembly.; Latch
- Position: Passenger Side
- Replaces: 5093404AA, 5093404AC, 5093404AB
- Item Weight: 4.10 Pounds
- Item Dimensions: 15.8 x 15.3 x 7.2 inches
- Condition: New
- Fitment Type: Direct Replacement
- SKU: 5093404AD
- Warranty: This genuine part is guaranteed by Mopar's factory warranty.
2006 Dodge Caravan Latch, Driver Side Part Number: 4675847AC
$32.81 MSRP: $47.90You Save: $15.09 (32%)Ships in 1-2 Business DaysProduct Specifications- Other Name: Latch - Sliding Door Hold Open; Sliding Door Latch, Left; Door Latch Assembly; Door Lock Actuator; Door Lock; Latch Sliding Door Hold Open
- Position: Driver Side
- Item Weight: 0.70 Pounds
- Item Dimensions: 3.2 x 2.0 x 1.5 inches
- Condition: New
- Fitment Type: Direct Replacement
- SKU: 4675847AC
- Warranty: This genuine part is guaranteed by Mopar's factory warranty.


2006 Dodge Caravan Lock, Front Passenger Side Part Number: 5109862AB
Product Specifications- Other Name: Latch - Front Door; Door Latch Assembly, Front Right; Door Lock Actuator Motor; Door Lock Actuator; Door Lock
- Position: Front Passenger Side
- Replaces: 4717802AE, 4717802AG, 4717802AC, 4717802AF, 5109862AA, 4717802AD
- Item Weight: 1.70 Pounds
- Item Dimensions: 6.3 x 3.9 x 3.5 inches
- Condition: New
- Fitment Type: Direct Replacement
- SKU: 5109862AB
- Warranty: This genuine part is guaranteed by Mopar's factory warranty.
2006 Dodge Caravan Lock, Driver Side Part Number: 5093405AC
Product Specifications- Other Name: Latch - Sliding Door; Left Sliding Door Latch; Door Lock Actuator Motor; Latch Assembly.; Latch; Latch Sliding Door
- Position: Driver Side
- Replaces: 5093405AA, 5093405AB
- Item Weight: 3.70 Pounds
- Item Dimensions: 10.1 x 10.4 x 6.0 inches
- Condition: New
- Fitment Type: Direct Replacement
- SKU: 5093405AC
- Warranty: This genuine part is guaranteed by Mopar's factory warranty.
2006 Dodge Caravan Lock, Front Passenger Side Part Number: 5109860AA
Product Specifications- Other Name: Latch - Front Door; Door Latch Assembly, Front Right; Door Lock Actuator Motor; Door Lock Actuator; Door Lock
- Position: Front Passenger Side
- Replaces: 4717800AC, 4717800AD, 4717800AE
- Item Weight: 1.00 Pounds
- Condition: New
- Fitment Type: Direct Replacement
- SKU: 5109860AA
- Warranty: This genuine part is guaranteed by Mopar's factory warranty.
2006 Dodge Caravan Lock, Front Driver Side Part Number: 5109861AB
Product Specifications- Other Name: Latch - Front Door; Door Latch Assembly, Front Left; Door Lock Actuator Motor; Door Lock Actuator; Door Lock
- Position: Front Driver Side
- Replaces: 4717801AC, 5109861AA, 4717801AD, 4717801AE
- Item Weight: 1.40 Pounds
- Item Dimensions: 7.4 x 4.0 x 4.1 inches
- Condition: New
- Fitment Type: Direct Replacement
- SKU: 5109861AB
- Warranty: This genuine part is guaranteed by Mopar's factory warranty.
2006 Dodge Caravan Latch, Passenger Side Part Number: 68030816AA
Product Specifications- Other Name: Latch - Sliding Door Hold Open; Sliding Door Latch, Right; Door Latch Assembly; Door Lock Actuator; Door Lock; Latch Sliding Door Hold Open
- Position: Passenger Side
- Replaces: 4894026AA
- Item Weight: 0.80 Pounds
- Item Dimensions: 5.0 x 4.7 x 1.6 inches
- Condition: New
- Fitment Type: Direct Replacement
- SKU: 68030816AA
- Warranty: This genuine part is guaranteed by Mopar's factory warranty.
2006 Dodge Caravan Latch, Passenger Side Part Number: 4675846AC
Product Specifications- Other Name: Latch - Sliding Door Hold Open; Sliding Door Latch, Right; Door Latch Assembly; Door Lock Actuator; Door Lock; Latch Sliding Door Hold Open
- Position: Passenger Side
- Item Weight: 0.70 Pounds
- Item Dimensions: 3.2 x 2.0 x 1.6 inches
- Condition: New
- Fitment Type: Direct Replacement
- SKU: 4675846AC
- Warranty: This genuine part is guaranteed by Mopar's factory warranty.
2006 Dodge Caravan Door Latch Assembly Parts and Q&A
- Q: How to Service and Repair a Sliding Door Latch Assembly on 2006 Dodge Caravan?A: The initial process is to take off the sliding door trim panel and sliding door stop bumper. Peel off the watershield from the sticky material on the panel edge, then remove the tidbit serving from the latch/lock at the door handle. After removing the foam block and the inside handle from your door, disconnect the inside cable from the latch/lock and unclip the link from the bellcrank. Following that, open up the door and unplug the hold open latch cable from the lower hinge. Then remove the bolts that secure the latch/lock control to the sliding door. If you have the tools, lower the latch, remove the wire connector from the power door lock motor and take the latch or lock off the door. For installation purposes, start by lowering the latch/lock lever and, assuming you have a wire connector, hooking it into the power door lock motor. If you have a new latch or lock, secure it onto the door and make sure you replace bolts in the inner panel. Now, insert both and screw them into the slots. Push the inside cable into the latch/lock assembly, add the inside door handle assembly and attach the foam block. Press the external cable back into the latch or lock assembly, hook the link rod to the bellcrank and attach the hold open latch cable to the lower hinge. Secure the clip to fasten the bellcrank link to the latch/lock control, test the sliding door and add the latch/lock cover. Maintain a good amount of adhesive so the watershield stays on solidly and change it appropriately before pressing the watershield onto the adhesive, routing wiring and linkages as you do so. At last, attach the sliding door stop bumper and the sliding door trim panel.
Related 2006 Dodge Caravan Parts
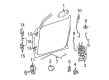
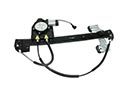 2006 Dodge Caravan Window Regulator
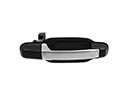 2006 Dodge Caravan Door Handle
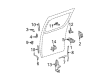
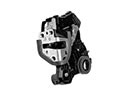 2006 Dodge Caravan Door Lock
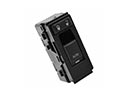 2006 Dodge Caravan Door Lock Switch
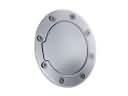 2006 Dodge Caravan Fuel Door
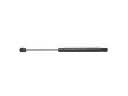 2006 Dodge Caravan Lift Support
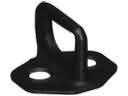 2006 Dodge Caravan Rear Door Striker
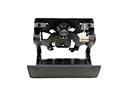 2006 Dodge Caravan Tailgate Handle
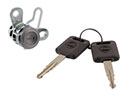 2006 Dodge Caravan Tailgate Lock
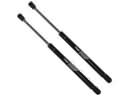 2006 Dodge Caravan Trunk Lid Lift Support
 2006 Dodge Caravan Window Crank Handles
 2006 Dodge Caravan Window Run