JeepParts
My Garage
My Account
Cart
OEM 2008 Dodge Ram 1500 Clock Spring
Spiral Cable Clock Spring- Select Vehicle by Model
- Select Vehicle by VIN
Select Vehicle by Model
orMake
Model
Year
Select Vehicle by VIN
For the most accurate results, select vehicle by your VIN (Vehicle Identification Number).
2 Clock Springs found


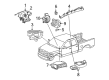
2008 Dodge Ram 1500 Clockspring Part Number: 56049795AE
$226.60 MSRP: $334.00You Save: $107.40 (33%)Product Specifications- Other Name: Air Bag Clockspring; Clockspring Steering Column Control Module; Clockspring See Group 10 Restraints
- Replaces: 5139286AA, 56049795AB, 56049795AA, 56049795AD, 56049795AC
- Item Weight: 0.80 Pounds
- Item Dimensions: 3.3 x 4.9 x 5.4 inches
- Condition: New
- Fitment Type: Direct Replacement
- SKU: 56049795AE
- Warranty: This genuine part is guaranteed by Mopar's factory warranty.


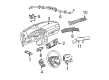
2008 Dodge Ram 1500 Clockspring Part Number: R5082062AJ
Product Specifications- Other Name: Air Bag Clockspring
- Replaces: 5082062AF, 5082062AI, 68292840AA, 68292840AB, 5082062AJ, 5082062AG, 5082062AH
- Item Weight: 1.40 Pounds
- Item Dimensions: 7.4 x 4.1 x 4.2 inches
- Condition: New
- Fitment Type: Direct Replacement
- SKU: R5082062AJ
- Warranty: This genuine part is guaranteed by Mopar's factory warranty.
2008 Dodge Ram 1500 Clock Spring Parts and Q&A
- Q: How to Remove and Replace a Clock Spring Assembly on 2008 Dodge Ram 1500?A: Disconnect the negative battery cable and wait for two minutes to disconnect the SRS before you try to replace the Clock Spring Assembly. Be sure the Clock Spring is aligned with the steering wheel and steering shaft, to avoid harm to the system. The service replacement Clock Spring comes preset and should be uncontrolled only when installing it in the steering column. Check that the car's front wheels are pointing straight out ahead before you begin. Keep the Clock Spring rotor and case stationary or be sure the plastic locking pin is inserted and very carefully move the Clock Spring up the steering column. Place the hole in the locating tab on the Clock Spring case over the locating pin on the multi-function switch mounting housing and secure the Clock Spring to the multi-function switch mounting housing with the two screws to 2 Nm (20 in. lbs.). Put the wire harness connectors from the panel to the receptacles below the steering column attached to the rear of the Clock Spring housing. For vehicles equipped with the ESP, insert the instrument panel wire harness connector for the Steering Angle Sensor into the location below the steering column, just behind the Clock Spring housing. Slide the lower shroud down over the steering column and install it with the center screw, but only tighten it to 2 Nm (20 in. lbs.). Lay the upper shroud over the lower shroud, press the gap hider in place if you have an automatic gearbox, match the hooks and squeeze the parts together by hand. Attach and tighten the two outboard screws holding the upper shroud to the lower shroud to 2 Nm (20 in. lbs.). Attach the tilt steering column knob to the tilt adjuster actuator located on the left side of the steering column and install your screw to secure it to 2 Nm (20 in. lbs.). Install the steering column opening cover back into the instrument panel. After installing a new Clock Spring, be sure to remove the plastic locking pin so it stays centered. Before reinstalling the steering wheel, place the engagement dowel on the Clock Spring rotor at the top over the two lower fins on the hub. Connect the steering wheel connector on the steering column and, making sure the wires are routed correctly, link each steering wheel harness connector to the upper Clock Spring connector receptacles. Put the driver air bag onto the steering wheel and link the negative cable of the battery once more.
Related 2008 Dodge Ram 1500 Parts
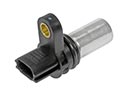 2008 Dodge Ram 1500 Camshaft Position Sensor
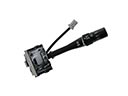 2008 Dodge Ram 1500 Wiper Switch
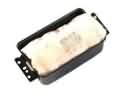 2008 Dodge Ram 1500 Air Bag
 2008 Dodge Ram 1500 Air Bag Control Module
 2008 Dodge Ram 1500 Air Bag Sensor
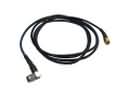 2008 Dodge Ram 1500 Antenna Cable
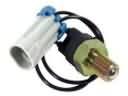 2008 Dodge Ram 1500 Back Up Light Switch
 2008 Dodge Ram 1500 Brake Light Switch
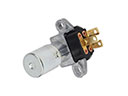 2008 Dodge Ram 1500 Dimmer Switch
 2008 Dodge Ram 1500 Headlight Switch
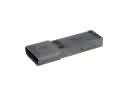 2008 Dodge Ram 1500 Ignition Control Module
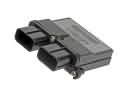 2008 Dodge Ram 1500 Occupant Detection Sensor