JeepParts
My Garage
My Account
Cart
OEM 2009 Chrysler Aspen Instrument Cluster
Speedometer Instrument Cluster- Select Vehicle by Model
- Select Vehicle by VIN
Select Vehicle by Model
orMake
Model
Year
Select Vehicle by VIN
For the most accurate results, select vehicle by your VIN (Vehicle Identification Number).
3 Instrument Clusters found

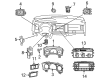
2009 Chrysler Aspen Instrument Cluster Part Number: 68039994AE
Product Specifications- Other Name: Cluster - Instrument Panel; Cluster Assembly
- Replaces: 5172393AA, 68039994AB, 68039994AA, 68039994AC, 68039994AD
- Item Weight: 3.30 Pounds
- Item Dimensions: 16.3 x 10.3 x 6.3 inches
- Condition: New
- Fitment Type: Direct Replacement
- SKU: 68039994AE
- Warranty: This genuine part is guaranteed by Mopar's factory warranty.

2009 Chrysler Aspen Instrument Cluster Part Number: 68039990AE
Product Specifications- Other Name: Cluster - Instrument Panel; Cluster Assembly; Cluster Instrument Panel
- Replaces: 68039990AA, 68039990AB, 68039990AC, 68039990AD
- Item Weight: 3.30 Pounds
- Item Dimensions: 16.3 x 10.3 x 6.1 inches
- Condition: New
- Fitment Type: Direct Replacement
- SKU: 68039990AE
- Warranty: This genuine part is guaranteed by Mopar's factory warranty.

2009 Chrysler Aspen Lens Part Number: 68003678AA
Product Specifications- Other Name: Lens - Instrument Cluster; Instrument Panel Lens; Mask And Lens Instrument Cluster
- Item Weight: 2.20 Pounds
- Condition: New
- Fitment Type: Direct Replacement
- SKU: 68003678AA
- Warranty: This genuine part is guaranteed by Mopar's factory warranty.
2009 Chrysler Aspen Instrument Cluster Parts and Q&A
- Q: How to Remove the Instrument Cluster on 2009 Chrysler Aspen?A: First, unconnect and break the battery negative cable so the SRS becomes disabled, then wait for two minutes to let the system capacitor discharge. Be careful not to bang or let the occupant restraint controller go, since it holds the impact sensor for air bag deployment; an air bag control module that falls MUST be replaced. If your vehicle has the Occupant Classification System (OCS), only replace one part, the Occupant Restraint Controller (ORC) or the Occupant Classification Module (OCM). Start by removing the battery negative cable, then make use of a trim stick C-4755 to uncover the left door sill and left cowl trims. Lift out the left instrument panel end cap, remove the screws on the steering column opening cover and place the hood release handle to the side. After that, get rid of the reinforcement and lift lever found inside the steering column and then disconnect the upper and lower shrouds. Unplug the connectors from the wiring harness of the column and pull the shift cable off of the column shift lever actuator. Disconnect the electrical connector by removing the SKIM module after pulling the shift cable out of the column bracket. Disconnect the upper steering shaft coupler bolt, slide the shaft down and discard the brake light switch. After securing the proper tools, unscrew the nuts that hold the column to the mounts, lower the column off the mounts and remove it from the vehicle. Lose the bolts keeping the pedal support bracket installed, remove the release rod from the pedal and take out the electrical connections from the fuse block. Remove the ground wire bolt, pop off the trim covers at the driver's side A-pillar handle by the grab and take out the A-pillar trim panel after removing the bolts. Pull out the floor console, disconnect the two bare wire connectors from the ORC and take out the instrument panel harness that's under the carpet after unscrewing its center screws. Remove the four support bolts, the driver's seat, the floor duct and the two bolts on the driver's side support. Take off the end cap from the right instrument panel, remove the two bolts that secure the passenger side support panel and the right door sill trim cover. Open the door, open the right cowl trim cover, unfasten the amplifier bolts and unplug the amplifier and antenna cables. Take out the harness bolt and ground wire bolt and next, get rid of the floor duct on the driver's side rear windows. Open what are called the 'trim covers' near the handle in the passenger side A-pillar and unscrew all the bolts to get to the A-pillar trim panel. Disconnect the instrument panel defroster's grille, remove the trim stick C-4755, separate the sensor wire connector if you have one and remove the four bolts from the fenceline. Take the assembly off the side support pins and pull it out through the driver's door to finish.
Related 2009 Chrysler Aspen Parts
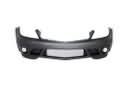 2009 Chrysler Aspen Bumper
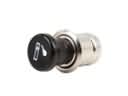 2009 Chrysler Aspen Cigarette Lighter
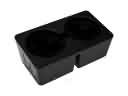 2009 Chrysler Aspen Cup Holder
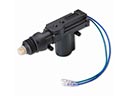 2009 Chrysler Aspen Door Lock Actuator
 2009 Chrysler Aspen Glove Box
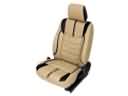 2009 Chrysler Aspen Seat Cover
 2009 Chrysler Aspen Seat Cushion
 2009 Chrysler Aspen Seat Heater
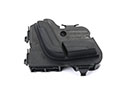 2009 Chrysler Aspen Seat Switch
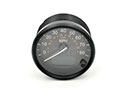 2009 Chrysler Aspen Speedometer
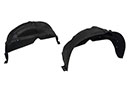 2009 Chrysler Aspen Wheelhouse
 2009 Chrysler Aspen Windshield Washer Nozzle