JeepParts
My Garage
My Account
Cart
OEM 2009 Dodge Viper Instrument Cluster
Speedometer Instrument Cluster- Select Vehicle by Model
- Select Vehicle by VIN
Select Vehicle by Model
orMake
Model
Year
Select Vehicle by VIN
For the most accurate results, select vehicle by your VIN (Vehicle Identification Number).
1 Instrument Cluster found

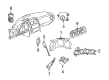
2009 Dodge Viper Instrument Cluster Part Number: 5030485AC
Product Specifications- Other Name: Cluster - Instrument Panel; Cluster Assembly; Cluster Instrument Panel
- Item Weight: 2.60 Pounds
- Item Dimensions: 16.2 x 9.3 x 8.7 inches
- Condition: New
- Fitment Type: Direct Replacement
- SKU: 5030485AC
- Warranty: This genuine part is guaranteed by Mopar's factory warranty.
2009 Dodge Viper Instrument Cluster Parts and Q&A
- Q: How to Install an Instrument Cluster Without Damaging the Interior Trim on 2009 Dodge Viper?A: An assistant should help you carefully set the instrument panel in place so as not to harm the vehicle's interior trim. Snap the white electrical connector on the right above the right side grounds and then install the instrument panel onto the dash panel. Fit ten nuts to the instrument panel studs in the engine compartment, then tighten them to 28 Nm (21 ft. lbs.). Affix the HVAC intake plenum outside and afterward, set the wiper module in place and install four small screws. Snap the retaining slots of speakers onto the retaining slots on the instrument panel. Next, put together the two occupant restraint controller electrical connectors and ground wires, link the electrical connectors to the radio, set the radio in place using four retaining screws and set the antenna connector onto the windshield. Hook up the electrical connector at the left A-pillar, then push the left and right A-pillar panels neatly into position. Connect the three right side electrical connectors, put the ground wire in place and the retaining bolt and tighten the bolt properly. Screw in the left side and right side instrument panel retaining bolts to 12 Nm (9 ft. lbs.) and connect the passenger air bag connector from below the instrument panel. Fit the left set of brackets with its bolts and nuts, tighten to 28 Nm (21 ft. lbs.) and mount the group wires and nuts on the LH floor tunnel afterward. Fix the five left side connectors, install the ground wire and fasten the retaining bolt tightly. Secure the wire harness lead on the brake lamp switch and the pedal servo connector, running the steering wheel in place to protect the clock spring. Position the steering column and put in the four retaining nuts, but don't tighten the steering column pinch bolt yet. Attach the five electrical wires coming from the steering column to their matching locations on the cluster, put screws into the upper and lower parts of the steering column shroud and join one electrical connector on the cluster bezel as you click it into where it belongs. Place the steering column opening cover into position and afterward, install the two cowl kick panels over the slots and snap them until they secure. Place screws in the backs of the cowls, insert two push pins and after that, set the sill plates into place and snap them down. Afterward, plug in the negative battery cable and secure the access cover.
Related 2009 Dodge Viper Parts
 2009 Dodge Viper Hood Latch
 2009 Dodge Viper Speedometer
 2009 Dodge Viper Car Speakers
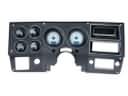 2009 Dodge Viper Dash Panels
 2009 Dodge Viper Door Latch Assembly
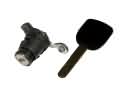 2009 Dodge Viper Door Lock Cylinder
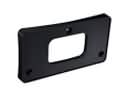 2009 Dodge Viper License Plate
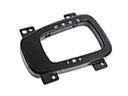 2009 Dodge Viper Shift Indicator
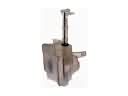 2009 Dodge Viper Washer Reservoir
 2009 Dodge Viper Windshield Wiper
 2009 Dodge Viper Wiper Arm
 2009 Dodge Viper Wiper Blade