JeepParts
My Garage
My Account
Cart
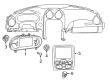
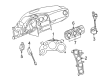
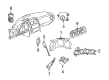
OEM Dodge Viper Instrument Cluster
Speedometer Instrument Cluster- Select Vehicle by Model
- Select Vehicle by VIN
Select Vehicle by Model
orMake
Model
Year
Select Vehicle by VIN
For the most accurate results, select vehicle by your VIN (Vehicle Identification Number).
6 Instrument Clusters found

Dodge Viper Instrument Cluster Part Number: 5035444AD
$828.98 MSRP: $1215.00You Save: $386.02 (32%)Ships in 1-3 Business DaysDodge Viper Instrument Cluster Part Number: 5035353AB
$1109.51 MSRP: $1630.00You Save: $520.49 (32%)
Dodge Viper Instrument Cluster Part Number: 4865626AE
Dodge Viper Cluster Assembly Part Number: 4865589AE

Dodge Viper Instrument Cluster Part Number: 5030485AC
Dodge Viper Instrument Cluster Part Number: 5029721AC
Dodge Viper Instrument Cluster
Choose OEM Instrument Cluster that meet Dodge factory standards. Dodge designs and tests every component for precision and durability. Each Instrument Cluster follows strict manufacturing steps to lock in quality and fit. If your Dodge Viper matters to you, OEM parts make the smart choice. You'll get the exact look, feel, and performance you expect. Shop genuine Viper parts at the highly competitive prices online. Enjoy a manufacturer's warranty, a hassle-free return policy, and rapid delivery. No more guesswork with off brands. Get genuine parts with exact fit and true factory performance. Shop with confidence today at JeepPartsDeal.com.
The Dodge Viper Instrument Cluster is one of the most critical aspects of the drive and a trademark and a symbol of reliability with regard to the Dodge Viper. Located just behind the wheel, this Instrument Cluster to offer the driver the desired details such as speed, Revolutions Per Minute of the engine and fuel gauge so that the driver can monitor the performance of the car or prevailing conditions. Thus, the Dodge Viper Instrument Cluster integration option is suitable for a range of Viper series, increasing productivity and safety levels of all the vehicles. It encompasses the vital warning lights, which indicate the state of the engine or the condition of the exterior lights hence the necessity of proper functioning of the automobile. Analyzing the options of the Dodge Viper's Instrument Cluster it is possible to state that this car's model has several unique features in the modern automotive market, including high precision along with the conception of ergonomics, ease of use and rather clear indicators' interpretation. Furthermore, relation of the identified cluster with high-tech and sophisticated technology means it is a Wired application, which makes it not only essential but a visionary component that defines the Viper legend. It is evident this Dodge Viper Instrument Cluster is all about giving the driver the premier performance that the particular vehicle brand has to offer through the car's rugged design. Conclusively, the Dodge Viper Instrument Cluster is another prove of the essence of the vehicle in terms of performance as well as a tool that sharpens the driver's ability or skill in the handling of this powerful car while making it safer and efficient.
Dodge Viper Instrument Cluster Parts and Q&A
- Q: How to Install the Instrument Cluster and Dashboard on Dodge Viper?A:Begin the installation by positioning five screws into the instrument panel on the lower right trim and then add three screws to the Glove Box to secure it. Insert one end of the electrical connector into the button on the cluster bezel, attach it over the retaining slots and press it hard to fix it in place. After that, join one electrical connector to the center of the instrument panel bezel and install six screws to secure it. Attach the electrical connector to the center console, line it up and then put in eight screws on the console. First, put in the floor console bezel, followed by the parking brake body and the joint of the shifter shaft with the knob and body. Hold the shifter bezel in place with six allen screws. Attach the negative Battery Cable again, cover the battery and put in all four bolts. Close the deck lid and then confirm that everything is working as it should.
- Q: How to Service and Repair the Instrument Cluster on Dodge Viper?A:When working on the instrument panel and pad assembly, start by lifting the deck cover, removing its bolts and pulling out the battery compartment cover. Cut the negative Battery Cable from the system and wait for two minutes while the system's capacitor discharges. Take out the cluster bezel, use a trim stick to raise up the left sill plate, remove a screw and push out two pins to separate the left cowl kick panel. Take out the cover over the Steering Column opening, being careful that the wheel remains still so the Clock Spring is not damaged. Unscrew two bolts from the upper and lower shrouds, detach five electrical connectors on the column, loosen the pinch bolt and take out the four nuts to pull the column. Disconnect the brake lamp switch and the pedal servo electrical wires, next disconnect all left instrument panel electrical connectors and ground wires and lastly remove the ground wire nuts under the left side of the floor tunnel. Let down one bolt and one nut from the left brace to the instrument panel, then unscrew both retaining bolts at the steering column opening. Remove one screw from the left A-pillar trim, then pry off the trim and take out the left instrument panel speaker grille using a trim stick. After that, separate the electrical connector from the left A-pillar. Use a crowbar to pull up the right sill plate and then use it to take out the cowl kick panel as well. From under the instrument panel, remove the passenger air bag electrical connector, three wiring harnesses from the right, a ground bolt and two of the retaining bolts for the side instrument panel. Peel off the A-pillar trim and the right speaker grille, unplug the radio antenna connection, remove four screws, disconnect the wiring for the radio and detach the two occupant restraint controller connectors. Unscrew the wiper module and the four screws from the HVAC exterior intake plenum, remove the wiper cowl's two bolts, nut, ground wire and after that, remove the ten nuts located beneath the instrument panel in the engine compartment. With some help, gently take out the instrument panel and rest it on a workbench. When you install it, aid someone in putting back the instrument panel, attach the white electrical connection on the right and position the other assembly on the front of the dash and put in all ten nuts to the instrument studs, tighten them all to 28 N.m (21 ft.lbs.). Reinstall the bolts, nut and ground wire on the wiper arm, place the intake plenum into place on the car, place and tighten four screws and secure the wiper module. Link up the wires from the occupant restraint controller with the same wires from the air bag system, connect the radio's electrical cables to the air bag system, use four retaining screws to secure the radio and attach the radio antenna to the Windshield. Insert the correct speaker grille and trim for the instrument panel and A-pillar, fasten the right side instrument panel retaining bolts (to 12 N.m or 9 ft.lbs.), link the right side electrical connectors and ground bolt, work underneath to link the passenger air bag electrical connection and then insert the panel and sill plate. Hook the small electrical connector at the lower A-pillar to the instrument panel, else clip the left instrument panel speaker grille in place and tighten two retaining bolts at the steering column opening to 12 N.m (9 ft.lbs.). Fit one bolt and a nut to the left brace at the instrument panel, tighten to 28 N.m (21 ft.lbs.), position ground wire nuts at the left tunnel floor, attach five electrical connectors to the left side instrument panel, put the electrical connector from the servo pedal on and hook up the brake lamp switch. As you fit the Steering Wheel, prevent it from moving, slide the steering column into position, attach the four retaining nuts, tighten the bolt, connect the five electrical connectors and screw in the upper and lower shrouds. Manually install the steering column opening cover, slide the left cowl kick panel to its place, secure it with one screw and use two push pins and snap the left sill plate into its hinges. Plug in an electrical connector on the cluster bezel, make sure it's in position and then attach the cluster bezel. Connect the battery negative cable next, set the battery access cover in its spot, add the bolts and ensure everything runs as it should.


Related Dodge Viper Parts
 Dodge Viper Spoiler
 Dodge Viper Speedometer
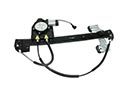 Dodge Viper Window Regulator
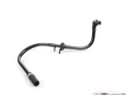 Dodge Viper Brake Booster Vacuum Hose
 Dodge Viper Floor Pan
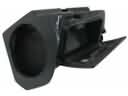 Dodge Viper Glove Box
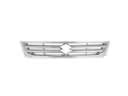 Dodge Viper Grille
 Dodge Viper Interior Door Handle
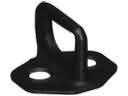 Dodge Viper Rear Door Striker
 Dodge Viper Shift Linkage Boot
 Dodge Viper Tailgate Lock
 Dodge Viper Windshield Washer Nozzle