JeepParts
My Garage
My Account
Cart
OEM Chrysler 300 Wheel Stud
Rim Wheel Stud- Select Vehicle by Model
- Select Vehicle by VIN
Select Vehicle by Model
orMake
Model
Year
Select Vehicle by VIN
For the most accurate results, select vehicle by your VIN (Vehicle Identification Number).
1 Wheel Stud found


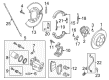
Chrysler 300 Wheel Stud, Rear Part Number: 6507915AA
$21.11 MSRP: $31.00You Save: $9.89 (32%)Ships in 1-2 Business Days
Chrysler 300 Wheel Stud
Choose OEM Wheel Stud that meet Chrysler factory standards. Chrysler designs and tests every component for precision and durability. Each Wheel Stud follows strict manufacturing steps to lock in quality and fit. If your Chrysler 300 matters to you, OEM parts make the smart choice. You'll get the exact look, feel, and performance you expect. Shop genuine 300 parts at the highly competitive prices online. Enjoy a manufacturer's warranty, a hassle-free return policy, and rapid delivery. No more guesswork with off brands. Get genuine parts with exact fit and true factory performance. Shop with confidence today at JeepPartsDeal.com.
The Chrysler 300 Wheel Stud functions as an essential element which supports reliable performance of Chrysler 300 series vehicles. The Wheel Studs from Chrysler deliver secure attachment between wheels and wheel hubs to provide operational stability combined with safety. The durable steel or carbon steel materials applied in manufacturing Chrysler 300 Wheel Studs enable them to maintain structural integrity through all sorts of driving challenges. These Wheel Studs present valuable compatibility because they work with numerous Chrysler 300 vehicles to provide their strong assembly features to the full lineup. The effectiveness and safety of the brand 300 vehicles depends heavily on proper maintenance and immediate replacement of damaged Wheel Studs because wheel security failure could produce serious risks for drivers and vehicle passengers. Among other wheel studs in the automotive market the car Wheel Stud stands out because its semi-permanent attachment to the hub enables effortless wheel exchange without losing the stud. The careful design improves user accessibility as well as strengthens vehicle safety during operation. The car part upholds the brand values of reliability and performance thus becoming a fundamental wheel component which secures the safety of the automaker model owners.
Chrysler 300 Wheel Stud Parts and Q&A
- Q: How to Service Rear Wheel Studs on Chrysler 300?A:You should place the vehicle on a jack and support it with jack stands and then pull off the rear wheel to adjust the fasteners. Connect the rear brakes and back off the adjuster until all the threads on the shoe have been removed. Use suitable instruments to take the spring off the adjuster, then pull up on the upper shoe near the adjuster to allow you to remove the adjuster. Attach the Remover C-4150A to the hub's inner flange and to the wheel stud and turn the forcing screw to pop the stud out of the flange and hub, then take the tool off. To make it easier to remove the studs, rock the hub flange back and forth. When installing, start by sliding the new wheel stud into the rear of the flange, then pile five washers over the stud and tighten a standard wheel mounting nut with its flat side against the washers. Trade Workshop at Hand drawings Put the parking brake shoe adjuster between the upper and lower parking brake shoes, so the end with the star wheel is facing upward and use the upper shoe to press against the adjuster's mounting slot. Install the spring securely at the adjuster with the suitable devices. Check the center diameter of the shoe by measuring the brake drum and then read the measurement inside the parking brake drum area with Brake Shoe Gauge C-3919 or an equivalent gauge. Lay the gauge over the parking brake shoe at its widest area and use the adjuster star wheel to tighten the shoes so the linings contact the gauge jaws. Put the brake rotor back on, reinstalling all of the removed components and fit the wheel and tire assembly, tightening the mounting nuts to 150 Nm (110 ft. lbs.) torque in the right order. Change the parking brake shoes, bring the vehicle to riding height and test the brakes on the road to check if they're okay.

Related Chrysler 300 Parts
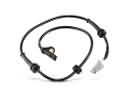 Chrysler 300 ABS Sensor
 Chrysler 300 Speed Sensor
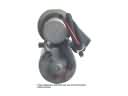 Chrysler 300 ABS Pump And Motor Assembly
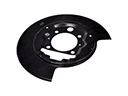 Chrysler 300 Backing Plate
 Chrysler 300 Brake Caliper Bolt
 Chrysler 300 Brake Caliper Bracket
 Chrysler 300 Brake Caliper Piston
 Chrysler 300 Brake Line
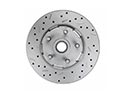 Chrysler 300 Brake Rotor
 Chrysler 300 Parking Brake Cable
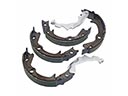 Chrysler 300 Parking Brake Shoes
 Chrysler 300 Wheel Bearing Dust Cap