JeepParts
My Garage
My Account
Cart
OEM Chrysler 300M Power Window Switch
Electric Window Switch- Select Vehicle by Model
- Select Vehicle by VIN
Select Vehicle by Model
orMake
Model
Year
Select Vehicle by VIN
For the most accurate results, select vehicle by your VIN (Vehicle Identification Number).
4 Power Window Switches found

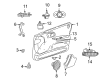
Chrysler 300M Window Switch, Black, Front Driver Side Part Number: 5026004AA
$159.84 MSRP: $177.00You Save: $17.16 (10%)Ships in 1-2 Business Days
Chrysler 300M Window Switch, Front Passenger Side Part Number: 4760978AB
$15.33Ships in 1-2 Business Days
Chrysler 300M Window Switch, Black, Front Passenger Side Part Number: 56007695AD
$23.37 MSRP: $33.55You Save: $10.18 (31%)Chrysler 300M Window Switch, Front Driver Side Part Number: 5026010AA
Chrysler 300M Power Window Switch
Choose OEM Power Window Switch that meet Chrysler factory standards. Chrysler designs and tests every component for precision and durability. Each Power Window Switch follows strict manufacturing steps to lock in quality and fit. If your Chrysler 300M matters to you, OEM parts make the smart choice. You'll get the exact look, feel, and performance you expect. Shop genuine 300M parts at the highly competitive prices online. Enjoy a manufacturer's warranty, a hassle-free return policy, and rapid delivery. No more guesswork with off brands. Get genuine parts with exact fit and true factory performance. Shop with confidence today at JeepPartsDeal.com.
Chrysler 300M Power Window Switch Parts and Q&A
- Q: How to Replace a Power Window Switch for the Passenger Side on Chrysler 300M?A:Start by opening the hood and taking off the negative cable from the battery's terminal. After that, take out the panel behind the door handle and detach the wire harness. After that, disconnect the switch from the bezel and the car. To install, do everything in the opposite way.
- Q: How to Maintain and Fix Power Window Switches on Chrysler 300M?A:To begin, you should, first open the hood, then take the negative battery cable remote terminal away from the remote battery post. Remove the trim around the driver's door, take out the three mounting screws and disconnect the connector before looking at the master switch on these models. To remove the switch from a LHS or 300M, use a trim stick (special tool #C-4755) to raise the switch bezel, eliminate the wire connection at the back and bring out the unit from the vehicle. Move the passenger door trim away from the door, unconnect the wire from the switch and then take the switch out both from the bezel and your car. Open the rear door, lift the edge of the switch with a trim stick, while pressing forward on the bezel, pull the switch from its place, push out the tabs around the connector and remove the switch. On Intrepid and Concorde models, attach the master switch and its wire to the harness, secure these with three screws, put the door trim panel back and fasten the negative battery cable to its remote terminal. For LHS and 300M, link the wire connector to the switch, glue the switch into the trim panel and reattach the negative battery cable remote terminal. When installing the switch and wires for passenger change, place the switch and connector, install the door panel and return the negative battery cable remote terminal to the proper position. Take the rear door switch, connect it to its connector, place the switch in the door panel and attach the negative battery cable remote terminal.


Related Chrysler 300M Parts
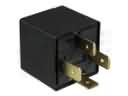 Chrysler 300M Daytime Running Light Relay
 Chrysler 300M Headlight Switch
 Chrysler 300M Horn Relay
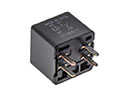 Chrysler 300M HVAC Relay
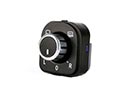 Chrysler 300M Mirror Switch
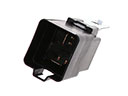 Chrysler 300M Radiator Fan Relay
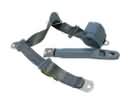 Chrysler 300M Seat Belt
 Chrysler 300M Seat Heater Switch
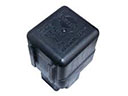 Chrysler 300M Starter Relay
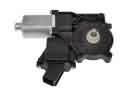 Chrysler 300M Window Motor
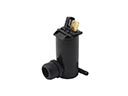 Chrysler 300M Windshield Washer Pump
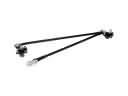 Chrysler 300M Wiper Linkage
Browse Chrysler 300M Power Window Switch by Years
2004
2003
2002
2001
2000
1999