JeepParts
My Garage
My Account
Cart
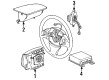
OEM Chrysler Cirrus Clock Spring
Spiral Cable Clock Spring- Select Vehicle by Model
- Select Vehicle by VIN
Select Vehicle by Model
orMake
Model
Year
Select Vehicle by VIN
For the most accurate results, select vehicle by your VIN (Vehicle Identification Number).
2 Clock Springs found


Chrysler Cirrus Clockspring Part Number: 4600161
Chrysler Cirrus Clockspring Part Number: 4600163
Chrysler Cirrus Clock Spring
Choose OEM Clock Spring that meet Chrysler factory standards. Chrysler designs and tests every component for precision and durability. Each Clock Spring follows strict manufacturing steps to lock in quality and fit. If your Chrysler Cirrus matters to you, OEM parts make the smart choice. You'll get the exact look, feel, and performance you expect. Shop genuine Cirrus parts at the highly competitive prices online. Enjoy a manufacturer's warranty, a hassle-free return policy, and rapid delivery. No more guesswork with off brands. Get genuine parts with exact fit and true factory performance. Shop with confidence today at JeepPartsDeal.com.
The Chrysler Cirrus Clock Spring functions as an indispensable vehicle component for the Supplemental Restraint System (SRS) to create a reliable electrical connection between airbag module and vehicle electrical network. Test driving the Chrysler Cirrus Clock Spring enables reliable airbag deployment which boosts safety for vehicle passengers. A flat multicore cable inside the Chrysler Cirrus Clock Spring spirals for energy storage which enables steering wheel movement. Since the Chrysler Cirrus models started production in 1995 different versions of the Clock Spring have appeared to enhance reliability and performance while warranting reliable airbag activation through an electric connection. The Chrysler Cirrus continues to stand out because of its reliable features which include affordable prices paired with style and safety elements that date back to the vehicle's launch in 1995. The the automaker car Clock Spring serves diverse model models which allows users to maintain their vehicle's operational efficiency combined with safety functions. The Clock Spring's construction includes strategic integration abilities which boost vehicle performance. Safety receives top priority in the automotive market thanks to the car Clock Spring which combines durability with effectiveness while reaching market popularity.
Chrysler Cirrus Clock Spring Parts and Q&A
- Q: How to Safely Remove a Deployed Driver Airbag Module Using a Clock Spring on Chrysler Cirrus?A:Be sure to put on rubber gloves, eye protection and long sleeves before removing a deployed module, because there might be irritants present. Detach and separate the battery negative remote signal cable at the beginning. Take out the two bolts that hold the lower cover on and then those for the upper cover. The next step is to get the torque control switch out from underneath the Steering Wheel. Unscrew the switch and pull both switch pods out. Once you've done that, separate the switch from the vehicle by removing the wiring. On the steering wheel, remove the bolts that are attaching the Driver air bag Module and grab the module, lifting it and using the finger grips on your arm to gently lift the secondary latch, allowing you to disconnect the wire from the back of the air bag module. Take away the horn wire from the steering wheel and remove the speed control wires from the wire guides. Removing the steering wheel is necessary and be sure all wiring is protected by running it through the steering wheel armature while attaching the new Clock Spring after replacing the Driver air bag module. Remove the nut connecting the steering wheel to the column, disconnect each cable connector on the Driver air bag Module and loosen the two fasteners to remove the steering column shrouds. Loosen and remove the multi-function switch with two screws and then lift up the latches of the top lock housing a bit to guide the Clock Spring over it, since you cannot service it. Set the tires straight and centralize the Clock Spring by making sure its yellow indicator is in the centering window while installing the steering wheel. Match the top locking tab to the slot on the bottom of the lock and slowly click it into position. Fit the multi-function switch, tighten it to 1.5 to 2.5 Nm (14 to 22 in. lbs.), then fit the steering column shrouds and tighten them to 1.7 to 2.3 Nm (15 to 20 in. lbs.). Send the wires through the slit in the steering wheel armature, fit the steering wheel and use a torque wrench set to 61 Nm (45 ft. lbs.) to tighten it. Route all speed control wiring beneath the horn, feed it through the pockets of the speed control switches, attach them to the speed wiring and bolt them down to their intended spots at a torque between 6 and 24 in lbs. Combine the horn lead wire into the mounting bracket of the air bag module, link the yellow wire to the Driver air bag Module and ensure you don't close the secondary latch until everything is safe. After that, fit the air bag module bolts and tighten them using a torque wrench to 80 to 90 in. lbs. (9 to 10 Nm). Perform the air bag tests and then attach the battery negative remote cable once more.

Related Chrysler Cirrus Parts
 Chrysler Cirrus Air Bag Control Module
 Chrysler Cirrus Airbag
 Chrysler Cirrus Antenna Base
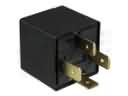 Chrysler Cirrus Daytime Running Light Relay
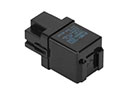 Chrysler Cirrus Flasher Relay
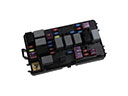 Chrysler Cirrus Fuse
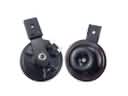 Chrysler Cirrus Horn
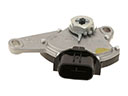 Chrysler Cirrus Neutral Safety Switch
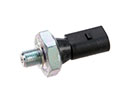 Chrysler Cirrus Oil Pressure Switch
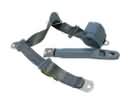 Chrysler Cirrus Seat Belt
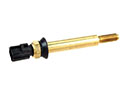 Chrysler Cirrus Temperature Sender
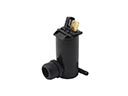 Chrysler Cirrus Windshield Washer Pump