JeepParts
My Garage
My Account
Cart
OEM Chrysler Prowler Dimmer Switch
Light Dimmer Switch- Select Vehicle by Model
- Select Vehicle by VIN
Select Vehicle by Model
orMake
Model
Year
Select Vehicle by VIN
For the most accurate results, select vehicle by your VIN (Vehicle Identification Number).
1 Dimmer Switch found


Chrysler Prowler Ignition Switch Part Number: 4728424
Chrysler Prowler Dimmer Switch
Choose OEM Dimmer Switch that meet Chrysler factory standards. Chrysler designs and tests every component for precision and durability. Each Dimmer Switch follows strict manufacturing steps to lock in quality and fit. If your Chrysler Prowler matters to you, OEM parts make the smart choice. You'll get the exact look, feel, and performance you expect. Shop genuine Prowler parts at the highly competitive prices online. Enjoy a manufacturer's warranty, a hassle-free return policy, and rapid delivery. No more guesswork with off brands. Get genuine parts with exact fit and true factory performance. Shop with confidence today at JeepPartsDeal.com.
Chrysler Prowler Dimmer Switch Parts and Q&A
- Q: How to Service and Repair a Dimmer Switch on Chrysler Prowler?A:First, lift the hood and disconnect the battery's negative wire to begin working on the switch. Take out the tilt steering column lever, then remove the screws that hold the tachometer. Then, get rid of the upper and lower shrouds on the steering column and lastly, take off the lower fixed column shroud. Unscrew the upper nuts on the steering column, but don't remove them; after that, move the upper fixed column shroud to expose the rear of the multi-function switch. Use the tamper proof Torx Bit TTXR20B2 to take the tamper proof screws off, after which you can carefully pull the switch from the column and loosen the connector's screw which will remain in the product. Take out the wire harness connector linked to the multi-function switch. You should join the wire harness connector with the multi-function switch then tighten the connector screw to 2 Nm (17 in. lbs.) for the installation process. Fix the switch in place and insert the 2 tamper proof screws to tighten them to 2 Nm. Put the upper and lower shrouds for the fixed columns back on and tighten them between 0.3 and 0.8 Nm (3 and 7 in. lbs.), then tighten the tachometer mounting screws to 3.7 Nm (33 in. lbs.). Also, place the tilt lever back onto the steering column and hook up the battery negative cable.

Related Chrysler Prowler Parts
 Chrysler Prowler Brake Light Switch
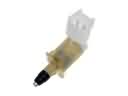 Chrysler Prowler Door Jamb Switch
 Chrysler Prowler Headlight Switch
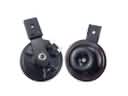 Chrysler Prowler Horn
 Chrysler Prowler Ignition Lock Assembly
 Chrysler Prowler Ignition Lock Cylinder
 Chrysler Prowler Ignition Switch
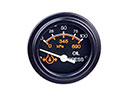 Chrysler Prowler Oil Pressure Gauge
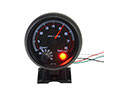 Chrysler Prowler Tachometer
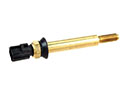 Chrysler Prowler Temperature Sender
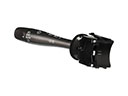 Chrysler Prowler Turn Signal Switch
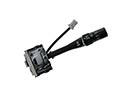 Chrysler Prowler Windshield Wiper Switch