JeepParts
My Garage
My Account
Cart
OEM Chrysler Sebring Release Bearing
Clutch Release Throw Out Bearing- Select Vehicle by Model
- Select Vehicle by VIN
Select Vehicle by Model
orMake
Model
Year
Select Vehicle by VIN
For the most accurate results, select vehicle by your VIN (Vehicle Identification Number).
3 Release Bearings found


Chrysler Sebring Release Bearing Part Number: 4670026AB
$86.47 MSRP: $129.00You Save: $42.53 (33%)Ships in 1-2 Business Days
Chrysler Sebring Release Bearing Part Number: MR145619
$84.40 MSRP: $106.99You Save: $22.59 (22%)Ships in 1-2 Business Days
Chrysler Sebring Release Bearing Part Number: MD722744
$20.15 MSRP: $25.54You Save: $5.39 (22%)Ships in 1-2 Business Days
Chrysler Sebring Release Bearing
Choose OEM Release Bearing that meet Chrysler factory standards. Chrysler designs and tests every component for precision and durability. Each Release Bearing follows strict manufacturing steps to lock in quality and fit. If your Chrysler Sebring matters to you, OEM parts make the smart choice. You'll get the exact look, feel, and performance you expect. Shop genuine Sebring parts at the highly competitive prices online. Enjoy a manufacturer's warranty, a hassle-free return policy, and rapid delivery. No more guesswork with off brands. Get genuine parts with exact fit and true factory performance. Shop with confidence today at JeepPartsDeal.com.
Chrysler Sebring Release Bearing Parts and Q&A
- Q: How to Maintain and Fix a Release Bearing on Chrysler Sebring?A:The first step to work on the clutch release bearing and lever is to take out the transaxle from the car. Stand the lever and bearing assembly up vertically along the wall, place your hands in the release lever socket area and pull evenly on both sides to remove the lever from the pivot-stud without using tools. Remove the lever from the bearing thrust plate, being careful not to damage the retaining tabs on the bearing. Look at the bearing, since it is already lubricated and tightly sealed; without immersing it in oil or solvent, the bearing should turn freely with some slight drag. Whenever a bearing is noisy, feels rough or is dry, you should replace the whole bearing unit. If the spring clips on the back of the clutch release lever are bent or damaged, change the releasing lever as well. Should it be required, take out the release lever pivot ball by using slide hammer C-3752 and remover/installer 6891. For installation, if a new release lever pivot ball is needed, attach slide hammer C-3752 and 6891 sliding tool. Once you have cleaned the pieces, grease both of the pivots (the pivot ball pocket in the lever and the lever arms) and then, when preparing to assemble the parts, make sure the bearing's small pegs go between the lever arms. Slide both the bearing and lever assembly onto the input shaft bearing retainer as one piece and snap the clutch release lever onto the pivot ball before you put the transaxle back into position.

Related Chrysler Sebring Parts
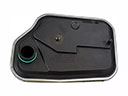 Chrysler Sebring Automatic Transmission Filter
 Chrysler Sebring Automatic Transmission Shift Levers
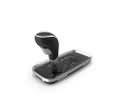 Chrysler Sebring Automatic Transmission Shifter
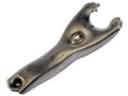 Chrysler Sebring Clutch Fork
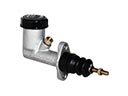 Chrysler Sebring Clutch Master Cylinder
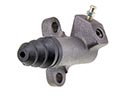 Chrysler Sebring Clutch Slave Cylinder
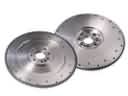 Chrysler Sebring Flywheel
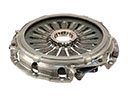 Chrysler Sebring Pressure Plate
 Chrysler Sebring Shift Cable
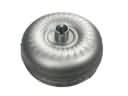 Chrysler Sebring Torque Converter
 Chrysler Sebring Transmission Pan