JeepParts
My Garage
My Account
Cart
OEM Chrysler Voyager Wheel Bearing
Hub Bearing- Select Vehicle by Model
- Select Vehicle by VIN
Select Vehicle by Model
orMake
Model
Year
Select Vehicle by VIN
For the most accurate results, select vehicle by your VIN (Vehicle Identification Number).
11 Wheel Bearings found


Chrysler Voyager Hub & Bearing, Rear Part Number: 68429526AA
$219.95 MSRP: $467.00You Save: $247.05 (53%)Ships in 1-2 Business Days
Chrysler Voyager Hub & Bearing Part Number: 4721515
$152.71 MSRP: $279.00You Save: $126.29 (46%)Ships in 1-2 Business Days
Chrysler Voyager Hub & Bearing, Front Part Number: 4641517AD
$323.46 MSRP: $538.00You Save: $214.54 (40%)Ships in 1-2 Business Days
Chrysler Voyager Hub & Bearing Part Number: 68522905AB
$163.91 MSRP: $250.00You Save: $86.09 (35%)Chrysler Voyager Hub & Bearing, Front Part Number: 68522906AB
$210.15 MSRP: $322.00You Save: $111.85 (35%)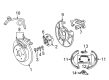
Chrysler Voyager Hub & Bearing, Rear Part Number: 4721515AD
$272.34 MSRP: $362.00You Save: $89.66 (25%)Ships in 1-2 Business Days
Chrysler Voyager Hub - Brake Part Number: 68624924AA
$216.31 MSRP: $328.00You Save: $111.69 (35%)Ships in 1-2 Business Days
Chrysler Voyager Bearing - Brake Part Number: 68319491AB
$214.14 MSRP: $315.00You Save: $100.86 (33%)Chrysler Voyager Hub & Bearing Part Number: 4721513
Chrysler Voyager Hub & Bearing Part Number: 4641516

Chrysler Voyager Hub & Bearing, Rear Part Number: 4683869AB
Chrysler Voyager Wheel Bearing
Choose OEM Wheel Bearing that meet Chrysler factory standards. Chrysler designs and tests every component for precision and durability. Each Wheel Bearing follows strict manufacturing steps to lock in quality and fit. If your Chrysler Voyager matters to you, OEM parts make the smart choice. You'll get the exact look, feel, and performance you expect. Shop genuine Voyager parts at the highly competitive prices online. Enjoy a manufacturer's warranty, a hassle-free return policy, and rapid delivery. No more guesswork with off brands. Get genuine parts with exact fit and true factory performance. Shop with confidence today at JeepPartsDeal.com.
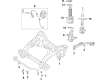
The Wheel Bearing is one of the features that greatly increases the efficiency of the Chrysler Voyager minivan and one of the car's strengths. Withstanding force, the Wheel Bearing is accountable for making wheel growth more efficient and secure for use thanks to it. Chrysler has also divided the Voyager's design and its hub and bearing assembly into 3 categories with the integral hub and bearing assembly being the most frequently used. It may employ an ABS sensor, so that the Chrysler Voyager will offer the necessary braking capability. The Wheel Bearing needs to undergo frequent servicing to ensure it does not become loose, and this may result in noisy or vibrating vehicles or indeed cause extreme dangerous situations. Because the Wheel Bearing can work with different models, it will enable the ownership to identify the appropriate one to use in their vehicle. This compatibility explains why the Wheel Bearing is crucial in enhancing the functionality of the Chrysler Voyager. Further, in the construction of the Wheel Bearing, abrasion constraints are reduced which, among other things, aids in the aspect of fuel economy. Some of the unique built-in attributes like the replaceable tapered roller bearings mounted in the non-driven axle hubs make Wheel Bearing unique in the auto industry. Chrysler takes time to use quality material in making the Voyager Wheel Bearing so as to have a guaranteed period of reliability to add up to the comfort of the cruisers in the Chrysler Voyager.
Chrysler Voyager Wheel Bearing Parts and Q&A
- Q: How to Service and Repair a Wheel Bearing in the Rear Hub on Chrysler Voyager?A:To start, raise the vehicle, then take off the tire and wheel, next the Brake Drum or brake disc caliper and finally the rotor attached to the hub and bearing. release the sensor if your vehicle has antilock brakes by removing the secondary (yellow) clip at the back of the wheel speed sensor, pushing up on the metal clip, letting it drop down and then taking out the sensor from the hub and bearing. Afterwards, undo the 4 bolts connecting the hub and bearing to the rear axle, being careful not to damage any corrosion on them. When the hub and bearing can't be removed manually, use Remover, Special Tool 8458, by threading Threaded Guides into the hub and bearing bolt holes, loosening the outboard spring plate bolts and screwing in Screw Mount, Special Tool 8458-2. Apply grease to the dimple of the Push Plate, slip it onto the ends of the Threaded Guide Pins and press the Forcing Screw against there to expel the hub and bearing from the axle. After getting the spring plate off, replace the two outboard spring plate bolts and tighten them to 102 Nm (75 ft. lbs.). Install the 4 hub and bearing axle mounting bolts into the flange holes of the rear axle, then put the rear brake support plate over these bolts. Align the hub and bearing with the bolts and tighten each bolt in a crisscross sequence to 129 Nm (95 ft. lbs.). With antilock brakes, be sure the wheel speed sensor is both clean and dry when installed, ensure the metal sensor clip is in its neutral position, slide on the wheel speed sensor head and secure it using the yellow retaining clip. After that, fit the brake drum/disc brake rotor and caliper, then mount the wheel and tire and tighten the nuts to 135 Nm (100 ft. lbs.). Thereafter, set the rear brake as needed, lower the vehicle, perform a road test to see if the brakes are working as they should.

Related Chrysler Voyager Parts
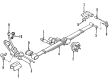
 Chrysler Voyager Axle Beam Mount
 Chrysler Voyager Axle Pivot Bushing
 Chrysler Voyager Axle Shaft Seal
 Chrysler Voyager Bump Stop
 Chrysler Voyager Crossmember Bushing
 Chrysler Voyager Leaf Spring Plate
 Chrysler Voyager Shock and Strut Boot
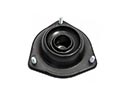 Chrysler Voyager Strut Mounts
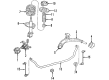
 Chrysler Voyager Sway Bar Link Bushing
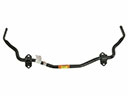 Chrysler Voyager Sway Bars
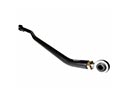 Chrysler Voyager Track Bar
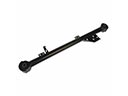 Chrysler Voyager Trailing Arm