JeepParts
My Garage
My Account
Cart
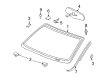
OEM Dodge Durango Windshield
Glass Windshield- Select Vehicle by Model
- Select Vehicle by VIN
Select Vehicle by Model
orMake
Model
Year
Select Vehicle by VIN
For the most accurate results, select vehicle by your VIN (Vehicle Identification Number).
10 Windshields found

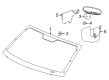
Dodge Durango Windshield, Front Part Number: 68213825AB
$408.77 MSRP: $596.00You Save: $187.23 (32%)Ships in 1-3 Business Days
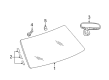
Dodge Durango Windshield, Front Part Number: 68080677AB
$443.12 MSRP: $645.00You Save: $201.88 (32%)Ships in 1-3 Business DaysDodge Durango Windshield, Front Part Number: 68213827AB
$500.37 MSRP: $730.00You Save: $229.63 (32%)Ships in 1-3 Business Days
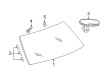
Dodge Durango Windshield - Shipping Assembly-30 Lite Part Number: 68080676AC
$528.99 MSRP: $771.00You Save: $242.01 (32%)Ships in 1-2 Business DaysDodge Durango Windshiel Part Number: 55112842AE
$699.60 MSRP: $1020.00You Save: $320.40 (32%)Ships in 1-2 Business Days
Dodge Durango Windshield Part Number: 55112845AE
$748.83 MSRP: $1090.00You Save: $341.17 (32%)Ships in 1-2 Business Days
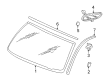
Dodge Durango Windshield - Shipping Assembly-30 Lite Part Number: 68213826AC
$218.67 MSRP: $322.00You Save: $103.33 (33%)Ships in 1-2 Business DaysDodge Durango Windshiel Part Number: 55112833AE
$699.60 MSRP: $1020.00You Save: $320.40 (32%)
Dodge Durango Windshield, Front Part Number: 5083964AC

Dodge Durango Windshield, Front Part Number: 5114521AB
Dodge Durango Windshield
Choose OEM Windshield that meet Dodge factory standards. Dodge designs and tests every component for precision and durability. Each Windshield follows strict manufacturing steps to lock in quality and fit. If your Dodge Durango matters to you, OEM parts make the smart choice. You'll get the exact look, feel, and performance you expect. Shop genuine Durango parts at the highly competitive prices online. Enjoy a manufacturer's warranty, a hassle-free return policy, and rapid delivery. No more guesswork with off brands. Get genuine parts with exact fit and true factory performance. Shop with confidence today at JeepPartsDeal.com.
Dodge Durango Windshield Parts and Q&A
- Q: How to Remove a Windshield on Dodge Durango?A:Always check all the warnings and cautions before trying to remove your windshield. The first step is to remove the two screws that hold the side windshield molding to the a-pillars, then take off the molding after that. Following that, take off the rear view mirror. Following that, take out the cowl grille. Place a cut-out wire between the glass and vehicle, press down to cut the adhesive and slowly pull out the windshield.
- Q: How to Replace a Windshield on Dodge Durango?A:First, remove the rear view mirror, the Wiper Arms and cowl grille so you can take off the windshield. With the doors open, take out the Weather Strip from the side windshield moldings and unscrew the molding from the A-pillars. Using a sharp cold knife, cut around the urethane on the outer side of the windshield and then cut the urethane from inside the cab at the bottom of the windshield. Give the urethane at least 24 hours of curing before driving the vehicle again. With the front left and right doors opened and the rear glass slider pulled open if it exists, install your vehicle's moldings. Remove most of the old urethane and leave just a bit, between 1 and 2 mm, in front of the windshield glass, then put in any replacement support spacers on the bottom of the windshield opening at the cowl. While the opening is empty, place the new windshield at its center, against the spacers and mark it at the spacers to remember them before you remove it. Lay the windshield inside down on top of two padded wood blocks on your work area, clean the inside with Mopar(R) Glass Cleaner and a cloth and seal the edge with clear glass primer, wiping with another clean cloth. After that, coat the windshield fence with pinchweld primer and wait at least three minutes for it to become dry. Put a 13 mm high and 10 mm wide strip of urethane caulking along the side of your product, giving it a triangular form. With help, fit the windshield above, match the ground markers to the support spacers and slowly bring the glass down, pushing it against the fence. After cleaning excess urethane on the molding, use masking tape to keep it in place until it dries. Put new screws in the side windshield moldings, secure the weather strip, then put the cowl grille, wiper arms, rear view mirror bracket and rear view mirror back. Once the urethane is completely dry, remove the tape strips and use water to make sure the repair is working.


Related Dodge Durango Parts
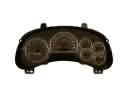 Dodge Durango Instrument Cluster
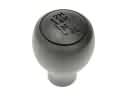 Dodge Durango Shift Knob
 Dodge Durango Air Deflector
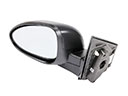 Dodge Durango Car Mirror
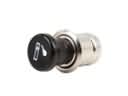 Dodge Durango Cigarette Lighter
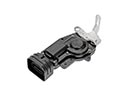 Dodge Durango Door Lock Actuator Motor
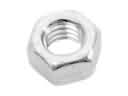 Dodge Durango Exhaust Nut
 Dodge Durango Floor Pan
 Dodge Durango Liftgate Lock Actuator
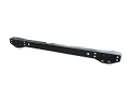 Dodge Durango Rear Crossmember
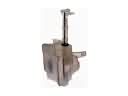 Dodge Durango Windshield Washer Fluid Reservoir
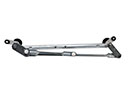 Dodge Durango Wiper Pivot