JeepParts
My Garage
My Account
Cart
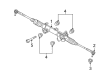
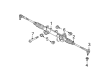
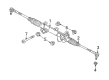
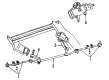
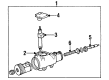
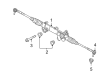
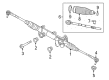
OEM Dodge Ram 1500 Rack And Pinion
Steering Gear- Select Vehicle by Model
- Select Vehicle by VIN
Select Vehicle by Model
orMake
Model
Year
Select Vehicle by VIN
For the most accurate results, select vehicle by your VIN (Vehicle Identification Number).
19 Rack And Pinions found

Dodge Ram 1500 Steering Gear Part Number: 55366385AL
$520.28 MSRP: $1190.00You Save: $669.72 (57%)Ships in 1-2 Business Days
Dodge Ram 1500 Steering Gear Part Number: 52110334AY
$821.62 MSRP: $1120.00You Save: $298.38 (27%)Ships in 1-2 Business Days
Dodge Ram 1500 Steering Gear Part Number: 52110487AI
$815.96 MSRP: $1250.00You Save: $434.04 (35%)Ships in 1-2 Business Days


Dodge Ram 1500 Steering Gear Part Number: 52113502AA


Dodge Ram 1500 Gear Assembly Part Number: 52113556AE

Dodge Ram 1500 Steering Gear Part Number: RL290770AF
Dodge Ram 1500 Steering Gear Part Number: RL366383AK
Dodge Ram 1500 Steering Gear Part Number: RL085421AC


Dodge Ram 1500 Steering Gear Part Number: 52113503AA

Dodge Ram 1500 Steering Gear Part Number: R5083894AB

Dodge Ram 1500 Steering Gear Part Number: R2113611AG


Dodge Ram 1500 Steering Gear Part Number: RL106519AZ

Dodge Ram 1500 Steering Gear Part Number: 52113556AB
Dodge Ram 1500 Steering Gear Part Number: RL106522AZ

Dodge Ram 1500 Steering Gear Part Number: 5154492AC
Dodge Ram 1500 Gear Assembly Part Number: 52113500AC
Dodge Ram 1500 Steering Gear Part Number: 52110333AX
Dodge Ram 1500 Steering Gear Part Number: 52106518BA
Dodge Ram 1500 Steering Gear Part Number: 5154494AC
Dodge Ram 1500 Rack And Pinion
Choose OEM Rack And Pinion that meet Dodge factory standards. Dodge designs and tests every component for precision and durability. Each Rack And Pinion follows strict manufacturing steps to lock in quality and fit. If your Dodge Ram 1500 matters to you, OEM parts make the smart choice. You'll get the exact look, feel, and performance you expect. Shop genuine Ram 1500 parts at the highly competitive prices online. Enjoy a manufacturer's warranty, a hassle-free return policy, and rapid delivery. No more guesswork with off brands. Get genuine parts with exact fit and true factory performance. Shop with confidence today at JeepPartsDeal.com.
The Steering Rack in Dodge Ram 1500 is needed to translate rotational movement of the steering wheel into the lateral movement of the front wheels. This mechanism employs a rack and pinion system, the pinion interlocking with the rack which is contained in a metall tubular structure in order to effect a smooth steering action. The majority of contemporary manufactures of Dodge Ram 1500 have used power-assisted steering racks where hydraulic systems are used to ease the pressure steering by directing the fluid inside the piston of the rack. The Dodge Ram 1500 vehicles have mainly used hydraulic power rack and pinion systems in the past decades while manual systems have been used in compact vehicles occasionally. The hydraulic setup is mostly used due to its initial performance and leak-age characteristics as compared to straight gears which are commonly used for lower temperatures and less wear of the gears as compared to helical gears. Maintenance should be done frequently because even a small fluid leakage or wear and tear may result in steering problems, which probably may call for Steering Rack replacements.
Dodge Ram 1500 Rack And Pinion Parts and Q&A
- Q: How to Service and Repair a Rack and Pinion with Independent Front Suspension on Dodge Ram 1500?A:Lock the Steering Wheel first when starting to service or repair a vehicle's rack and pinion with independent front suspension. Remove the reservoir cap, drain the fluid, after which lift the car. Unplug and throw away the steering coupler pinch bolt, then disconnect the power steering lines from the rack and pinion. After that, take the tire and wheel assembly off and use Special tool 8677 to unclip the Tie Rod Ends from the knuckles after you've removed the tie rod end nuts. After removing the skid plate and the rack and pinion bolts, you should lift the rack and pinion out of your vehicle. After unpacking the newest parts, inspect your bushings and make certain to replace worn or broken ones. While installing, line up the gear on the front crossmember and bolts it on securely to 319 Nm (235 ft. lbs.), with the bolt in the slotted hole being tightened first to prevent the gasket from pushing. Slide the coupler shaft onto the gear, secure a new pinch bolt and fasten it to 49 Nm (36 ft. lbs.). Wipe the tie rod end studs and knuckle tapers dry, place the tie rod ends into the steering knuckles and use a torque wrench to tighten the nuts to 61 Nm (45 ft. lbs.) and then add another 90° of tightening. Hook up the pressure Power Steering Hose to the rack and pinion and secure it using 32 Nm (23 ft. lbs.), next hook up the return power steering hose and secure it using 71 Nm (52 ft. lbs.). Once you've reinstalled the tire and wheel assembly, as well as the front skid plate, remove the support and bring the vehicle down. After that, put fluid in the system and check the toe position.
- Q: How to Remove a Rack and Pinion Steering Gear on Dodge Ram 1500?A:Before taking off the rack and pinion, lock the wheels in place by turning them to the right or left and back. Drain and remove the power steering fluid from its reservoir and afterward raise and support the vehicle. Release the pinch bolt from the steering coupler and unplug both hoses from the rack and pinion. Get rid of the front tires and wheels and then take off the nuts securing the outer tie rods to the knuckles with Ball Joint Remover 8677. Should the model require it, remove the skid plate. Lastly, take out the rack and pinion mounted bolts and slide the rack out of the vehicle.


Related Dodge Ram 1500 Parts
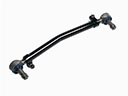 Dodge Ram 1500 Drag Link
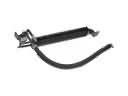 Dodge Ram 1500 Power Steering Cooler
 Dodge Ram 1500 Tie Rod End
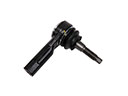 Dodge Ram 1500 Tie Rod
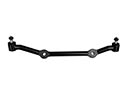 Dodge Ram 1500 Center Link
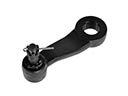 Dodge Ram 1500 Pitman Arm
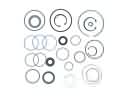 Dodge Ram 1500 Power Steering Gear Seal
 Dodge Ram 1500 Power Steering Hose
 Dodge Ram 1500 Power Steering Reservoir
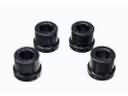 Dodge Ram 1500 Rack & Pinion Bushing
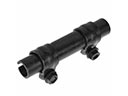 Dodge Ram 1500 Tie Rod Adjusting Sleeve
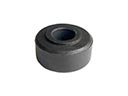 Dodge Ram 1500 Tie Rod Bushing