JeepParts
My Garage
My Account
Cart
OEM Dodge Ram 1500 Van Thermostat
Engine Coolant Thermostat- Select Vehicle by Model
- Select Vehicle by VIN
Select Vehicle by Model
orMake
Model
Year
Select Vehicle by VIN
For the most accurate results, select vehicle by your VIN (Vehicle Identification Number).
1 Thermostat found

Dodge Ram 1500 Van Thermostat Part Number: 52028185AC
$18.30 MSRP: $26.80You Save: $8.50 (32%)
Dodge Ram 1500 Van Thermostat
Choose OEM Thermostat that meet Dodge factory standards. Dodge designs and tests every component for precision and durability. Each Thermostat follows strict manufacturing steps to lock in quality and fit. If your Dodge Ram 1500 Van matters to you, OEM parts make the smart choice. You'll get the exact look, feel, and performance you expect. Shop genuine Ram 1500 Van parts at the highly competitive prices online. Enjoy a manufacturer's warranty, a hassle-free return policy, and rapid delivery. No more guesswork with off brands. Get genuine parts with exact fit and true factory performance. Shop with confidence today at JeepPartsDeal.com.
Dodge Ram 1500 Van Thermostat Parts and Q&A
- Q: How to remove and install a thermostat on Dodge Ram 1500 Van?A:Be sure the draincock or cap on the radiator is secure, away from being loosened, to keep the system safe from burning hot water. Check the coolant and use it again if it is clean-and confirm that you have the right thermostat for your vehicle when you replace it. Factory-made thermostat housings are fixed with an anti-stick coated gasket to help remove them. Take off the negative battery cable, then drain out the coolant until it falls under the thermostat. If your vehicle comes with air conditioning, first remove its engine cover, unhook the support bracket near the rear of the generator and relax the belt tension on the generator drive using a socket/wrench on the automatic mounting bolt. Take out the bolts that attached the generator to the bracket, all while still keeping the wiring intact and shift the generator to get near the thermostat gasket. Disconnect the 60-way connector, but leave the cable plugged in when you remove the three bolts and set the Pcm aside. Tighten or loosen any constant tension hose clamps using the special tool (Number 6094) or Snap-On tool (Hpc-20) and never forget your safety glasses. Unscrew the radiator hose clamp above the radiator, plus the hose on top of the thermostat housing and put the wiring harness aside for ease of access. Unscrew the thermostat housing mounting bolts, take out the housing, gasket and remove the thermostat, tossing out the worn gasket. When installing, make sure the intake manifold and thermostat housing are clean and place the thermostat (With spring facing down) into the groove in the manifold. Afterward, insert the gasket. Make sure the Front side of the thermostat housing points toward the vehicle's front after you have fitted it and inclined it a little. Adjust the two housing-to-intake manifold bolts to a tightness of 24 Nm (18 ft. lbs.), so that the tightening is uniform without causing harm to the vehicle. Attach the upper radiator hose to the thermostat housing and for vehicles with air-conditioning, put the generator in place and tighten the bolts to 30 ft. lbs. (41 Nm). Then, using the same torque, connect the support bracket. Arrange the serpentine belt in its correct path to prevent overheating and then swing the tensioner to place the belt around all pulleys, but the idler pulley which you should loop last. Next, reconnect the battery, go back to the engine bay to put the Pcm in place, fill the cooling system, start the engine, warm it up as you check for leaks and finally set the engine cover in place if installed with A/c.

Related Dodge Ram 1500 Van Parts
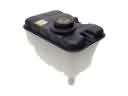 Dodge Ram 1500 Van Coolant Reservoir
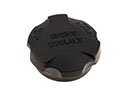 Dodge Ram 1500 Van Coolant Reservoir Cap
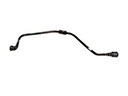 Dodge Ram 1500 Van Coolant Reservoir Hose
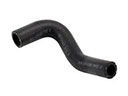 Dodge Ram 1500 Van Cooling Hose
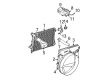
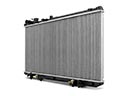 Dodge Ram 1500 Van Radiator
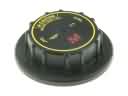 Dodge Ram 1500 Van Radiator Cap
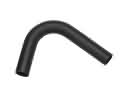 Dodge Ram 1500 Van Radiator Hose
 Dodge Ram 1500 Van Serpentine Belt
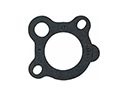 Dodge Ram 1500 Van Thermostat Gasket
 Dodge Ram 1500 Van Thermostat Housing
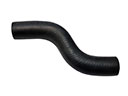 Dodge Ram 1500 Van Water Hose
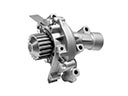 Dodge Ram 1500 Van Water Pump