JeepParts
My Garage
My Account
Cart
OEM Dodge Sprinter 2500 Fuel Injector
Gas Injector- Select Vehicle by Model
- Select Vehicle by VIN
Select Vehicle by Model
orMake
Model
Year
Select Vehicle by VIN
For the most accurate results, select vehicle by your VIN (Vehicle Identification Number).
3 Fuel Injectors found

Dodge Sprinter 2500 Injector Part Number: R5137297AB
$602.12 MSRP: $909.00You Save: $306.88 (34%)

Dodge Sprinter 2500 Injector Part Number: RL011710AA

Dodge Sprinter 2500 Injector Part Number: RL028404AA
Dodge Sprinter 2500 Fuel Injector
Choose OEM Fuel Injector that meet Dodge factory standards. Dodge designs and tests every component for precision and durability. Each Fuel Injector follows strict manufacturing steps to lock in quality and fit. If your Dodge Sprinter 2500 matters to you, OEM parts make the smart choice. You'll get the exact look, feel, and performance you expect. Shop genuine Sprinter 2500 parts at the highly competitive prices online. Enjoy a manufacturer's warranty, a hassle-free return policy, and rapid delivery. No more guesswork with off brands. Get genuine parts with exact fit and true factory performance. Shop with confidence today at JeepPartsDeal.com.
The Dodge Sprinter 2500 Fuel Injector is a verified device that has been widely recognized trusty and performative, thereby being of great importance in the proper functioning of Dodge Sprinter 2500 vehicles. This Fuel Injector is primarily mounted to deliver fuel directly into the engine cylinders while having an air-fuel mixture mandate by the Engine Control Module. Its returnless fuel system does away with numerous fuel lines and provides a far better efficiency; it also means that in the unlikely event of a failure, poor engine performance and damaging to expensive elements such as the catalytic converter is unlikely. This Dodge Sprinter 2500 Fuel Injector fits different models of the Sprinter 2500 that contains different engine types including the 2.3L I4 OM601 Diesel and 2.7L turbo-diesel. This Fuel Injector not only enhances the utilization of the engine but also plays a safety aspect since the delivery of fuel is very crucial to achieve the optimum power and performance. Moreover, in the aspects of bumpers, the Dodge Sprinter 2500 Fuel Injector possesses higher levels of innovations wherein it adopts complex designs of fuel injectors for accurate fuel flow. Due to the tough and steady character, the Dodge Sprinter 2500 Fuel Injector is a key component of a car that makes the drivers confident in their Dodge Sprinter 2500 in work or in recreation.
Dodge Sprinter 2500 Fuel Injector Parts and Q&A
- Q: How to Remove and Install a Fuel Injector on Dodge Sprinter 2500?A:Before removing the fuel injector, unhook the negative Battery Cable and remove the engine cover. Then, take out the return hose lock clamps, undo the hose and separate the injector's electrical connector. Counterhold the injector lines with a wrench socket at the ends that are threaded and only then disconnect the high-pressure fuel injector line. Remove the bolt holding the injector in place, followed by the tension claw and the seal will also come loose. If the injectors are not loose, use an extraction claw, rather than a tension claw and, if needed, remove the cylinder head cover. Make sure to clean the injectors and the space each preforms sit in thoroughly. To do the installation, use anti-seize lubricant around the body of the injector and fit them with new seals. Put in new screws to keep the tensioning claws secure, applying 7 Nm (62 lbs. in.) the first time and then another 90°. After placing the fuel return line at the injectors, set and secure the locking clamps, being careful not to put too much force on them. Attach the strong injection system lines, put the electrical connectors in place for the injectors and attach the negative battery cable. If your car's injectors have various flow rates, check all injector codes, re-enter them and use a scan tool to program them into the ECM. Engine started, let it run for a bit, switch it off and check for any leaks. After placing the engine cover, direct the return fuel hose for the fuel injectors toward the banjo bolt fitting which is in the left rear corner of the cover, to prevent the hose from being pinched or damaged. Now it's time to secure the engine cover.
- Q: How to Effectively Service and Repair a Fuel Injector on Dodge Sprinter 2500?A:Remove the Fuel Tank Filler Tube Cap to start and then release the pressure in the fuel system. Take out the Air Duct and Air Box from the Throttle Body after separating the Negative Battery Cable. Take out the Fuel Line from the Fuel Rail and free any attached Vacuum Lines that end at the Throttle Body. After that, take out the Harness Connectors from each fuel injector and the Throttle Body, placing the Harness on one side. Pull out the four screws on the fuel rail mounts and use a gentle side to side motion to free the left injectors when the holes are open; repeat for the right set until all injectors are removed. After that, detach the Fuel Rail from the engine, free the clipped fuel injector and part the injector from the rail.

Related Dodge Sprinter 2500 Parts
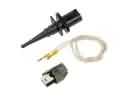 Dodge Sprinter 2500 Air Temperature Sensor
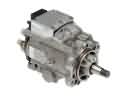 Dodge Sprinter 2500 Fuel Injection Pump
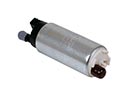 Dodge Sprinter 2500 Fuel Pump
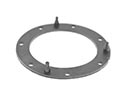 Dodge Sprinter 2500 Fuel Pump Gasket
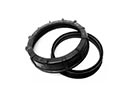 Dodge Sprinter 2500 Fuel Pump Seal
 Dodge Sprinter 2500 Fuel Pump Tank Seal
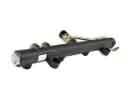 Dodge Sprinter 2500 Fuel Rail
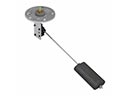 Dodge Sprinter 2500 Fuel Sending Unit
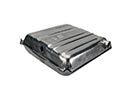 Dodge Sprinter 2500 Fuel Tank
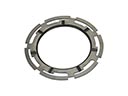 Dodge Sprinter 2500 Fuel Tank Lock Ring
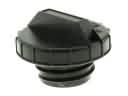 Dodge Sprinter 2500 Gas Cap
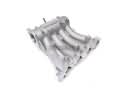 Dodge Sprinter 2500 Intake Manifold