JeepParts
My Garage
My Account
Cart
OEM Dodge Viper Ignition Lock Cylinder
Ignition Key Lock Cylinder- Select Vehicle by Model
- Select Vehicle by VIN
Select Vehicle by Model
orMake
Model
Year
Select Vehicle by VIN
For the most accurate results, select vehicle by your VIN (Vehicle Identification Number).
4 Ignition Lock Cylinders found


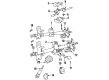
Dodge Viper Ignition Lock Cylinder Part Number: 5083915AB
$103.61 MSRP: $153.00You Save: $49.39 (33%)Ships in 1-3 Business Days

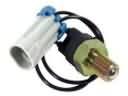
Dodge Viper Ignition Switch Part Number: 5003845AA
$192.61 MSRP: $285.00You Save: $92.39 (33%)Ships in 1-2 Business DaysDodge Viper Ignition Switch Part Number: 4897986AA
$153.86 MSRP: $218.00You Save: $64.14 (30%)Ships in 1-2 Business Days
Dodge Viper Ignition Lock Cylinder Part Number: 5161055AA
Dodge Viper Ignition Lock Cylinder
Choose OEM Ignition Lock Cylinder that meet Dodge factory standards. Dodge designs and tests every component for precision and durability. Each Ignition Lock Cylinder follows strict manufacturing steps to lock in quality and fit. If your Dodge Viper matters to you, OEM parts make the smart choice. You'll get the exact look, feel, and performance you expect. Shop genuine Viper parts at the highly competitive prices online. Enjoy a manufacturer's warranty, a hassle-free return policy, and rapid delivery. No more guesswork with off brands. Get genuine parts with exact fit and true factory performance. Shop with confidence today at JeepPartsDeal.com.
Dodge Viper Ignition Lock Cylinder is an essential part that the durability and efficiency, which is associated with Dodge Viper automobile. Thus, this ignition lock cylinder is intended to make the relevant procedure as effortless as possible and make sure that drivers can start their potent Viper automobiles. The Dodge Viper Ignition Lock Cylinder fulfills this by having its own set of keys and tumblers and additional features that are coded ignition keys with computer chips to interface with the onboard computer of the car. This innovation brings rather a dramatic improvement in security against theft, which in addition to being a sports car of great performance, the Dodge Viper is also a safe automobile for enthusiasts. The possibility to fit the offered ignition lock cylinder to a variety of Viper models guarantees that this part will complement the further evolution of this outstanding automobile, preserving the reliability of the vehicle's management. While the base is very solid, mechanical stress and fatigue can cause such problems as start-up issues, but thanks to the possibility of buying new ignition lock cylinders, starting problems can be avoided. Gaining much popularity in the automotive market, Dodge Viper Ignition Lock Cylinder consists of features with security strategies and performance dependability in its driving system. In conclusion, the Dodge Viper and its ignition lock cylinder are one great example that cannot be marred by mediocrity due to advanced technology and the same time, it's safe and performs extremely well to fit in the automobile history.
Dodge Viper Ignition Lock Cylinder Parts and Q&A
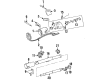
- Q: How to Remove and Install the Ignition Lock Cylinder on the Steering Column on Dodge Viper?A:The ignition lock cylinder is placed inside the steering column and the Key-In-Switch is found where the Ignition Switch module is located. To start the service, take off the negative cable from the battery and twist the tilt lever in a counterclockwise direction to remove it. After that, take off the top and bottom covers on the steering column, then remove the ignition switch screws using a tamper-proof torx bit Snap-on TTXR20A2 or the same. Move the switch out of the column as you remove it which disconnects the connector locks of the 7-terminal wiring connector. Pull the lock open on the 4-terminal connector and remove it as well. Turn the key in the LOCK position of the ignition while it is in the aspect. With a TTXR20A2 or the same type of torx bit, remove the screw and the bracket that hold the key cylinder. Turn the key counterclockwise to take it out completely and it will be pulled out about 1/8 inch from the ignition switch halo light ring. Don't remove the key cylinder now; just unseat it and turn the key counterclockwise, all the way to the lock position, before removing the key. After you've finished, remove the ignition key from the cylinder. Install the electrical wires onto the ignition switch by ensuring that the locking tabs are located in the switch. See that the park lock dowel pin and column lock flag are properly indexed before setting the ignition switch into the lock position with the column lock flag parallel to its terminals. Shift the ignition switch park lock dowel pin, so it fits into the steering column park lock slider linkage and add a bit of grease to the flag and dowel pin. Put the ignition switch against the lock housing opening on the steering column, making certain the park lock dowel pin goes into the slot in the park lock slider linkage. Use 3 ± 0.5 Nm (26 ± 4 in. lbs.) torque to tighten the ignition switch and retaining bracket mounting screws. Insert the ignition lock cylinder and seeing both are in the Lock position, let the lock cylinder sink into the ignition switch until it stops moving. Stick the key into the cylinder and, while pushing it backwards, turn the key until you reach the end of travel. Insert the retaining screw into both the bracket and the lock cylinder and turn it until you reach 3 ± 0.5 Nm (26 ± 4 in. lbs.) torque. Fit the Steering Column Covers again, tighten all screws to 2 Nm (17 in. lbs.) and where available, install the tilt lever. To complete the test, hook up the negative terminal to the battery, check that everything functions as it should and check the other options too.

Related Dodge Viper Parts
 Dodge Viper Back Up Light Switch
 Dodge Viper Brake Light Switch
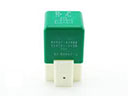 Dodge Viper Cooling Fan Relay
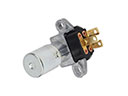 Dodge Viper Dimmer Switch
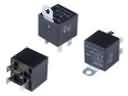 Dodge Viper Fuel Pump Relay
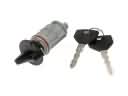 Dodge Viper Ignition Lock Assembly
 Dodge Viper Ignition Switch
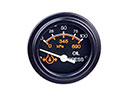 Dodge Viper Oil Pressure Gauge
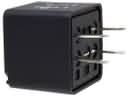 Dodge Viper Relay
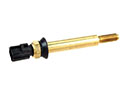 Dodge Viper Temperature Sender
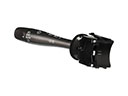 Dodge Viper Turn Signal Switch
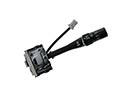 Dodge Viper Windshield Wiper Switch