JeepParts
My Garage
My Account
Cart
OEM Dodge Viper Pressure Plate
Clutch Pressure Plate- Select Vehicle by Model
- Select Vehicle by VIN
Select Vehicle by Model
orMake
Model
Year
Select Vehicle by VIN
For the most accurate results, select vehicle by your VIN (Vehicle Identification Number).
1 Pressure Plate found


Dodge Viper Pressure Plate Part Number: 4848708AF
Dodge Viper Pressure Plate
Choose OEM Pressure Plate that meet Dodge factory standards. Dodge designs and tests every component for precision and durability. Each Pressure Plate follows strict manufacturing steps to lock in quality and fit. If your Dodge Viper matters to you, OEM parts make the smart choice. You'll get the exact look, feel, and performance you expect. Shop genuine Viper parts at the highly competitive prices online. Enjoy a manufacturer's warranty, a hassle-free return policy, and rapid delivery. No more guesswork with off brands. Get genuine parts with exact fit and true factory performance. Shop with confidence today at JeepPartsDeal.com.
Dodge Viper Pressure Plate Parts and Q&A
- Q: How to Service and Repair a Pressure Plate on Dodge Viper?A:The first step to fixing the pressure plate is to take off both the transmission and the inspection cover fixed with 4 screws. Then, remove the bell housing after taking out 6 bolts and ensure you keep track of how the clutch cover and Flywheel were aligned. Secure the disc using a Clutch Discs Aligning Tool, then loosen the bolts in a crisscross pattern to reduce pressure on the springs. Once that's done, unfasten the cover assembly and clutch disc from the flywheel, making sure not to contaminate the friction parts. Check for telltale signs of oil dripping at the rear main engine bearing seal and the transmission input shaft and repair any leaks that are found. Review the outside surfaces of the flywheel and clutch cover for discoloration, burned appearances, tiny cracks and deep or large grooves. Whenever you see any issue, replace the components as required. Dust off the flywheel face using either crocus cloth or 400-600 grade sandpaper, then clean it with mineral spirits; in case the finish is highly scratched, checked or warped, replace the flywheel without machining it. Should you change or take out the flywheel, thread sealer should be used on the bolts to protect the clutch from oil. Work with the disc assembly only by the sides and assemble a new disk if the facings show grease, oil or are ground down beyond 0.38 mm (0.015 inch) from the rivet heads. Make sure the disc hub and transaxle shaft tendons form a tight connection, without too much wear and that the components of the disc assembly are perfectly clean and dry. Be sure that there are no broken arched springs and all the rivets are firm between the facings. With mineral spirits, wipe the area where the clutch is frictioned on the cover and use a straightedge to check that it is flat within 0.020 inch and doesn't have burn marks, cracks or other irregularities. Place the cover with its edge on a surface plate to ensure all points around its attaching holes are within 0.015 inch of the plate. The covers on the flywheel dowels need to fit tightly, if not, replace them. Align everything on the clutch assembly with the dowels and the marked positions and if you have a brand new clutch or flywheel, place the cover so the center is opposed to the orange-marked balance spot on the flywheel. Fit the alignment tool and close the clutch cover bolts so that the disc remains in place with moderate pressure. To stop any distortion, tighten all the bolts a few turns each, starting with one, then across to the next and so on until they all seat. After that, tighten them all to 30 Nm (270 inch lbs.) and get rid of your clutch disc alignment tool. After that, fasten the bell housing onto the engine and slide the transmission into the assembly inside the car.

Related Dodge Viper Parts
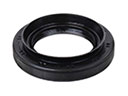 Dodge Viper Automatic Transmission Output Shaft Seal
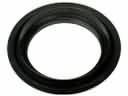 Dodge Viper Automatic Transmission Seal
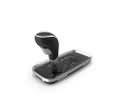 Dodge Viper Automatic Transmission Shifter
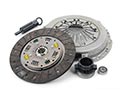 Dodge Viper Clutch Disc
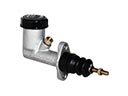 Dodge Viper Clutch Master Cylinder
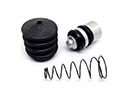 Dodge Viper Clutch Slave Repair Kit
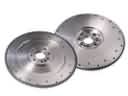 Dodge Viper Flywheel
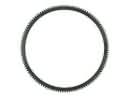 Dodge Viper Flywheel Ring Gear
 Dodge Viper Manual Transmission Extension Housing Seal
 Dodge Viper Needle Bearing
 Dodge Viper Pilot Bearing
 Dodge Viper Transmission Assembly