JeepParts
My Garage
My Account
Cart
OEM Jeep Cherokee Seat Belt
Seat Safety Belt- Select Vehicle by Model
- Select Vehicle by VIN
Select Vehicle by Model
orMake
Model
Year
Select Vehicle by VIN
For the most accurate results, select vehicle by your VIN (Vehicle Identification Number).
83 Seat Belts found


Jeep Cherokee Lap & Shoulder Belt, Beige/Black, Front Outer Driver Side Part Number: 6DR29HL1AC
$193.16 MSRP: $337.00You Save: $143.84 (43%)Ships in 1-3 Business Days


Jeep Cherokee Buckle End, Black/Gray, Front Inner Part Number: 6DR271X9AB
$58.58 MSRP: $86.20You Save: $27.62 (33%)


Jeep Cherokee Lap & Shoulder Belt, Blue, Rear Outer Passenger Side Part Number: 1UU52LC5AD
$129.16 MSRP: $190.00You Save: $60.84 (33%)Ships in 1-3 Business Days

Jeep Cherokee Lap & Shoulder Belt, Blue, Rear Outer Driver Side Part Number: 1WK65LC5AD
$131.43 MSRP: $194.00You Save: $62.57 (33%)Ships in 1-3 Business Days


Jeep Cherokee Lap & Shoulder Belt, Black/Gray, Front Outer Driver Side Part Number: 6DR29DX9AC
$208.47 MSRP: $307.00You Save: $98.53 (33%)Ships in 1-2 Business Days

Jeep Cherokee Buckle End, Front Inner Part Number: 5HG44LAZAA
$56.87 MSRP: $72.10You Save: $15.23 (22%)Ships in 1-2 Business Days

Jeep Cherokee Buckle End, Front Inner Part Number: 5HG45LAZAA
$68.22 MSRP: $74.25You Save: $6.03 (9%)Ships in 1-2 Business Days
Jeep Cherokee Buckle End, Black, Rear Center Part Number: 6BC231X9AB
$40.89 MSRP: $60.60You Save: $19.71 (33%)Ships in 1-3 Business DaysJeep Cherokee Outer Belt Assembly, Black Part Number: 6MH88DX9AA
$92.31 MSRP: $163.00You Save: $70.69 (44%)Ships in 1-3 Business DaysJeep Cherokee Buckle End, Black/Gray, Rear Passenger Side Part Number: 1UU691S4AD
$39.52 MSRP: $67.85You Save: $28.33 (42%)Ships in 1-3 Business Days
Jeep Cherokee Adjuster, Front Part Number: 68102536AB
$45.65 MSRP: $78.40You Save: $32.75 (42%)Ships in 1-2 Business Days
Jeep Cherokee Buckle End, Beige/Black, Front Inner Part Number: 6DR271L1AB
$57.05 MSRP: $83.95You Save: $26.90 (33%)Ships in 1-3 Business Days
Jeep Cherokee Lap & Shoulder Belt, Beige/Black, Rear Center Part Number: 6AR16HL1AA
$64.81 MSRP: $95.35You Save: $30.54 (33%)Ships in 1-3 Business DaysJeep Cherokee Buckle End, Black/Gray, Front Inner Part Number: 6DR271S4AB
$68.43 MSRP: $101.00You Save: $32.57 (33%)Ships in 1-3 Business DaysJeep Cherokee Buckle End, Beige/Black, Rear Driver Side Part Number: 6BC211L1AE
$82.14 MSRP: $121.00You Save: $38.86 (33%)Ships in 1-3 Business DaysJeep Cherokee Buckle End, Black, Rear Driver Side Part Number: 6BC211X9AE
$85.54 MSRP: $127.00You Save: $41.46 (33%)Ships in 1-3 Business DaysJeep Cherokee Buckle End, Black/Gray, Rear Driver Side Part Number: 6BC211S4AE
$88.32 MSRP: $131.00You Save: $42.68 (33%)Ships in 1-3 Business DaysJeep Cherokee Buckle End, Black/Gray, Front Inner Part Number: 6DR271S4AC
$89.62 MSRP: $133.00You Save: $43.38 (33%)Jeep Cherokee Buckle End, Beige/Black, Front Inner Part Number: 6DR271L1AC
$92.85 MSRP: $137.00You Save: $44.15 (33%)

Jeep Cherokee Buckle, Inner Part Number: 5CR94RAZ
| Page 1 of 5 |Next >
1-20 of 83 Results
Jeep Cherokee Seat Belt
Choose OEM Seat Belt that meet Jeep factory standards. Jeep designs and tests every component for precision and durability. Each Seat Belt follows strict manufacturing steps to lock in quality and fit. If your Jeep Cherokee matters to you, OEM parts make the smart choice. You'll get the exact look, feel, and performance you expect. Shop genuine Cherokee parts at the highly competitive prices online. Enjoy a manufacturer's warranty, a hassle-free return policy, and rapid delivery. No more guesswork with off brands. Get genuine parts with exact fit and true factory performance. Shop with confidence today at JeepPartsDeal.com.
Jeep Cherokee Seat Belt Parts and Q&A
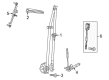
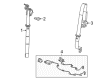
- Q: How to Properly Service and Repair a Front Seat Belt and Retractor on Jeep Cherokee?A:During and after a seat belt service, make sure all belts, buckles, mounting brackets and retractors are correctly installed and working well or else they may have been damaged. If a belt looks damaged, if a fastener is hung loosely, if your retractor or buckle fails or if the latch or anchor plate is bent or dented, have it replaced as soon as possible. Never try to fix a seat belt component yourself; use the Mopar Parts Catalog to find and use the correct, unused and new parts to replace damaged or faulty components. For easier access to the front shoulder belt lower anchor screw, the belt retractor and the B-pillar, first move the front seats all the way forward. Take off the belt cover from the front shoulder mount and then pull out the screw securing the turning loop to the shoulder belt adjuster. If your car has two doors, pull up the cover for the lower seat belt anchor plate located in the inner sill and take out the screw there. Take the inner sill trim off the sill panel if your car has 4 doors. Make sure to take out the lower trim from the B-pillar in 2-door models. Unscrew the retractor on the B-pillar (for 2-door models) or remove the retractor and lower seat belt anchor plate from the B-pillar and the seat shoulder belt at the front (for 4-door models). To install the retractor, place the front seat shoulder belt against the B-pillar, then drill and install it there, tightening the screw to 43 Nm (32 ft.lbs.). If your car is a 2-door, fit the B-pillar lower piece and for the 4-door, fit the inner sill trim. When using a 2-door model, open the lower seat belt anchor plate cover, install the screw and tighten it to 43 Nm (32 ft.lbs). Put the shoulder belt turning loop and the support washer on the adjuster, secure the loop with the screw to 43 Nm (32 ft.lbs.) and tuck the loop cover back so it rests on the screw.
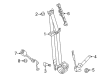
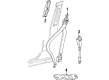
- Q: How to Properly Service and Repair a Rear Seat Belt and Retractor on Jeep Cherokee?A:During and immediately after a seat belt service, check all seat belts, their buckles, mounting hardware and retractors for any problems or damage. For loose belts and belts that are cut, frayed or torn, replace them. For twisted belts, straighten them; and for loose fasteners, tighten them. Change any belt that has a defective or broken buckle or retractor or has a warped or broken anchor plate or latch plate. Don't attempt to repair a seat belt part; always use the Mopar catalog to purchase new and unused replacements for any damaged parts. Hold the rear seat cushion in place, then pull up on the release strap near the shoulder belt and retractor. Take out the screw joining the lower anchor plate of the rear seat shoulder belt to the rear floor panel and then remove the plate. Pull down the button release next to the anchor on the roof rail header to access the screw that holds the anchor plate to the header and then detach the anchor plate. Remove the trim covering the bottom of the quarter panel, then remove the screw attaching the retractor to the rear wheelhouse flange and remove both the rear seat shoulder belt and retractor from the quarter inner panel. During installation, fasten the rear seat shoulder belt retractor into the quarter interior panel, after which you should tighten the screw in the back wheelhouse to a force of 43 Nm (32 ft.lbs.). Replace the fabric lower trim on the rear quarter panel, fit the shoulder belt loop plate to the roof rail header and put the cover back to mount the plate to the header with a 43 Nm (32 ft.lbs.) torque. Hook the rear seat shoulder belt lower anchor plate onto the rear floor panel, attach and tighten the screw to 43 Nm (32 ft.lbs.) and after that, put the rear seat cushion back until it engages firmly with its latch.


Related Jeep Cherokee Parts
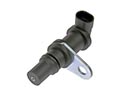 Jeep Cherokee Crankshaft Position Sensor
 Jeep Cherokee Ignition Switch
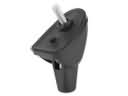 Jeep Cherokee Antenna Base
 Jeep Cherokee Ignition Lock Cylinder
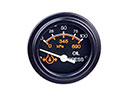 Jeep Cherokee Oil Pressure Gauge
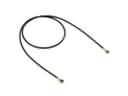 Jeep Cherokee Speedometer Cable
 Jeep Cherokee Turn Signal Relay
 Jeep Cherokee Daytime Running Light Relay
 Jeep Cherokee Distributor Rotor
 Jeep Cherokee Horn Relay
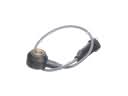 Jeep Cherokee Knock Sensor
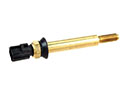 Jeep Cherokee Temperature Sender