JeepParts
My Garage
My Account
Cart
OEM Jeep Commander Liftgate Hinge
Luggage Compartment Door Hinge- Select Vehicle by Model
- Select Vehicle by VIN
Select Vehicle by Model
orMake
Model
Year
Select Vehicle by VIN
For the most accurate results, select vehicle by your VIN (Vehicle Identification Number).
3 Liftgate Hinges found


Jeep Commander Hinge, Rear Part Number: 55396529AB


Jeep Commander Hinge, Rear Driver Side Part Number: 55369023AC


Jeep Commander Hinge, Rear Passenger Side Part Number: 55369022AC
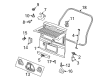
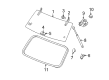
Jeep Commander Liftgate Hinge
Choose OEM Liftgate Hinge that meet Jeep factory standards. Jeep designs and tests every component for precision and durability. Each Liftgate Hinge follows strict manufacturing steps to lock in quality and fit. If your Jeep Commander matters to you, OEM parts make the smart choice. You'll get the exact look, feel, and performance you expect. Shop genuine Commander parts at the highly competitive prices online. Enjoy a manufacturer's warranty, a hassle-free return policy, and rapid delivery. No more guesswork with off brands. Get genuine parts with exact fit and true factory performance. Shop with confidence today at JeepPartsDeal.com.
Jeep Commander Liftgate Hinge Parts and Q&A
- Q: How to Install a Liftgate Hinge Without Removing the Liftgate on Jeep Commander?A:The liftgate does not need to be taken off, since you can install or replace hinges one side at a time. Apply a proper body sealer to the parts that connect the hinge and car doors. Place half the body liftgate on top of the header of the upper part of the liftgate on the vehicle. Take care to pull the rear portion of the headliner down towards the header, so you can secure the three fasteners to 28 Nm (21 ft. lbs.). After that, set the liftgate on top of the half of the hinge located on the liftgate side of the vehicle and connect the hinge using the two screws and tighten them both to 28 Nm (21 ft. lbs.) Secure the support struts and afterwards release the support from the rear hatch. Make sure the liftgate works and is aligned well and fit the tabs in the upper liftgate trim molding onto the retaining clips in the liftgate opening until the tabs click. Look for leaks coming from the hinge to body screw connections.
- Q: How to Maintain and Fix a Liftgate Hinge on Jeep Commander?A:Before servicing or repairing the trunk or liftgate hinge, prop or block open the liftgate securely. With the liftgate support struts removed, use a trim stick, preferably C-4755, to unclip the molding around the liftgate's header from the retaining clips and take it out. Place a mark on the liftgate inner panel where the hinge liftgate half should be reinstalled and remove the two screws securing the hinge to the liftgate. Mark the position of the hinge body on the upper liftgate opening header before you remove the liftgate. Pull the lower edge of the headliner downward past the header to reach and unscrew the two nuts and one bolt that hold the hinge in place and then remove the hinge from under the header. It is necessary to coat the hinge to body mating surfaces with a proper body sealer before you begin installation. On top of the liftgate opening on the vehicle, fasten to the header half the liftgate hinge, then pull the headliner's rear edge down and secure the nuts and bolt beneath using a torque setting of 28 N.m (21 ft.lbs). First, position the liftgate to the vehicle's liftgate half of the hinge. Afterward, set the two screws provided into the hinge to secure the liftgate and tighten them both to 28 N.m (21 ft.lbs). After that, reinstall the support struts, release the support under the liftgate and make sure the liftgate works and is aligned properly. After that, put the retaining tabs on the trim molding into the clips in the liftgate, then secure the trim molding by engaging the retaining tabs. Check for water leaks at the hinge to body screws.


Related Jeep Commander Parts
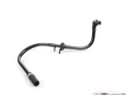 Jeep Commander Brake Booster Vacuum Hose
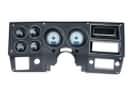 Jeep Commander Dash Panel
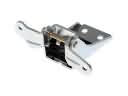 Jeep Commander Door Hinge
 Jeep Commander Door Latch Assembly
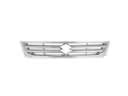 Jeep Commander Grille
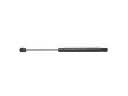 Jeep Commander Lift Support
 Jeep Commander Liftgate Lock Actuator
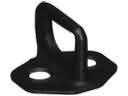 Jeep Commander Rear Door Striker
 Jeep Commander Seat Cushion
 Jeep Commander Tailgate Handle
 Jeep Commander Tailgate Lock
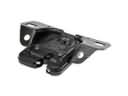 Jeep Commander Trunk Lid Latch