JeepParts
My Garage
My Account
Cart
OEM Jeep Grand Cherokee Windshield
Glass Windshield- Select Vehicle by Model
- Select Vehicle by VIN
Select Vehicle by Model
orMake
Model
Year
Select Vehicle by VIN
For the most accurate results, select vehicle by your VIN (Vehicle Identification Number).
20 Windshields found

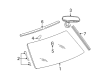
Jeep Grand Cherokee Windshield, Front Part Number: 5170272AB
$207.34 MSRP: $306.00You Save: $98.66 (33%)Ships in 1-3 Business Days
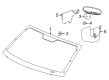
Jeep Grand Cherokee Windshield, Front Part Number: 68213825AB
$408.77 MSRP: $596.00You Save: $187.23 (32%)Ships in 1-3 Business DaysJeep Grand Cherokee Windshield, Front Part Number: 5170273AB
$423.65 MSRP: $618.00You Save: $194.35 (32%)Ships in 1-3 Business Days
Jeep Grand Cherokee Windshield, Front Part Number: 68080677AB
$443.12 MSRP: $645.00You Save: $201.88 (32%)Ships in 1-3 Business DaysJeep Grand Cherokee Windshield, Front Part Number: 68213827AB
$500.37 MSRP: $730.00You Save: $229.63 (32%)Ships in 1-3 Business Days
Jeep Grand Cherokee Windshield - Shipping Assembly-30 Lite Part Number: 68080676AC
$528.99 MSRP: $771.00You Save: $242.01 (32%)Ships in 1-2 Business Days
Jeep Grand Cherokee Windshield Part Number: 68378329AH
$675.55 MSRP: $984.00You Save: $308.45 (32%)Ships in 1-2 Business DaysJeep Grand Cherokee Windshiel Part Number: 55112842AE
$699.60 MSRP: $1020.00You Save: $320.40 (32%)Ships in 1-2 Business Days
Jeep Grand Cherokee Windshield Part Number: 55112845AE
$748.83 MSRP: $1090.00You Save: $341.17 (32%)Ships in 1-2 Business DaysJeep Grand Cherokee Windshield Part Number: 68379504AH
$1061.42 MSRP: $1555.00You Save: $493.58 (32%)Ships in 1-2 Business Days
Jeep Grand Cherokee Windshield - Shipping Assembly-30 Lite Part Number: 68213826AC
$218.67 MSRP: $322.00You Save: $103.33 (33%)Ships in 1-2 Business DaysJeep Grand Cherokee Windshield Part Number: 68378351AH
$1019.05 MSRP: $1490.00You Save: $470.95 (32%)Ships in 1-2 Business DaysJeep Grand Cherokee Windshield Part Number: 68378351AG
$1019.05 MSRP: $1490.00You Save: $470.95 (32%)Ships in 1-2 Business DaysJeep Grand Cherokee Windshield Part Number: 68378327AH
$611.43 MSRP: $890.00You Save: $278.57 (32%)Jeep Grand Cherokee Windshiel Part Number: 55112833AE
$699.60 MSRP: $1020.00You Save: $320.40 (32%)
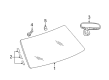
Jeep Grand Cherokee Glass Part Number: 5017531AA

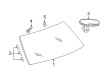
Jeep Grand Cherokee Windshield, Front Part Number: 5104820AB
Jeep Grand Cherokee Windshield, Front Part Number: 5017527AB
Jeep Grand Cherokee Windshield, Front Part Number: 5080595AD
Jeep Grand Cherokee Windshield, Front Part Number: 5170274AB
Jeep Grand Cherokee Windshield
Choose OEM Windshield that meet Jeep factory standards. Jeep designs and tests every component for precision and durability. Each Windshield follows strict manufacturing steps to lock in quality and fit. If your Jeep Grand Cherokee matters to you, OEM parts make the smart choice. You'll get the exact look, feel, and performance you expect. Shop genuine Grand Cherokee parts at the highly competitive prices online. Enjoy a manufacturer's warranty, a hassle-free return policy, and rapid delivery. No more guesswork with off brands. Get genuine parts with exact fit and true factory performance. Shop with confidence today at JeepPartsDeal.com.
Jeep Grand Cherokee Windshield Parts and Q&A
- Q: How Should You Prepare and Remove a Windshield Safely on Jeep Grand Cherokee?A:Before you begin, look over the warnings and warnings that apply to Windows and Glass installation and servicing. First, get rid of the rear view mirror, then the rain sensor module from the windshield and after that, the cowl grille. Work in a way so that your actions do not damage the paintwork when removing moldings or urethane around the windshield. After that, remove the molding from above the windshield. Using another hand, cut the urethane glue attaching the windshield to the windshield frame with a special wire-type windshield removal tool. Last, take care to remove the windshield from the vehicle.
- Q: How to Properly Install a Windshield on Jeep Grand Cherokee?A:Let the glass be set for 24 hours before you use the car so that the urethane can completely cure; otherwise, performance in an accident could suffer. Before you install the body, roll down the left and right door glass a little so that, if a door is slammed, the cabin is not pressurized. Apply urethane only to surfaces that are not paint or trimmed. To reuse the windshield, remove most of the original sealant from the glass carefully with a razor knife, so as not to scratch the paint around it. Clean off extra old urethane adhesive from the windshield fence, until you have 1 mm remaining. Make sure all support spacers are in good condition and complete. Once your leveled the bead of urethane to roughly 1 mm, add new adhesive backed spacers as necessary. Attach a new rubber seal at the top of the windshield, put the windshield against the fence and spacers and ensure it is level. Use the windshield's marks on the car and fence for orientation, remove it and put it on a surfaced that will not scratch it. Rub the windshield interior with an ammonia cleaner and a clean cloth before spreading the glass prep adhesion promoter evenly around the edge and drying the area. After that, prime the edge of the glass with a 25 mm stripe of primer, wait three minutes for it to dry and check for evenness with a flashlight. Re-priming anything that is uneven. After cleaning the fence with an ammonia cleaner, put on pinch weld primer, making it 15 mm wide and let it dry, checking for even coverage. Hold a triangular adhesive nozzle about 6 mm away from the edge of the glass and place a 10 mm long bead in the center at the bottom of the glass, pulling the ends down flat as you go. Guide the windshield over the cutout, adjusting it to line up with the dots and slowly set it down gently so the spacers are contacted. Put the cowl grill, rear view mirror and rain sensor module onto the windshield as your final step.

Related Jeep Grand Cherokee Parts
 Jeep Grand Cherokee Windshield Washer Nozzle
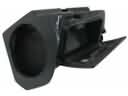 Jeep Grand Cherokee Glove Box
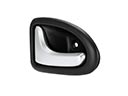 Jeep Grand Cherokee Interior Door Handle
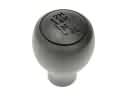 Jeep Grand Cherokee Shift Knob
 Jeep Grand Cherokee Bumper Reflector
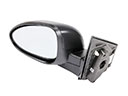 Jeep Grand Cherokee Car Mirror
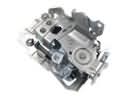 Jeep Grand Cherokee Door Latch Assembly
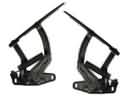 Jeep Grand Cherokee Hood Hinge
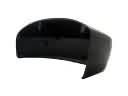 Jeep Grand Cherokee Mirror Cover
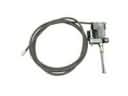 Jeep Grand Cherokee Sunroof Cable
 Jeep Grand Cherokee Tailgate Handle
 Jeep Grand Cherokee Tailgate Lock