JeepParts
My Garage
My Account
Cart
OEM 2000 Dodge Durango Air Duct
Air Hose- Select Vehicle by Model
- Select Vehicle by VIN
Select Vehicle by Model
orMake
Model
Year
Select Vehicle by VIN
For the most accurate results, select vehicle by your VIN (Vehicle Identification Number).
4 Air Ducts found

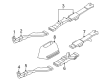
2000 Dodge Durango Duct, Rear Part Number: 55055776AB
$4.37 MSRP: $25.05You Save: $20.68 (83%)Ships in 1-2 Business DaysProduct Specifications- Other Name: Duct - Floor; Cabin Air Intake Duct, Rear; Duct Floor Rear
- Position: Rear
- Item Weight: 1.00 Pounds
- Condition: New
- Fitment Type: Direct Replacement
- SKU: 55055776AB
- Warranty: This genuine part is guaranteed by Mopar's factory warranty.

2000 Dodge Durango Air Hose, Front Part Number: 53032083AA
Product Specifications- Other Name: Hose - Air Cleaner; Engine Air Intake Hose, Front; Intake Coupling; Air Duct; Hose Air Cleaner; Air Intake Hose
- Position: Front
- Item Weight: 1.00 Pounds
- Item Dimensions: 7.6 x 4.3 x 4.2 inches
- Condition: New
- Fitment Type: Direct Replacement
- SKU: 53032083AA
- Warranty: This genuine part is guaranteed by Mopar's factory warranty.

2000 Dodge Durango Air Duct, Front Part Number: 53031692AA
Product Specifications- Other Name: Duct - Air Cleaner; Engine Air Intake Hose, Front; Intake Coupling; Air Inlet Tube; Duct Air Cleaner; Air Intake Hose
- Position: Front
- Item Weight: 0.80 Pounds
- Condition: New
- Fitment Type: Direct Replacement
- SKU: 53031692AA
- Warranty: This genuine part is guaranteed by Mopar's factory warranty.

2000 Dodge Durango Air Hose Part Number: 4883599AA
Product Specifications- Other Name: Hose - Air Cleaner To Throttle Body; Engine Air Intake Hose; Intake Coupling; Hose Air Cleaner To Throttle Body; Air Intake Hose
- Item Weight: 1.10 Pounds
- Item Dimensions: 12.2 x 4.6 x 4.4 inches
- Condition: New
- Fitment Type: Direct Replacement
- SKU: 4883599AA
- Warranty: This genuine part is guaranteed by Mopar's factory warranty.
2000 Dodge Durango Air Duct Parts and Q&A
- Q: How to Maintain and Repair an Air Duct System on 2000 Dodge Durango?A: To care for an air duct system, always make sure the vehicles have the air bag lights turned off before service begins. The instrument panel assembly contains both the panel and the defroster ducts and the outlets for the defroster are built into the top cover. When inserting the barrel, gently work at its sides to detach the snap-fit pivots from the outlet housing. Afterwards, place the barrel in position and distribute pressure on it until it locks. To replace the front seat floor duct, unscrew it from the heater-A/C housing, pull it out and reinstall after screwing the duct back into place and tightening the three screws to 2.2 Nm (20 in. lbs.). Unhook the three retainers on the HVAC rear bezel for the rear seat floor duct control, pull the bezel out to exposed the control cable and reverse this order to complete the job. The rear floor duct and linkage for bucket seats are handled as a set with the console duct assembly; remove the four screws from the console bin, disengage the control rod and secure them again by reversing these steps. As both bench seat and bucket seat models have rear seat floor duct dampers, this is serviced by detaching the carpeting, retainers and ducts as needed, then installing them again in the bench seat cars or in the center duct on the buckets. Roll down the instrument panel assembly, separate the flexible hose from the duct adapter, remove the two fixing screws, insert the adapter again and tighten the screws to 2.2 Nm (20 in. lbs.). To service the demister hose, take out the heater-A/C control, loosen the screw fastening the hose to the tee, unhook the hose and then reattach, tightening the screw to 2.2 Nm (20 in. lbs.). Remove the cover from the instrument panel, unscrew the demister ducts, carefully release them from the outlets and secure everything, screwing them back in to 2.2 Nm (20 in. lbs.). To install the heater-A/C housing plenum adapter, take the heatom out, move the adapter to one end, pull it down and check that there is no water leak when done. Only on models equipped with the rear overhead A/C, separate the bezel from the headliner by prying, pull away and clip it back in by following reverse steps.
Related 2000 Dodge Durango Parts
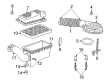
 2000 Dodge Durango Air Filter
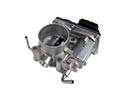 2000 Dodge Durango Throttle Body
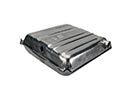 2000 Dodge Durango Fuel Tank
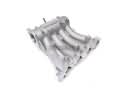 2000 Dodge Durango Intake Manifold
 2000 Dodge Durango Intake Manifold Gasket
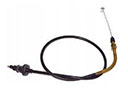 2000 Dodge Durango Accelerator Cable
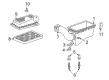
 2000 Dodge Durango Air Filter Box
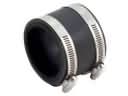 2000 Dodge Durango Air Intake Coupling
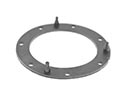 2000 Dodge Durango Fuel Pump Gasket
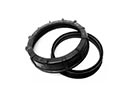 2000 Dodge Durango Fuel Pump Seal
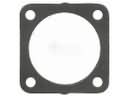 2000 Dodge Durango Throttle Body Gasket
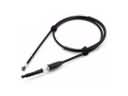 2000 Dodge Durango Throttle Cable