JeepParts
My Garage
My Account
Cart
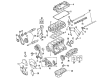
OEM 2001 Chrysler Sebring Piston
Engine Pistons- Select Vehicle by Model
- Select Vehicle by VIN
Select Vehicle by Model
orMake
Model
Year
Select Vehicle by VIN
For the most accurate results, select vehicle by your VIN (Vehicle Identification Number).
4 Pistons found

2001 Chrysler Sebring Piston Part Number: MD357068
$45.47 MSRP: $65.35You Save: $19.88 (31%)Ships in 1-2 Business DaysProduct Specifications- Other Name: Piston - Standard; Piston & Pin Assembly Standard
- Item Weight: 1.30 Pounds
- Item Dimensions: 3.8 x 3.8 x 2.7 inches
- Condition: New
- Fitment Type: Direct Replacement
- SKU: MD357068
- Warranty: This genuine part is guaranteed by Mopar's factory warranty.


2001 Chrysler Sebring Piston Part Number: 5018627AD
$316.65 MSRP: $576.00You Save: $259.35 (46%)Ships in 1-2 Business DaysProduct Specifications- Other Name: Piston Pin And Rod; Piston Pin And Rod
- Replaces: 5018627AB, 5018627AA, 5018627AC
- Item Weight: 2.60 Pounds
- Item Dimensions: 13.3 x 5.2 x 4.4 inches
- Condition: New
- Fitment Type: Direct Replacement
- SKU: 5018627AD
- Warranty: This genuine part is guaranteed by Mopar's factory warranty.
2001 Chrysler Sebring Piston Part Number: MD357067
$89.79 MSRP: $133.00You Save: $43.21 (33%)Ships in 1-2 Business DaysProduct Specifications- Other Name: Piston - Standard; Piston & Pin Assembly Standard; Piston And Pin
- Item Weight: 1.30 Pounds
- Item Dimensions: 3.8 x 3.9 x 2.7 inches
- Condition: New
- Fitment Type: Direct Replacement
- SKU: MD357067
- Warranty: This genuine part is guaranteed by Mopar's factory warranty.
2001 Chrysler Sebring Piston Part Number: MD357066
Product Specifications- Other Name: Piston - Standard; Piston & Pin Assembly Standard
- Item Weight: 1.40 Pounds
- Item Dimensions: 3.9 x 3.8 x 2.7 inches
- Condition: New
- Fitment Type: Direct Replacement
- SKU: MD357066
- Warranty: This genuine part is guaranteed by Mopar's factory warranty.
2001 Chrysler Sebring Piston Parts and Q&A
- Q: How to Properly Remove and Install Pistons and Connecting Rods in an Engine on 2001 Chrysler Sebring?A: The pistons and rods can only be removed after the Cylinder Head is taken off. Remember to use a good ridge reamer while covering the piston heads with something, using the same color to mark each piston with the matching cylinder number. Next up, take out the oil pan and scribe the cylinder number by the rod and its cap, so you can identify it. Keep in mind that the pistons are stamped with arrows in the front half and these point toward the engine front. Each piston and connecting rod should be removed from the top of the cylinder block by turning the crankshaft which positions each connecting rod in the center of the bore. Body Number 847282.509 When the bearings are removed, place the bearing cap on the end of the mating rod because the piston and rod are serviced as a unit. Set up the compression ring gaps so they are not all the same and make sure the tips of the oil ring expanders fit into the rail ends properly. Before installing the rings, put the piston and rings in clean engine oil then cover with the ring compressor. The front of the engine should be where the piston's directional stamp is. Place the connecting rod journal of the crankshaft at the cylinder center, push in the rod and piston assembly and rest the rod over the crankshaft journal as you rotate the crank. Hold the connecting rod so it fits on the journal, then tap the piston down into the cylinder using a hammer handle. Don't use the old bolts, since the cap bolts should not be reused; apply light engine oil to the threads on the new bolts and install them, alternating between tightening and untightening each bolt to finish assembling the cap by hand. Once that is complete, tighten all the bolts to 27 Nm plus a 1/4 turn and take a feeler gauge reading at the connecting rod side.
Related 2001 Chrysler Sebring Parts
 2001 Chrysler Sebring Timing Belt
 2001 Chrysler Sebring Coolant Filter
 2001 Chrysler Sebring Crankshaft Pulley
 2001 Chrysler Sebring Cylinder Head Gasket
 2001 Chrysler Sebring Dipstick
 2001 Chrysler Sebring Intake Valve
 2001 Chrysler Sebring Lash Adjuster
 2001 Chrysler Sebring Oil Filler Cap
 2001 Chrysler Sebring Rocker Arm Pivot
 2001 Chrysler Sebring Timing Belt Tensioner
 2001 Chrysler Sebring Timing Cover Gasket
 2001 Chrysler Sebring Valve Cover Gasket