JeepParts
My Garage
My Account
Cart
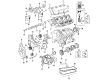
OEM 2004 Chrysler Pacifica Exhaust Valve
Exhaust Muffler Valve- Select Vehicle by Model
- Select Vehicle by VIN
Select Vehicle by Model
orMake
Model
Year
Select Vehicle by VIN
For the most accurate results, select vehicle by your VIN (Vehicle Identification Number).
1 Exhaust Valve found

2004 Chrysler Pacifica Exhaust Valve Part Number: 4892094AA
Product Specifications- Other Name: Valve - Exhaust; Valve Exhaust Standard
- Item Weight: 0.50 Pounds
- Item Dimensions: 5.5 x 1.4 x 1.4 inches
- Condition: New
- Fitment Type: Direct Replacement
- SKU: 4892094AA
- Warranty: This genuine part is guaranteed by Mopar's factory warranty.
2004 Chrysler Pacifica Exhaust Valve Parts and Q&A
- Q: How to Service and Repair Exhaust Valve and Intake Valves on 2004 Chrysler Pacifica?A: Always check the remaining margin on the valve and valve seat after the valves have been refaced. When refacing valve seats, always pick the right sized guide pilot so that the stones are seated properly. Do a dial indicator test of the seated valves and check that their total runout never rises past 0.051 mm (0.002 inch). If Prussian blue gets onto the center of the valve face, that indicates good contact between the valve and the valve seat. For edge transfer to the top of the heatband, adjust the valve seat with a 15-degree stone; and, for points moving to the bottom, polish with a 65-degree stone. Should the angle and width of the seat stay correct, worn or burned valve seats can be repaired, but a new cylinder head is required if they do not. INTA seats all around should be 0.75 - 1.25 mm wide and EXHA seats should measure 1.25 - 1.75 mm. Add a dab of clean oil to the valve tops and put them into the cylinder head openings. Once valve or seat refacing is done, measure each valve tip; if it is higher than 1.7185 for intake or 1.8102 inch for exhaust, you must grind the tip to meet the standards. Carefully put the valve seal/spring seat assembly over the valve guides so the spring is not broken. Set the valve spring on the valve seat with the color coded end facing up and put the valve retainer in place. With the spring compressor C-3422-D and adapter 6526, press down on the valve springs, attach the locks and then release the compressor. Test the installed height of the springs; if it is above 38.75 mm (1.5256 inch), insert a 0.762 mm (0.030 inch) spacer below the valve spring seat. To take away the valves, first pull off the cylinder head(s), rocker arm assembly and valve spring(s). Be sure to clean up any burrs on the valve stem lock spots to ensure there is no harm to the valve guides and to mark the valves so you know which valves go where for installation. Clean every valve and throw away any that have burn marks, unusual shapes or cracks. Use a ring gauge to measure the valve stems about 60 mm (2.36 inch) beneath the lock grooves and check that the size matches the requirements; remember the valve stems are chrome-plated and must not be polished. By placing the valve 15 mm (0.590 inch) clear of the valve seat in the cylinder head, you can measure its stem-to-guide clearance using a small piece of hose. Place C-3339 dial indicator directly face-on to the valve and watch as you open the valve; use the comparison readout to check if the valve is within spec. Replace the cylinder head if there is not enough stem-to-guide clearance or if the guide isn't properly kept in place by the cylinder head. Before putting the valve stems in, you should cover them with clean engine oil for installation. Should you find new valves or seats have been reground, make sure to inspect the tip height and grind them as needed. Change the valve stem seals, valve springs and put in the cylinder head(s).
Related 2004 Chrysler Pacifica Parts
 2004 Chrysler Pacifica Engine Mount
 2004 Chrysler Pacifica Dipstick
 2004 Chrysler Pacifica Timing Belt
 2004 Chrysler Pacifica Camshaft
 2004 Chrysler Pacifica Crankshaft Seal
 2004 Chrysler Pacifica Cylinder Head Gasket
 2004 Chrysler Pacifica Harmonic Balancer
 2004 Chrysler Pacifica Oil Pan Gasket
 2004 Chrysler Pacifica Piston Ring Set
 2004 Chrysler Pacifica Rocker Arm
 2004 Chrysler Pacifica Rocker Arm Pivot
 2004 Chrysler Pacifica Rod Bearing