JeepParts
My Garage
My Account
Cart
OEM 2004 Dodge Dakota CV Boot
Axle Boot- Select Vehicle by Model
- Select Vehicle by VIN
Select Vehicle by Model
orMake
Model
Year
Select Vehicle by VIN
For the most accurate results, select vehicle by your VIN (Vehicle Identification Number).
2 CV Boots found


2004 Dodge Dakota Outer Boot Part Number: 5066025AB
$51.44 MSRP: $112.00You Save: $60.56 (55%)Ships in 1-2 Business DaysProduct Specifications- Other Name: Boot Package - Half Shaft; CV Boot; Outer Boot Kit; Boots; Boot Kit Half Shaft Outer
- Item Weight: 1.50 Pounds
- Item Dimensions: 6.3 x 6.2 x 5.9 inches
- Condition: New
- Fitment Type: Direct Replacement
- SKU: 5066025AB
- Warranty: This genuine part is guaranteed by Mopar's factory warranty.

2004 Dodge Dakota Inner Boot Part Number: 5015966AA
Product Specifications- Other Name: Boot Package - Half Shaft; CV Boot; Boots; Boot Kit Half Shaft Inner
- Item Weight: 1.60 Pounds
- Condition: New
- Fitment Type: Direct Replacement
- SKU: 5015966AA
- Warranty: This genuine part is guaranteed by Mopar's factory warranty.
2004 Dodge Dakota CV Boot Parts and Q&A
- Q: How to Service and Repair a CV Boot and CV Joint for Outer on 2004 Dodge Dakota?A: Start by clamping the shaft into a vise that has soft jaws and then support the C/V joint below. Unscrew the clamps with a cut-off wheel or grinder, but be sure not to harm the C/V housing or half shaft as you do so. Pull the boot down the shaft to reveal and remove the lubricant that holds the C/V joint snap ring in place. Pull apart the snap ring and get the defective boot off the shaft, separating it from the inside part of the wheel. Put dabs of paint on the inner race/hub, bearing cage and housing in the marked places. Hold the C/V joint in a vise with soft jaws, oriented vertically and push down on the bearing cage to reach the ball on the other side. If the joint is too tight, hit the bearing hub with a hammer and a brass drift so you won't touch the bearing cage. Take out all the balls from the bearing cage and lift the cage and inner race away from the housing. Turn the inner cage 90° and set it into your printer's housing. For installation, if the ON joint shows signs of wear, change both the ON joint and its boot. Add a little grease onto the joint parts before assembly, line up the inner race, cage and housing with the provided alignment marks and put the inner race into the cage. Once you have the cage in the housing, turn it so it is 90° from the front. After removing the existing boot, put a bit of the specific lubricant on your finger and use it to evenly cover the ball races. Install the balls after tilting the race/hub and cage, then add the new clamps to the boot and slide the boot back onto the shaft in its regular place. Grease the C/V joint and boot with the left-over lubricant, put the joint onto the shaft and slide it down until the ring snaps into place and you can verify that it engages by tugging on the joint. Put the boot on the joint without twisting it and get rid of any trapped air. Lastly, use Clamp Installer C-4975A to secure the boot clamps, making sure the tool is on the clamp bridge and you tighten until the jaws are shut.
Related 2004 Dodge Dakota Parts
 2004 Dodge Dakota Differential
 2004 Dodge Dakota Drive Shaft
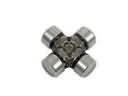 2004 Dodge Dakota Universal Joint
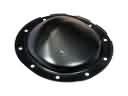 2004 Dodge Dakota Differential Cover
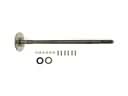 2004 Dodge Dakota Axle Shaft
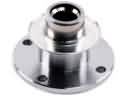 2004 Dodge Dakota CV Joint Companion Flange
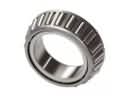 2004 Dodge Dakota Differential Bearing
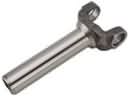 2004 Dodge Dakota Driveshaft Yokes
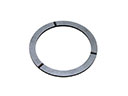 2004 Dodge Dakota Mainshaft Washer
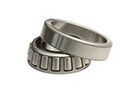 2004 Dodge Dakota Pinion Bearing
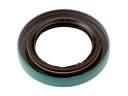 2004 Dodge Dakota Transfer Case Seal
 2004 Dodge Dakota Transfer Case Shim