JeepParts
My Garage
My Account
Cart
OEM 2005 Chrysler Pacifica Seat Belt
Seat Safety Belt- Select Vehicle by Model
- Select Vehicle by VIN
Select Vehicle by Model
orMake
Model
Year
Select Vehicle by VIN
For the most accurate results, select vehicle by your VIN (Vehicle Identification Number).
20 Seat Belts found


2005 Chrysler Pacifica Outer Belt, Gray, Front Passenger Side Part Number: XF981DVAF
$252.45 MSRP: $320.00You Save: $67.55 (22%)Ships in 1-2 Business DaysProduct Specifications- Other Name: Seat Belt - Front; Seat Belt Lap and Shoulder Belt, Front Right Outer; Lap & Shoulder Belt
- Position: Front Outer Passenger Side
- Replaces: XF981DVAC, XF981DVAD, XF981DVAE, XF981DVAB
- Item Weight: 4.40 Pounds
- Item Dimensions: 11.4 x 5.6 x 4.4 inches
- Condition: New
- Fitment Type: Direct Replacement
- SKU: XF981DVAF
- Warranty: This genuine part is guaranteed by Mopar's factory warranty.


2005 Chrysler Pacifica Outer Belt, Dark Gray, Rear Center Passenger Side Part Number: TS741DVAD
$167.68 MSRP: $247.00You Save: $79.32 (33%)Ships in 1-3 Business DaysProduct Specifications- Other Name: Seat Belt - Rear; Seat Belt Lap and Shoulder Belt, Center Right Outer; Lap & Shoulder Belt; Seat Belt Rear
- Position: Rear Center Outer Passenger Side
- Replaces: TS741DVAC
- Item Weight: 3.50 Pounds
- Item Dimensions: 13.5 x 4.0 x 3.9 inches
- Condition: New
- Fitment Type: Direct Replacement
- SKU: TS741DVAD
- Warranty: This genuine part is guaranteed by Mopar's factory warranty.
2005 Chrysler Pacifica Outer Belt, Dark Gray, Rear Center Driver Side Part Number: TS751DVAD
$138.23 MSRP: $204.00You Save: $65.77 (33%)Ships in 1-3 Business DaysProduct Specifications- Other Name: Seat Belt - Rear; Seat Belt Lap and Shoulder Belt, Center Left Outer; Lap & Shoulder Belt; Seat Belt Rear
- Position: Rear Center Outer Driver Side
- Replaces: TS751DVAC
- Item Weight: 3.30 Pounds
- Item Dimensions: 9.3 x 3.9 x 3.8 inches
- Condition: New
- Fitment Type: Direct Replacement
- SKU: TS751DVAD
- Warranty: This genuine part is guaranteed by Mopar's factory warranty.

2005 Chrysler Pacifica Outer Belt, Dark Gray, Rear Center Driver Side Part Number: TS771DVAE
$136.48 MSRP: $289.00You Save: $152.52 (53%)Ships in 1-2 Business DaysProduct Specifications- Other Name: Seat Belt - Rear; Seat Belt Lap and Shoulder Belt, Center Left Outer, Rear Left Outer; Lap & Shoulder Belt; Seat Belt Rear
- Position: Rear Center Outer Driver Side
- Replaces: TS771DVAD
- Item Weight: 3.60 Pounds
- Item Dimensions: 11.2 x 5.3 x 4.5 inches
- Condition: New
- Fitment Type: Direct Replacement
- SKU: TS771DVAE
- Warranty: This genuine part is guaranteed by Mopar's factory warranty.
2005 Chrysler Pacifica Outer Belt, Taupe, Rear Center Driver Side Part Number: TS771L2AE
$124.65 MSRP: $264.00You Save: $139.35 (53%)Ships in 1-2 Business DaysProduct Specifications- Other Name: Seat Belt - Rear; Seat Belt Lap and Shoulder Belt, Center Left Outer, Rear Left Outer; Lap & Shoulder Belt; Seat Belt Rear
- Position: Rear Center Outer Driver Side
- Replaces: TS771L2AC, TS771L2AD
- Item Weight: 3.60 Pounds
- Item Dimensions: 10.5 x 5.1 x 4.2 inches
- Condition: New
- Fitment Type: Direct Replacement
- SKU: TS771L2AE
- Warranty: This genuine part is guaranteed by Mopar's factory warranty.
2005 Chrysler Pacifica Outer Belt, Taupe, Rear Center Driver Side Part Number: TS751L2AD
$113.60 MSRP: $240.00You Save: $126.40 (53%)Ships in 1-2 Business DaysProduct Specifications- Other Name: Seat Belt - Rear; Seat Belt Lap and Shoulder Belt, Center Left Outer; Lap & Shoulder Belt; Seat Belt Rear
- Position: Rear Center Outer Driver Side
- Replaces: TS751L2AC
- Item Weight: 2.30 Pounds
- Item Dimensions: 9.4 x 3.9 x 3.2 inches
- Condition: New
- Fitment Type: Direct Replacement
- SKU: TS751L2AD
- Warranty: This genuine part is guaranteed by Mopar's factory warranty.
2005 Chrysler Pacifica Outer Belt, Taupe, Front Driver Side Part Number: TS591L2AF
$142.80 MSRP: $324.00You Save: $181.20 (56%)Ships in 1-2 Business DaysProduct Specifications- Other Name: Seatbelt - Front; Seat Belt Lap and Shoulder Belt, Front Left Outer; Lap & Shoulder Belt
- Position: Front Outer Driver Side
- Replaces: TS591L2AD, TS591L2AE, TS591P7AD
- Item Weight: 4.10 Pounds
- Item Dimensions: 11.1 x 5.3 x 4.2 inches
- Condition: New
- Fitment Type: Direct Replacement
- SKU: TS591L2AF
- Warranty: This genuine part is guaranteed by Mopar's factory warranty.
2005 Chrysler Pacifica Outer Belt, Taupe, Rear Passenger Side Part Number: TS761L2AE
$98.61 MSRP: $224.00You Save: $125.39 (56%)Ships in 1-2 Business DaysProduct Specifications- Other Name: Seat Belt - Rear; Seat Belt Lap and Shoulder Belt, Center Right Outer, Rear Right Outer; Lap & Shoulder Belt; Seat Belt Rear
- Position: Rear Outer Passenger Side
- Replaces: TS761L2AC, TS761L2AF, TS761L2AD
- Item Weight: 2.50 Pounds
- Item Dimensions: 8.2 x 5.1 x 3.1 inches
- Condition: New
- Fitment Type: Direct Replacement
- SKU: TS761L2AE
- Warranty: This genuine part is guaranteed by Mopar's factory warranty.
2005 Chrysler Pacifica Outer Belt, Taupe, Rear Center Passenger Side Part Number: TS741L2AD
$95.46 MSRP: $217.00You Save: $121.54 (57%)Ships in 1-2 Business DaysProduct Specifications- Other Name: Seat Belt - Rear; Seat Belt Lap and Shoulder Belt, Center Right Outer; Lap & Shoulder Belt; Seat Belt Rear
- Position: Rear Center Outer Passenger Side
- Replaces: TS741L2AC
- Item Weight: 3.50 Pounds
- Item Dimensions: 13.7 x 4.2 x 3.8 inches
- Condition: New
- Fitment Type: Direct Replacement
- SKU: TS741L2AD
- Warranty: This genuine part is guaranteed by Mopar's factory warranty.
2005 Chrysler Pacifica Outer Belt, Taupe, Front Passenger Side Part Number: XF981L2AF
$95.21 MSRP: $302.00You Save: $206.79 (69%)Ships in 1-2 Business DaysProduct Specifications- Other Name: Seat Belt - Front; Seat Belt Lap and Shoulder Belt, Front Right Outer; Lap & Shoulder Belt
- Position: Front Outer Passenger Side
- Replaces: XF981L2AB, XF981L2AC, XF981L2AE, XF981L2AD
- Item Weight: 5.00 Pounds
- Item Dimensions: 11.2 x 5.8 x 4.4 inches
- Condition: New
- Fitment Type: Direct Replacement
- SKU: XF981L2AF
- Warranty: This genuine part is guaranteed by Mopar's factory warranty.

2005 Chrysler Pacifica Buckle End, Gray, Rear Center Inner Passenger Side Part Number: TS921DVAB
$47.21 MSRP: $67.85You Save: $20.64 (31%)Ships in 1-3 Business DaysProduct Specifications- Other Name: Seat Belt - Rear Inner; Seat Belt Receptacle, Center Right; Latch; Seat Belt Rear Inner
- Position: Rear Center Inner Passenger Side
- Item Weight: 0.80 Pounds
- Item Dimensions: 6.0 x 3.2 x 2.3 inches
- Condition: New
- Fitment Type: Direct Replacement
- SKU: TS921DVAB
- Warranty: This genuine part is guaranteed by Mopar's factory warranty.
2005 Chrysler Pacifica Buckle End, Dark Gray, Rear Inner Driver Side Part Number: TS931DVAB
$41.76 MSRP: $66.20You Save: $24.44 (37%)Ships in 1-2 Business DaysProduct Specifications- Other Name: Seat Belt - Rear Inner; Seat Belt Receptacle, Center Left, Rear Left; Latch; Seat Belt Rear Inner
- Position: Rear Inner Driver Side
- Item Weight: 1.20 Pounds
- Item Dimensions: 5.9 x 3.2 x 2.4 inches
- Condition: New
- Fitment Type: Direct Replacement
- SKU: TS931DVAB
- Warranty: This genuine part is guaranteed by Mopar's factory warranty.
2005 Chrysler Pacifica Buckle End, Taupe, Rear Center Inner Passenger Side Part Number: TS921L2AB
$32.43 MSRP: $68.50You Save: $36.07 (53%)Ships in 1-2 Business DaysProduct Specifications- Other Name: Seat Belt - Rear Inner; Seat Belt Receptacle, Center Right; Latch; Seat Belt Rear Inner
- Position: Rear Center Inner Passenger Side
- Item Weight: 0.80 Pounds
- Item Dimensions: 6.0 x 4.4 x 2.7 inches
- Condition: New
- Fitment Type: Direct Replacement
- SKU: TS921L2AB
- Warranty: This genuine part is guaranteed by Mopar's factory warranty.
2005 Chrysler Pacifica Buckle End, Taupe, Rear Inner Driver Side Part Number: TS931L2AB
$30.68 MSRP: $64.85You Save: $34.17 (53%)Ships in 1-2 Business DaysProduct Specifications- Other Name: Seat Belt - Rear Inner; Seat Belt Receptacle, Center Left, Rear Left; Latch; Seat Belt Rear Inner
- Position: Rear Inner Driver Side
- Item Weight: 0.80 Pounds
- Item Dimensions: 5.8 x 3.1 x 2.5 inches
- Condition: New
- Fitment Type: Direct Replacement
- SKU: TS931L2AB
- Warranty: This genuine part is guaranteed by Mopar's factory warranty.

2005 Chrysler Pacifica Buckle End, Taupe, Inner Part Number: TS901L2AE
$42.50 MSRP: $80.50You Save: $38.00 (48%)Ships in 1-2 Business DaysProduct Specifications- Other Name: Seat Belt - Front Inner; Seat Belt Receptacle, Front, Rear; Latch; Seat Belt Front Inner
- Position: Inner
- Replaces: TS901L2AD
- Item Weight: 1.20 Pounds
- Item Dimensions: 10.6 x 6.2 x 5.1 inches
- Condition: New
- Fitment Type: Direct Replacement
- SKU: TS901L2AE
- Warranty: This genuine part is guaranteed by Mopar's factory warranty.
- Product Specifications
- Other Name: Seatbelt - Front; Seat Belt Lap and Shoulder Belt, Front Left Outer; Lap & Shoulder Belt
- Position: Front Outer Driver Side
- Replaces: TS591DVAE, TS591DVAD
- Item Weight: 4.10 Pounds
- Item Dimensions: 11.3 x 5.3 x 4.1 inches
- Condition: New
- Fitment Type: Direct Replacement
- SKU: TS591DVAF
- Warranty: This genuine part is guaranteed by Mopar's factory warranty.
- Product Specifications
- Other Name: Seat Belt - Rear; Seat Belt Lap and Shoulder Belt, Center Right Outer, Rear Right Outer; Lap & Shoulder Belt; Seat Belt Rear
- Position: Rear Center Outer Passenger Side
- Replaces: TS761DVAD
- Item Weight: 3.10 Pounds
- Item Dimensions: 9.3 x 4.1 x 3.4 inches
- Condition: New
- Fitment Type: Direct Replacement
- SKU: TS761DVAE
- Warranty: This genuine part is guaranteed by Mopar's factory warranty.
- Product Specifications
- Other Name: Seat Belt - Front Inner; Seat Belt Receptacle, Front, Rear; Latch; Seat Belt Front Inner
- Position: Front Inner
- Replaces: TS901DVAD
- Item Weight: 1.20 Pounds
- Item Dimensions: 10.2 x 6.1 x 5.3 inches
- Condition: New
- Fitment Type: Direct Replacement
- SKU: TS901DVAE
- Warranty: This genuine part is guaranteed by Mopar's factory warranty.
 Product Specifications
- Other Name: Bracket - Seat Belt; Seat Belt Bracket, Rear Left; Bracket Seat Belt
- Position: Rear Driver Side
- Condition: New
- Fitment Type: Direct Replacement
- SKU: 4680555AA
- Warranty: This genuine part is guaranteed by Mopar's factory warranty.
- Product Specifications
- Other Name: Bracket - Seat Belt; Seat Belt Bracket, Rear Right; Bracket Seat Belt
- Position: Rear Passenger Side
- Condition: New
- Fitment Type: Direct Replacement
- SKU: 4680554AA
- Warranty: This genuine part is guaranteed by Mopar's factory warranty.
2005 Chrysler Pacifica Seat Belt Parts and Q&A
- Q: How to Maintain Your Seat Belt and Retractor on 2005 Chrysler Pacifica?A: Before starting the work on the front retractor, raise the hood, remove the negative battery cable and allow two minutes to drain the stored energy. Remove the bolt piece and bolt cover on the seat belt anchor of the lower B-pillar, making sure to not hurt the harness pigtail only if the car has the Occupant Classification System (OCS). After that, take off the lower B-pillar trim, connect with caution and remove the two fastening screws from the seat belt retaining ring along with the retaining ring itself. Remove both seat belt retractor mounting bolts, separate the height adjuster knob cover from the retractor by grasping its knob and next, unfasten the turning loop retaining bolt from the height adjuster, to finish by removing the seat belt and retractor from the car. To install, we put the seat belt and retractor into the vehicle, fit the turning loop retaining bolt in the height adjuster and torque it to 40 N.m or 30 ft. lbs. and next install the seat belt turning loop cover. Once the height adjuster knob is on its knob cover, thread the seat belt retractor mounting bolts into place and tighten them to 40 N.m (30 ft. lbs.), then slip the B-pillar seat belt retaining ring over the seat belt. Connect the retractor electrical connector and if fitted with OCS, put the harness connector into the belt tension sensor before setting in the lower B-pillar trim. Set the lower seat belt anchor bolt and its toggle cover into position through the lower B-pillar, tighten this bolt to 40 N.m (30 ft. lbs.), use a scan tool to test that the system works and then close the hood. You must not connect the negative battery cable until all the work is done, to keep occupants safe.
Related 2005 Chrysler Pacifica Parts
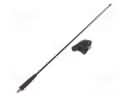 2005 Chrysler Pacifica Antenna
 2005 Chrysler Pacifica Ignition Switch
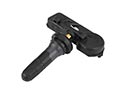 2005 Chrysler Pacifica TPMS Sensor
 2005 Chrysler Pacifica Clock Spring
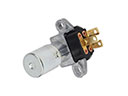 2005 Chrysler Pacifica Dimmer Switch
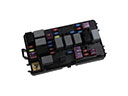 2005 Chrysler Pacifica Fuse
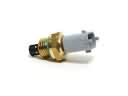 2005 Chrysler Pacifica Intake Manifold Temperature Sensor
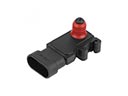 2005 Chrysler Pacifica MAP Sensor
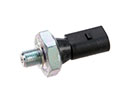 2005 Chrysler Pacifica Oil Pressure Switch
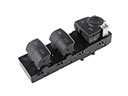 2005 Chrysler Pacifica Power Window Switch
 2005 Chrysler Pacifica Relay
 2005 Chrysler Pacifica Washer Pump