JeepParts
My Garage
My Account
Cart
OEM 2007 Chrysler Pacifica CV Boot
Axle Boot- Select Vehicle by Model
- Select Vehicle by VIN
Select Vehicle by Model
orMake
Model
Year
Select Vehicle by VIN
For the most accurate results, select vehicle by your VIN (Vehicle Identification Number).
2 CV Boots found


2007 Chrysler Pacifica Boot Kit, Rear Outer Driver Side Part Number: 5014914AA
$32.13 MSRP: $40.72You Save: $8.59 (22%)Ships in 1-2 Business DaysProduct Specifications- Other Name: Boot - Half Shaft; CV Joint Boot Kit, Rear Left Outer, Rear Right Outer; Outer Boot; Boots; Boot Kit Half Shaft Outer Left And Right; Boot Kit Half Shaft Outer
- Position: Rear Outer Driver Side
- Item Weight: 0.80 Pounds
- Condition: New
- Fitment Type: Direct Replacement
- SKU: 5014914AA
- Warranty: This genuine part is guaranteed by Mopar's factory warranty.
 Product Specifications
- Other Name: Boot Kit - Half Shaft; CV Joint Boot Kit, Rear Left Inner, Rear Right Inner; CV Boot; Inner Boot; Boots; Boot Kit Half Shaft Inner
- Position: Rear Inner Driver Side
- Item Weight: 0.60 Pounds
- Condition: New
- Fitment Type: Direct Replacement
- SKU: 5103006AA
- Warranty: This genuine part is guaranteed by Mopar's factory warranty.
2007 Chrysler Pacifica CV Boot Parts and Q&A
- Q: How to Install a CV Boot on a Constant Velocity Joint on 2007 Chrysler Pacifica?A: The first step is to push the inner retaining clamp of the seal boot onto the interconnecting shaft and then push the new inner seal onto the shaft, so that the raised bead in the seal lines up with the groove on the shaft. After that, place the spider assembly (1) onto the interconnecting shaft (2) so that there is enough clearance for the spider retaining snap-ring and it won't rub against the outer tripod bearings. Do not force the spider assembly (2). If it won't fit by hand, strike the spider body with a brass drift. Place the spider assembly over the retaining snap-ring which goes into the groove on the interconnecting shaft, so that it is fitted securely. Then, slide the inner CV joint seal boot (4) evenly over the sealing boot on the clamp for the interconnecting shaft. Place the Crimping Tool C-4975-A (1) under the bridge of the clamp to tighten the nut, closing the jaws without making the seal boot dimpled, stretched or misshapen. Insert the sealing boot into the groove cut in the side of the tripod housing and secure the seal boot retaining clamp so that it is balanced. Line up the trilobal boot and the tripod housing, so that the trilobal lobes sit in the recesses. Remove pressure from the inner CV joint assembly slowly so you do not pierce or harm the protective boot. Insert a trim stick (4) into the space between the sealing boot insert and the CV joint housing to allow the assembly to vent. Make sure the trim stick is pushed flat against the tripod housing so it won't damage the housing. Set the trim stick at its appropriate angle, place the interconnecting shaft in the center and remove the shift stick to balance air in the outer joint of the CV axle unit. In the end, after preparing the joint, use proper methods to secure the boot to the joint. With a crimp type clamp, use the C-4975-A crimping tool, push it on top of the clamp over its bridge and tighten the nut fully until the jaws are closed completely. When using low profile latching type boot clamps, put the prongs of the Clamp Locking Tool into the holes on the clamp and squeeze the tool so the top band latches behind the two tabs on the lower band. Once each step is done, put the half shaft back into the vehicle.
Related 2007 Chrysler Pacifica Parts
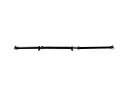 2007 Chrysler Pacifica Drive Shaft
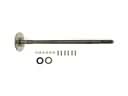 2007 Chrysler Pacifica Axle Shaft
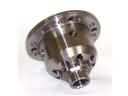 2007 Chrysler Pacifica Differential