JeepParts
My Garage
My Account
Cart
OEM 2008 Chrysler PT Cruiser Front Cross-Member
Front Engine Cross Member- Select Vehicle by Model
- Select Vehicle by VIN
Select Vehicle by Model
orMake
Model
Year
Select Vehicle by VIN
For the most accurate results, select vehicle by your VIN (Vehicle Identification Number).
2 Front Cross-Members found


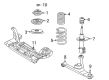
2008 Chrysler PT Cruiser Engine Cradle, Front Part Number: 5272962AE
Product Specifications- Other Name: Crossmember - Front Suspension; Engine Cradle, Front; Crossmember Front Suspension
- Position: Front
- Replaces: 5272962AD, 5272962AB, 5272962AC
- Item Weight: 34.20 Pounds
- Item Dimensions: 39.1 x 23.9 x 10.8 inches
- Condition: New
- Fitment Type: Direct Replacement
- SKU: 5272962AE
- Warranty: This genuine part is guaranteed by Mopar's factory warranty.
2008 Chrysler PT Cruiser Engine Cradle, Front Part Number: 5272970AH
Product Specifications- Other Name: Crossmember - Front Suspension; Engine Cradle, Front; Crossmember Front Suspension
- Position: Front
- Replaces: 5272970AE, 5272970AD
- Item Weight: 39.40 Pounds
- Item Dimensions: 39.9 x 23.2 x 11.8 inches
- Condition: New
- Fitment Type: Direct Replacement
- SKU: 5272970AH
- Warranty: This genuine part is guaranteed by Mopar's factory warranty.
2008 Chrysler PT Cruiser Front Cross-Member Parts and Q&A
- Q: How to Install the Front Cross-Member on 2008 Chrysler PT Cruiser?A: It's important to inspect the steering column lower coupling for damage after you remove the old crossmember. First, put the lower control arms onto the front suspension crossmember and install the pivot bolts loosely. When the crossmember and lower control arms touch both the frame and body rails, use a transmission jack and guide the power steering shaft into the correct place. Line up the lower control arm rear isolator bushings with the two crossmember mounting bolts and tap the bolts into the tapping plates in the body, then do the same for the front and rear mounting bolts into the crossmember rails to the frame in the same manner. The crossmember should be fastened back onto the body where it was prior to ensure wheel alignment is preserved. Line up the crossmember with your old marks using a soft face hammer, then secure the mounting bolts on either side with 250 Nm (185 ft. lbs.) of torque and the others with 153 Nm (120 ft. lbs.). Tighten the pivot bolts on the lower control arm front to 163 Nm (120 ft. lbs.), remove the suspension wire or bungee cord attached to the power steering gear and install four bolts to mount the power steering gear to the crossmember which you should tighten to 61 Nm (45 ft. lbs.). Attach the screws securing the cooler to the crossmember next and follow by inserting each ball joint stud into the steering knuckle with the bolt hole fitting the notch on the stud. Replace the old ball joint stud with a new pinch bolt and nut, secure them tightly at 95 Nm (70 ft. lbs.). Install the engine torque strut onto the right front side of the crossmember with its mounting bolt, as shown in the section on the Engine. Place the washer over the stud on the torque strut bolt, then fit the pencil strut under the right front corner of the crossmember and body and tighten the nuts to 58 Nm (43 ft. lbs.). After that, fit the splash shield and bolts on the drive-belt and screw together the front fascia to the reinforcement. Be sure the stabilizer bar is not upside-down and then set it on the crossmember so the slits in the cushions face toward the front and onto the raised beads. Put the cushion retainers in place so the raised beads meet the grooves and don't tighten the bolts for now. Put back both stabilizer bar links, starting with the bottom bolt and fitting the bushing through it, the stabilizer bar and then into the top retainer/nut and another bushing, but don't tighten them yet. Rebolt the tire and wheel assemblies with all nuts set to 135 Nm (100 ft. lbs.) and bring the vehicle down. At times, you will need to lift the vehicle with a platform hoist or alignment rack to be able to access the bolts at curb height. Hold the upper retainer/nut on each stabilizer bar link while turning the bolt to 28 Nm (20 ft. lbs.) and then tighten the cushion retainer bolts to the same number. Once that is done, check the alignment of your front wheels.
Related 2008 Chrysler PT Cruiser Parts
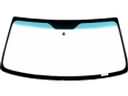 2008 Chrysler PT Cruiser Windshield
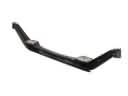 2008 Chrysler PT Cruiser Axle Beam
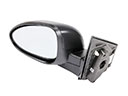 2008 Chrysler PT Cruiser Car Mirror
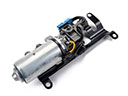 2008 Chrysler PT Cruiser Convertible Top Motor
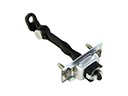 2008 Chrysler PT Cruiser Door Check
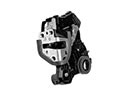 2008 Chrysler PT Cruiser Door Lock
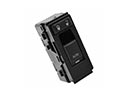 2008 Chrysler PT Cruiser Door Lock Switch
 2008 Chrysler PT Cruiser Exhaust Nut
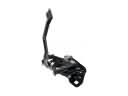 2008 Chrysler PT Cruiser Hood Latch
 2008 Chrysler PT Cruiser License Plate
 2008 Chrysler PT Cruiser Shift Indicator
 2008 Chrysler PT Cruiser Trunk Lid Lift Support