JeepParts
My Garage
My Account
Cart
OEM 2008 Jeep Grand Cherokee Front Cross-Member
Front Engine Cross Member- Select Vehicle by Model
- Select Vehicle by VIN
Select Vehicle by Model
orMake
Model
Year
Select Vehicle by VIN
For the most accurate results, select vehicle by your VIN (Vehicle Identification Number).
1 Front Cross-Member found


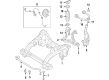
2008 Jeep Grand Cherokee Engine Cradle, Front Part Number: 52089493AI
Product Specifications- Other Name: Crossmember - Front Suspension; Engine Cradle, Front; Crossmember; Cradle Front Suspension
- Position: Front
- Replaces: 52089493AH, 52089493AE, 52089493AG, 52089493AF
- Item Weight: 65.10 Pounds
- Item Dimensions: 36.4 x 30.3 x 13.8 inches
- Condition: New
- Fitment Type: Direct Replacement
- SKU: 52089493AI
- Warranty: This genuine part is guaranteed by Mopar's factory warranty.
2008 Jeep Grand Cherokee Front Cross-Member Parts and Q&A
- Q: How to Install a Front Cross-Member on 2008 Jeep Grand Cherokee?A: Install the front cross-member by attaching the sway bar to the engine cradle and only then put in the lower control arms. Hold the engine cradle in place, getting the engine mount bolts to line up in the cradle slots and secure everything with the four engine cradle bolts. Lay the cradle back in place by following the marks you made earlier and fasten the front bolts to 203 Nm and the rear bolts to 122 Nm. After steering gear installation, drop the engine all the way onto its mounts and tighten the bolts to 111 Nm (82 ft. lbs.). Put the front differential into the vehicle for 4WD and join it by threading in the bolts from the top. Use 102 Nm (75 ft. lbs.) of force for the bolts going in from the back and the right side and just 54 Nm (40 ft. lbs.) for the two front individual bolts. Set in the propeller shaft as necessary, fasten the right halfshaft to the differential, put on the electrical connector (if needed) and fix the vent hose. Install the lower lower clevis bolts and tighten them to 169 Nm (125 ft. lbs.), as well as the knuckles and the halfshaft nut if they are fitted and tighten the nut to 251 Nm (185 ft. lbs.) when done. After that, fit the new lower ball joint into the knuckle, secure it with the lower ball joint nut tightened up to 81 Nm (60 ft. lbs.) and afterward fit the new upper ball joint and nut, also tightened up to 81 Nm (60 ft. lbs.). Join the outer tie rod end to the steering knuckle and then tightly affix the ball stud nut with a force of 75 Nm (55 ft. lbs.). Connect each electric cable from the speed sensor to its proper port, grab each harness grabber and finally put in the rotors. Check and fill the front differential if required, attach the skid plates and then check and modify the front wheel alignment when needed.
Related 2008 Jeep Grand Cherokee Parts
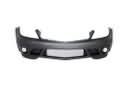 2008 Jeep Grand Cherokee Bumper
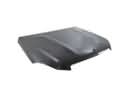 2008 Jeep Grand Cherokee Hood
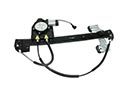 2008 Jeep Grand Cherokee Window Regulator
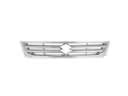 2008 Jeep Grand Cherokee Grille
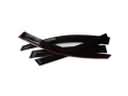 2008 Jeep Grand Cherokee Air Deflector
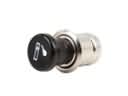 2008 Jeep Grand Cherokee Cigarette Lighter
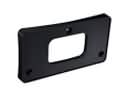 2008 Jeep Grand Cherokee License Plate
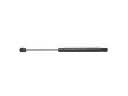 2008 Jeep Grand Cherokee Lift Support
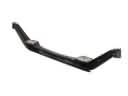 2008 Jeep Grand Cherokee Axle Beam
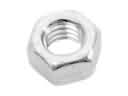 2008 Jeep Grand Cherokee Exhaust Nut
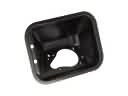 2008 Jeep Grand Cherokee Fuel Filler Housing
 2008 Jeep Grand Cherokee Tailgate Lock