JeepParts
My Garage
My Account
Cart
OEM Chrysler 300 Automatic Transmission Filter
AT Filter- Select Vehicle by Model
- Select Vehicle by VIN
Select Vehicle by Model
orMake
Model
Year
Select Vehicle by VIN
For the most accurate results, select vehicle by your VIN (Vehicle Identification Number).
3 Automatic Transmission Filters found


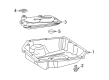
Chrysler 300 Oil Pan Part Number: 52108325AA
$40.50 MSRP: $60.00You Save: $19.50 (33%)


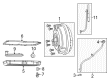
Chrysler 300 Filter Part Number: 68059549AA
$43.62 MSRP: $62.65You Save: $19.03 (31%)Ships in 1-2 Business Days
Chrysler 300 Oil Pan Part Number: 68259490AD
$190.91 MSRP: $287.00You Save: $96.09 (34%)Ships in 1-2 Business Days
Chrysler 300 Automatic Transmission Filter
Choose OEM Automatic Transmission Filter that meet Chrysler factory standards. Chrysler designs and tests every component for precision and durability. Each Automatic Transmission Filter follows strict manufacturing steps to lock in quality and fit. If your Chrysler 300 matters to you, OEM parts make the smart choice. You'll get the exact look, feel, and performance you expect. Shop genuine 300 parts at the highly competitive prices online. Enjoy a manufacturer's warranty, a hassle-free return policy, and rapid delivery. No more guesswork with off brands. Get genuine parts with exact fit and true factory performance. Shop with confidence today at JeepPartsDeal.com.
The Automatic Transmission Filter in Chrysler 300 is very vital since it is responsible for capturing contaminants and wear by-products as the advance of healthy automatic transmission system, in the same way, as engine oil filter. This function is rather useful to stop the possible harm that may be caused to the transmission and enable it work optimally. Automatic Transmission Filter should also be replaced frequently as a part of routine maintenance since the filter gets clogged over time as the vehicle continues to operate. Several generations of Chrysler 300 models have been equipped with different types of Automatic Transmission Filters which were developed to offer such features as longer service life or increased filtration properties. As these filters could seem quite similar absolutely, internally they comes in rather different and as a result may turn out ineffective. In any case, Chrysler 300 Automatic Transmission Filters serve to provide just the degree of protection that the vehicle's transmission system requires for that particular model year.
Chrysler 300 Automatic Transmission Filter Parts and Q&A
- Q: How to Maintain and Repair an Automatic Transmission Filter on Chrysler 300?A:Before changing the filter in your automatic transmission, add Mopar ATF+4 to the sump and include cleaning and replacing the filter when you change the transmission's oil. Change the fluid and filter only if you disassemble the transmission. The first step is to lift the car on a hoist and set a drain container under the transmission Oil Pan. Make sure at least one of the bolts has a sealing patch and use a hammer to tap at the pan's corner where you want the sump fluid to flow out. Ensure you install a new O-ring and filter at the bottom of the valve body and tighten the retaining screws only to 5 Nm or 45 inch lbs. Replenish the space inside the oil pan bolt first with Mopar Lock & Seal Adhesive before putting the sealing patch back on. Remove the oil pan and magnet, clean them, then re-install the pan using new Mopar Silicone Adhesive sealant, having the oil pan bolts tightened to 20 Nm (14.5 ft lbs.). Pour in four quarts of Mopar ATF+4 while the engine is off and move the selector lever through every position, concluding in park or neutral, before letting the car run for at least one minute. Check the transmission fluid level, add fluid as necessary to keep it at 3 mm (1/8 inch) above the lowest indicator on the stick and then check the fluid level after the transmission has warmed up to 82°C (180°F). Fully insert the dipstick into its opening so nothing can get into your transmission.
- Q: What Steps Should Be Taken During an Automatic Transmission Filter Change and Which Fluids Are Best on Chrysler 300?A:Use only Mopar® ATF+4 or Automatic Transmission Fluid in the transmission sump and take this chance to remove and change the filter, removing the magnet inside the oil sump with a clean, dry piece of cloth when you finish. Anytime the transmission is taken apart, the fluid and filter should be replaced. First, support your vehicle on a hoist and remember to put a large-opening container under the transmission pan. One of the bolts in the Oil Pan comes from the factory with a sealing patch attached. You should remove this patch for reuse. Unscrew the pan bolts and hit the pan at one edge so it moves, letting the oil drain first. Fasten a new filter together with another new O-ring at the bottom of the valve body using retaining screws set at 5 Nm (45 in. lbs.). Usually, before installing the oil pan bolt into the hole, you should apply Lock & Seal Adhesive on the sealing patch of the bolt. Rinse out the oil pan and magnet and after that, install the pan again with Mopar® Silicone Adhesive, tightening the bolts to a torque of 20 Nm (14.5 ft. lbs.). Introduce four quarts of Mopar® ATF+4, Automatic Transmission Fluid, into the dipstick open, turn on the engine and let the vehicle idle for about one minute. After you've used the parking and service brakes, move the selector lever to every position, finishing in park or neutral. See that the transmission fluid is between 1 and 8 millimeters or 1/8 to 1/3 inch, below the lowest mark on the dipstick. Check the level of the transfer case fluid while the vehicle is at its operating temperature, about 140° F (60° C) and push the dipstick into the dipstick opening tightly so no dirt gets inside the transmission.


Related Chrysler 300 Parts
 Chrysler 300 Shift Cable
 Chrysler 300 Transfer Case
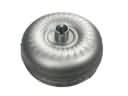 Chrysler 300 Torque Converter
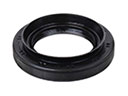 Chrysler 300 Automatic Transmission Output Shaft Seal
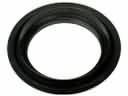 Chrysler 300 Automatic Transmission Seal
 Chrysler 300 Automatic Transmission Shift Levers
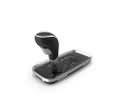 Chrysler 300 Automatic Transmission Shifter
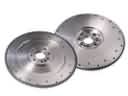 Chrysler 300 Flywheel
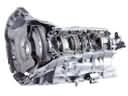 Chrysler 300 Transmission Assembly
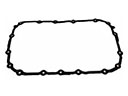 Chrysler 300 Transmission Gasket
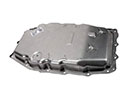 Chrysler 300 Transmission Pan
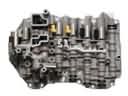 Chrysler 300 Valve Body