JeepParts
My Garage
My Account
Cart
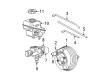
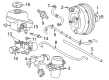
OEM Chrysler 300 Brake Booster
Brake Power Booster- Select Vehicle by Model
- Select Vehicle by VIN
Select Vehicle by Model
orMake
Model
Year
Select Vehicle by VIN
For the most accurate results, select vehicle by your VIN (Vehicle Identification Number).
6 Brake Boosters found


Chrysler 300 Brake Booster Part Number: 68048544AA
$404.36 MSRP: $414.00You Save: $9.64 (3%)Ships in 1-2 Business Days
Chrysler 300 Brake Booster Part Number: 68089130AD
$227.72 MSRP: $314.00You Save: $86.28 (28%)
Chrysler 300 Brake Booster Part Number: 68033785AA
Chrysler 300 Booster Part Number: 68020421AA
Chrysler 300 Brake Booster Part Number: 5139152AA
Chrysler 300 Brake Booster Part Number: 5139145AA
Chrysler 300 Brake Booster
Choose OEM Brake Booster that meet Chrysler factory standards. Chrysler designs and tests every component for precision and durability. Each Brake Booster follows strict manufacturing steps to lock in quality and fit. If your Chrysler 300 matters to you, OEM parts make the smart choice. You'll get the exact look, feel, and performance you expect. Shop genuine 300 parts at the highly competitive prices online. Enjoy a manufacturer's warranty, a hassle-free return policy, and rapid delivery. No more guesswork with off brands. Get genuine parts with exact fit and true factory performance. Shop with confidence today at JeepPartsDeal.com.
The Brake Booster in Chrysler 300 cars is crucial since it helps to improve the braking system by diminishing the amount of force the driver has to apply on the brake pedal. This gadget employs vacuum of chamber to magnify the impact of force applied by a driver on brake pedal facilitates passing it to the master cylinder and developing the right hydraulic pressure needed for safe and proper braking. Chrysler 300 models have primarily employed two types of Brake Boosters: There are two types of holders namely the vacuum-operated holder and hydraulic holder. Vacuum boosters use a vacuum created by the engine or with the help of a vacuum pump while hydraulic boosters use pressure created by the steering pump. Main difference is in the operation of these types of vaccuum boosters where the engine has to be on for the optimal result in the form of vacuum booster performance. In the Chrysler 300 the Brake Booster plays an important part in the operation of the braking and hence its proper functioning is very important.
Chrysler 300 Brake Booster Parts and Q&A
- Q: How to Install and Maintain a Brake Booster on Chrysler 300?A:Replacement seals should be placed over the push rod and mounting studs at the rear of the new power brake booster, prior to installation. Pass the boosters through the space between the cross-brace and windshield, guiding both rods and the mount to fit through the front of the dash panel. Apply 25 Nm (18 ft. lbs.) of torque to all booster mounts to avoid leaks in the vacuum lines. Slide the push rod from the booster onto the brake pedal pin, then insert a new clip to lock it into place. Add and set up the brake lamp switch to the vehicle. Screw the vacuum hose to the check valve on the booster while still keeping the check valve in place. Should the car have MK25 and Electronic Stability Program, connect the wiring from the BMS to the pedal travel sensor of the power brake booster and to the active brake booster solenoid. Fix the master cylinder in place. Install the windshield wiper module and the related items you removed when accessing the system. Connect the negative cable of the battery to its post on the battery, making sure everything is right. Once you've filled and bled the brakes, drive the car around to check how well the brakes function.
- Q: How to Maintain and Fix a Brake Booster on Chrysler 300?A:If you want to service or repair the vacuum brake booster, move the driver's seat all the way to the back and remove the negative cable from the battery post. Without the master cylinder and if the vehicle includes an ESP, release theottage the brake control unit wiring for the power booster and the solenoid in the brake booster. Pull the vacuum hose away from the check valve located on the booster's surface, but make sure you aren't taking out the check valve, then remove the brake lamp switch. To remove the push rod from the brake pedal pin, slide a small screwdriver in between the retaining clip and pin, rotate it to let the clip move over the end of the pin and take it off and discard it. A new clip must be used when you reinstall everything. After moving the push rod off the brake pedal, pull out the power booster's four mounting bolts, then remove the windshield wiper module. Slide the power brake booster toward you out of the dash and lift it up through the space between the cross-brace and the windshield. After removing the push rod and mounting studs from the booster's rear, attach the new seal with the push rod and mounting studs. Place the power brake booster through the opening, direct the push rod and all mounting studs through the dash panel and torque all four nuts to 25 Nm (18 ft. lbs.) to prevent vacuum leaking. Put the booster push rod onto the brake pedal pin and fasten it using a new retaining clip. Put in the new brake lamp switch, connect the vacuum hose back to the check valve and also reinsert the wiring harness at both the pedal travel sensor and active brake booster solenoid if the car has ESP. Replace the master cylinder and the wiper module and install any extra components removed prior to access. After that, join the battery negative cable to the battery connector and do a quick drive to check how the brakes are working.


Related Chrysler 300 Parts
 Chrysler 300 ABS Control Module
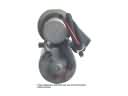 Chrysler 300 ABS Pump And Motor Assembly
 Chrysler 300 Backing Plate
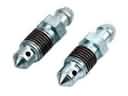 Chrysler 300 Brake Bleeder Screw
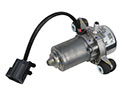 Chrysler 300 Brake Booster Vacuum Pump
 Chrysler 300 Brake Caliper Bolt
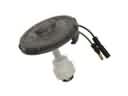 Chrysler 300 Brake Fluid Level Sensor
 Chrysler 300 Brake Line
 Chrysler 300 Brake Master Cylinder
 Chrysler 300 Parking Brake Cable
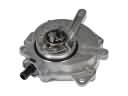 Chrysler 300 Vacuum Pump
 Chrysler 300 Wheel Stud