JeepParts
My Garage
My Account
Cart
OEM Chrysler 300 Fuel Tank
Gas Tank- Select Vehicle by Model
- Select Vehicle by VIN
Select Vehicle by Model
orMake
Model
Year
Select Vehicle by VIN
For the most accurate results, select vehicle by your VIN (Vehicle Identification Number).
8 Fuel Tanks found

Chrysler 300 Fuel Tank Part Number: 68258722AD
$819.91 MSRP: $1250.00You Save: $430.09 (35%)Ships in 1-2 Business Days
Chrysler 300 Fuel Tank Part Number: 68494592AB
$935.94 MSRP: $1430.00You Save: $494.06 (35%)Ships in 1-2 Business Days
Chrysler 300 Fuel Tank Part Number: 68258723AD
$1221.03 MSRP: $1850.00You Save: $628.97 (34%)Ships in 1-2 Business Days
Chrysler 300 Fuel Tank Part Number: 68051891AB
$676.26 MSRP: $1020.00You Save: $343.74 (34%)Chrysler 300 Fuel Tank Part Number: 68051910AB
Chrysler 300 Fuel Tank Part Number: 68142803AE
Chrysler 300 Fuel Tank Part Number: 68142792AF
Chrysler 300 Fuel Tank Part Number: 68102695AG
Chrysler 300 Fuel Tank
Choose OEM Fuel Tank that meet Chrysler factory standards. Chrysler designs and tests every component for precision and durability. Each Fuel Tank follows strict manufacturing steps to lock in quality and fit. If your Chrysler 300 matters to you, OEM parts make the smart choice. You'll get the exact look, feel, and performance you expect. Shop genuine 300 parts at the highly competitive prices online. Enjoy a manufacturer's warranty, a hassle-free return policy, and rapid delivery. No more guesswork with off brands. Get genuine parts with exact fit and true factory performance. Shop with confidence today at JeepPartsDeal.com.
Electric fuel pump: Chrysler 300 automobiles have the Fuel Tank act as a receptacle for fuel together with serving as a conduit that supplies fuel to the car's engine, also located in the fuel tank is the fuel gauge sender. Made to feature the tackle of harsh environment situations, the Chrysler 300 Fuel Tank has been fitted with baffles with an aim of reducing both, fuel and noise movement, and the EVAP system is supplemented by the chassis mounted Fuel Tank for prevention of vapour loss. Chrysler 300 Fuel Tanks have been manufactured form both metals and plastic, The metal ones are made by stamping and welding it from steel or aluminum while the plastic one are made from High Density Polyethylene (HDPE). Both types are somewhat beneficial and weak in their ways, metal can start to rust and become corroded while plastic can crack when under pressure. As for the Chrysler 300 Fuel Tank we have replacement solutions as an product, focusing on the original fitment and quality for the vehicle.
Chrysler 300 Fuel Tank Parts and Q&A
- Q: How to Maintain and Fix a Fuel Tank on Chrysler 300?A:To begin maintenance or repairs of the fuel tank unit, first release the fuel pressure by using the procedure in the manual, then take the negative Battery Cable off. Pump the tank down to just below 5/8 if you don't want fuel to leak while you unscrew the lock-rings. Use a 30" nylon tube to remove some gas from the tank by working the tube hard through the tight-fit filler tube. To open the modules, push the back lower rear seat back and up, then lift back the foam pad covering the storage access door below. Unplug the electrical connector from the left side module and note where each end goes. Spray special tool #9340 on the left side module lock ring, then pull the lock out to remove the panel and ensure the fuel does not drain inside the vehicle. Lift the module's detachable top half from the bottom by removing the connectors. Take apart the module's fuel level sending card, fuel return lines and fuel supply line by holding in and pulling up on the tab of each fuel line. Lift the fuel return line out of the lower module to disconnect it; it will unsnap from the unit. Place the module at a tilt to pour out any extra fuel in the reservoir after you have removed it from the vehicle.
- Q: How to Maintain and Repair a Fuel Tank on Chrysler 300?A:When working on the tank, first release the fuel pressure and disconnect the negative Battery Cable. Be sure the fuel is below 5/8 of the length so that it does not cause spills as the module disconnects. Take out partial gas by attaching a hard nylon tube with a 30° cut to the check valve to open it. Pull back and up the lower Seat Cushion, then lift open the back cover by folding the foam cushion behind it. Remove the electrical connector from the left side module and record its correct installation directions. To drain the fuel on the left, remove ring #9340 from the left side module and raise the module enough to place the tip into the tank. Remove the electrical connectors from the module top and lift away the half of the module including the fuel level sending card, return fuel lines and supply fuel line. Remove the fuel line by pushing the button on the release tab and pull out the fuel return line from the lower module. Rotate the module sideways to discharge any fuel left in the tank and take it out of the vehicle. To install the pump, insert the module into the tank again, set up the return lines from the tank and check that the fuel feed line is properly locked. Plug the electrical wires back into the bottom of the module top and attach the module top to the bottom, ensuring the logo is upward. Use tool #9340 to tighten the module with the lock ring, hook up the left side electrical connector and position the plastic access cover in place. Figure 5: Fold the foam pad back into its place, set up the back lower seat cushion, fill the fuel tank and link the negative battery cable. Afterward, use your scan tool to open the fuel system and look for any leaks.

Related Chrysler 300 Parts
 Chrysler 300 Fuel Pump
 Chrysler 300 Gas Cap
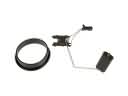 Chrysler 300 Fuel Level Sensor
 Chrysler 300 Fuel Filler Hose
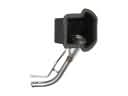 Chrysler 300 Fuel Filler Neck
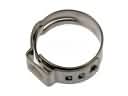 Chrysler 300 Fuel Line Clamps
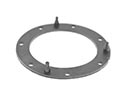 Chrysler 300 Fuel Pump Gasket
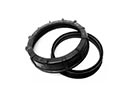 Chrysler 300 Fuel Pump Seal
 Chrysler 300 Fuel Pump Tank Seal
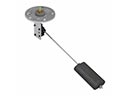 Chrysler 300 Fuel Sending Unit
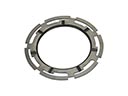 Chrysler 300 Fuel Tank Lock Ring
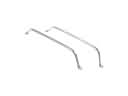 Chrysler 300 Fuel Tank Strap