JeepParts
My Garage
My Account
Cart
OEM Chrysler Town & Country Control Arm
Suspension Arm- Select Vehicle by Model
- Select Vehicle by VIN
Select Vehicle by Model
orMake
Model
Year
Select Vehicle by VIN
For the most accurate results, select vehicle by your VIN (Vehicle Identification Number).
11 Control Arms found


Chrysler Town & Country Lower Control Arm, Front Driver Side Part Number: 4766911AL
$224.32 MSRP: $343.00You Save: $118.68 (35%)Ships in 1-2 Business Days


Chrysler Town & Country Lower Control Arm, Front Passenger Side Part Number: 4766910AL
$224.32 MSRP: $343.00You Save: $118.68 (35%)Ships in 1-2 Business Days
Chrysler Town & Country Lower Control Arm, Front Passenger Side Part Number: 4743834AB
$411.31 MSRP: $843.00You Save: $431.69 (52%)Ships in 1-2 Business DaysChrysler Town & Country Lower Control Arm, Front Passenger Side Part Number: 4743376AD
$716.64Ships in 1-2 Business Days
Chrysler Town & Country Control Arm, Front Part Number: 4728885
Chrysler Town & Country Control Arm Part Number: 4728884

Chrysler Town & Country Lower Control Arm Part Number: 4694761AC
Chrysler Town & Country Lower Control Arm Part Number: 4694760AC
Chrysler Town & Country Control Arm
Choose OEM Control Arm that meet Chrysler factory standards. Chrysler designs and tests every component for precision and durability. Each Control Arm follows strict manufacturing steps to lock in quality and fit. If your Chrysler Town & Country matters to you, OEM parts make the smart choice. You'll get the exact look, feel, and performance you expect. Shop genuine Town & Country parts at the highly competitive prices online. Enjoy a manufacturer's warranty, a hassle-free return policy, and rapid delivery. No more guesswork with off brands. Get genuine parts with exact fit and true factory performance. Shop with confidence today at JeepPartsDeal.com.
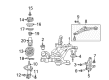
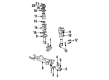
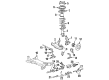
The Control Arm of Chrysler Town & Country vehicles are used to connect the frame of the car to the wheels to enable the movement or swaying of the suspension in accordance to the road. This component is used to enable the powers vertical motion of the wheel while ensuring a correct direction and control is maintained. Control Arms used in Chrysler Town & Country models have incorporated stamped steel, and also latest cast iron or aluminum forms which provide greater strength and weigh less than the steel ones. Stamped steel Control Arms are strong, however, they are very sensitive to rusting and this compromises their strength. On the other hand, latest models in the market are designed to deliver high levels of performance and are more robust in construction using DOM Tubular Steel and aluminum. These high-performance control arms are ideal for those who Like. This to drive fast and modified for a superior grip for the Chrysler Town & Country whether on highway or street use.
Chrysler Town & Country Control Arm Parts and Q&A
- Q: How to Remove and Replace the Front Lower Control Arm on Chrysler Town & Country?A:Raising and supporting the vehicle should be your first step in changing the front lower control arm. Take out all three of the wheel mounting nuts and lift off the whole tire and wheel assembly. After slicing, remove the knuckle. On vehicles fitted with a 62TE (6-speed) automatic transaxle, disconnect the front and rear engine mount through-bolts and move the front and transaxle section of the engine forward. After placing the engine and transaxle in this location, first unbolt the front lower control arm from the crossmember and then the rear nut and bolt that secure it too. Lastly, take off the lower control arm.
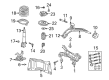
- Q: How to Install the Control Arm Assembly on Chrysler Town & Country?A:After preparing the assembly, put it in the front suspension cradle crossmember and get the bushings into their right spots. Secure the front bushing of the lower control arm to the front suspension cradle crossmember using a new pivot bolt, but don't tighten it for now. Once that's done, fit the reinforcement under the passenger-side cradle crossmember with bolts and tighten them to 153 Nm (113 ft. lbs.) for the M-14 size and 106 Nm (78 ft. lbs.) for the M-12 size. The next step is to push the rear M-10 bolts into the reinforcement from both sides of the lower control arm rear bushings, tightening them to 61 Nm (45 ft. lbs.). Attach the two bolts and bushings on the reinforcement and cradle crossmember to the vehicle body and tighten them to 163 Nm (120 ft. lbs.). Place the cooler in position, attach it and tighten its bolts until the torque shows 11 Nm (100 inch lbs.). Set up the Steering Knuckle, brake rotor and brake caliper on the axle and place jack stands under the control arms as close as possible to the ball joints. After that, bring down the vehicle by lifting it off the wheel and resting it on the stands. Tighten the bolt on the lower front arm at 183 Nm (135 ft. lbs.), then install the tire and wheel, tightening all its wheel mounting stud nuts halfway to 67 Nm (50 ft. lbs.) and then tighten them to 135 Nm (100 ft. lbs.) afterwards following the same sequence. After that, jack the vehicle up, take away the jack stands, drive it down to the swivel part and make sure to adjust the alignment if you must.


Related Chrysler Town & Country Parts
 Chrysler Town & Country Axle Pivot Bushing
 Chrysler Town & Country Bump Stop
 Chrysler Town & Country Coil Spring Insulator
 Chrysler Town & Country Coil Springs
 Chrysler Town & Country Crossmember Bushing
 Chrysler Town & Country Leaf Spring Plate
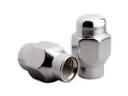 Chrysler Town & Country Lug Nuts
 Chrysler Town & Country Shock Absorber
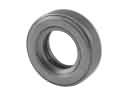 Chrysler Town & Country Strut Bearing
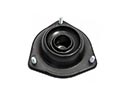 Chrysler Town & Country Strut Mounts
 Chrysler Town & Country Sway Bar Link Bushing
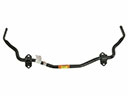 Chrysler Town & Country Sway Bars
Browse Chrysler Town & Country Control Arm by Years
2016
2015
2014
2013
2012
2011
2010
2009
2008
2007
2006
2005
2004
2003
2002
2001
2000
1999
1998
1997
1996
1995
1994
1993
1992
1991
1988
1987
1986
1985
1984