JeepParts
My Garage
My Account
Cart
OEM Chrysler Voyager Antenna Cable
Radio Antenna Cable- Select Vehicle by Model
- Select Vehicle by VIN
Select Vehicle by Model
orMake
Model
Year
Select Vehicle by VIN
For the most accurate results, select vehicle by your VIN (Vehicle Identification Number).
5 Antenna Cables found

Chrysler Voyager Antenna Part Number: 6ZP28GW7AA
$135.96 MSRP: $214.00You Save: $78.04 (37%)Ships in 1-3 Business Days
Chrysler Voyager Body & Cable Part Number: 68224760AA
$16.70 MSRP: $24.75You Save: $8.05 (33%)Ships in 1-2 Business Days
Chrysler Voyager Antenna Cable Part Number: 5082002AA
$2.71 MSRP: $15.55You Save: $12.84 (83%)Ships in 1-2 Business Days


Chrysler Voyager Antenna Cable Part Number: 4685765AE
Chrysler Voyager Cable Extension Part Number: 4685598AC
Chrysler Voyager Antenna Cable
Choose OEM Antenna Cable that meet Chrysler factory standards. Chrysler designs and tests every component for precision and durability. Each Antenna Cable follows strict manufacturing steps to lock in quality and fit. If your Chrysler Voyager matters to you, OEM parts make the smart choice. You'll get the exact look, feel, and performance you expect. Shop genuine Voyager parts at the highly competitive prices online. Enjoy a manufacturer's warranty, a hassle-free return policy, and rapid delivery. No more guesswork with off brands. Get genuine parts with exact fit and true factory performance. Shop with confidence today at JeepPartsDeal.com.
Within Chrysler minivans the Voyager Antenna Cable operates as a fundamental element which reinforces both reliability and performance standards. This Antenna Cable functions as the connection between radio antenna and radio receiver which delivers the optimal audio signals for passengers to enjoy their entertainment along with their communication ability. Multiple Voyager models can utilize the Antenna Cable for various antennas which includes internal types and external types and satellite types that have specifically been designed to deliver maximum signal reception. The company demonstrates its dedication to appearance as well as functionality by switching from adjustable large antennas to modern compact antenna designs. Signal maintenance depends heavily on the Antenna Cable because signal degradation results from any broken connection which requires immediate replacement to restore quality performance. The reliable nature of this system remains crucial for Chrysler Voyager owners who use the vehicle for everyday travel and extended distance venturing because communication and entertainment need constant access during their journeys. The Chrysler Voyager Antenna Cable distinguishes itself in the automotive market by featuring strong construction and modern technology integration for delivering exceptional sound quality to users. The Chrysler Voyager remains a consumer preferred choice with more than 12 million units sold because the brand maintains its dedication to drive safety through the Antenna Cable.
Chrysler Voyager Antenna Cable Parts and Q&A
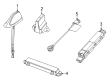
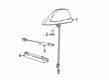
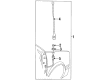
- Q: How to Maintain and Fix an Antenna Cable on Chrysler Voyager?A:The first step in repairing or serving the antenna cable is to remove the Glove Box from the instrument panel. Take out the antenna cable connector from the extension cable and get the right kick panel out. Lift the rubber grommet insulator away from the door hinge pillar and then pull the antenna cable through the pillar and into the area between the door hinges. Elevate and secure the vehicle on safety stands and after that, remove both the front wheel and the front wheelhouse splash shield. After that, free the Antenna Mast from the base. After removing the plastic cap from the cap nut, unscrew the cap nut securing the antenna with the tool and get the antenna base from under the front fender. Take out the glove box, disconnect the end of the antenna extension cable from the antenna cable and get rid of the cable clip holding the extension in place by the HVAC unit. Take the radio out when needed, disconnect the extension cable from behind the radio and pull the cable from the vehicle after you have it. Install the antenna base under the front fender, securing it using the special cap nut. After that, place the plastic cap on top of the cap nut. Set up the mast of the antenna to the base and put the splash shield and front wheel back on before you lower the vehicle. Pass the antenna cable via the hinge hole, slide the grommet into the door hinge pillar and bolt the kick panel in place. Link the cable from the antenna to the extension cable and insert the glove box once again. For this installation, wind the extension cable around the transmission tower, link it to the back of the radio and reposition the radio. Connect the cable hanger clip to the HVAC unit and then connect the antenna cable's extension to it. Next, reattach the glove box finaly.
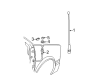
- Q: How to Replace the Antenna Cable on the Instrument Panel on Chrysler Voyager?A:Detach and isolate the battery's negative cable before you begin to remove the antenna cable. Get rid of the Glove Box and cut the extension cable from the end of the antenna cable. After that, pull away the cable hanger clip from the unit and pull out the radio when it prevents access to the extension cable. Pull the extension cable out of the radio's back and disconnect it from the vehicle. The first step is to install the extension cable back into the vehicle and attach it to the radio at the back. Mount the radio, attach the clip of the cable hanger to the HVAC unit and link the extension cable end to the end of the antenna cable. At the end, install the glove box once more and hook up the battery negative cable.

Related Chrysler Voyager Parts
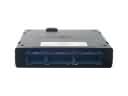 Chrysler Voyager Body Control Module
 Chrysler Voyager Air Bag Control Module
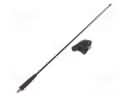 Chrysler Voyager Antenna
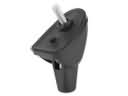 Chrysler Voyager Antenna Base
 Chrysler Voyager Antenna Mast
 Chrysler Voyager Brake Light Switch
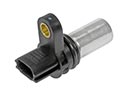 Chrysler Voyager Camshaft Position Sensor
 Chrysler Voyager Clock Spring
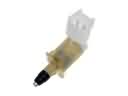 Chrysler Voyager Door Jamb Switch
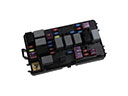 Chrysler Voyager Fuse
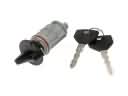 Chrysler Voyager Ignition Lock Assembly
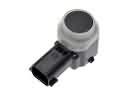 Chrysler Voyager Parking Assist Sensor