JeepParts
My Garage
My Account
Cart
OEM Chrysler Voyager Crankshaft
Crank Shaft- Select Vehicle by Model
- Select Vehicle by VIN
Select Vehicle by Model
orMake
Model
Year
Select Vehicle by VIN
For the most accurate results, select vehicle by your VIN (Vehicle Identification Number).
4 Crankshafts found


Chrysler Voyager Crankshaft Part Number: 4621983AD
$374.75 MSRP: $1045.00You Save: $670.25 (65%)Ships in 1-2 Business Days

Chrysler Voyager Crankshaft Part Number: 4781643AA
$539.13 MSRP: $818.00You Save: $278.87 (35%)Ships in 1-2 Business Days

Chrysler Voyager Crankshaft Part Number: 4893950AC
$646.43 MSRP: $975.00You Save: $328.57 (34%)Ships in 1-2 Business Days

Chrysler Voyager Crankshaft Part Number: 4621917
Chrysler Voyager Crankshaft
Choose OEM Crankshaft that meet Chrysler factory standards. Chrysler designs and tests every component for precision and durability. Each Crankshaft follows strict manufacturing steps to lock in quality and fit. If your Chrysler Voyager matters to you, OEM parts make the smart choice. You'll get the exact look, feel, and performance you expect. Shop genuine Voyager parts at the highly competitive prices online. Enjoy a manufacturer's warranty, a hassle-free return policy, and rapid delivery. No more guesswork with off brands. Get genuine parts with exact fit and true factory performance. Shop with confidence today at JeepPartsDeal.com.
The Chrysler Voyager Crankshaft stands as a main vehicle element celebrated for delivering reliable performance by converting engine piston back-and-forth movement into engine rotation. Various Chrysler Voyager models receive this crankshaft design because it exists in cast iron for engines with lower output power and in forged steel for engines with high horsepower requirements which delivers durability together with accuracy throughout the entire lineup. The Chrysler Voyager Crankshaft endures the entire vehicle lifetime through appropriate maintenance steps to provide enhanced engine efficiency as well as safety. Changes should occur in timely fashion to avoid critical engine problems caused by dust accumulation and reduced oil flow. Since the Chrysler Voyager achieved over 12 million unit sales this demonstrates that high-quality components including the crankshaft serve as keys to maintaining brand reputation. This crankshaft enables top-level vehicle performance and drives the overall driving experience as a distinguished component of automotive technology. The Chrysler Voyager Crankshaft demonstrates model model compatibility to demonstrate the company's dedication toward innovation and reliable performance which provides drivers extended periods of smooth safe journeys.
Chrysler Voyager Crankshaft Parts and Q&A
- Q: How to Remove and Replace a Crankshaft in an Engine on Chrysler Voyager?A:Before you get rid of the crankshaft, you have to remove the engine assembly from the vehicle and separate it from the transaxle. Take off the flex plate and rear oil seal on the crankshaft after that, then set the engine on a repair stand. Release the oil from the engine and remove the Oil Filter, after that remove the Oil Pan and its supporting bracket. You have to remove the covers for the crankshaft damper and Timing Belt, the timing belt, the crankshaft sprocket and the oil pump. You need to take out the cylinder head if replacements for the Piston or connecting rod are called for. Label every cap on a connecting rod using a permanent ink or paint marker to avoid using a number stamp or punch. Making sure not to harm the fracture rod and cap surfaces, remove all of the connecting rod bolts and caps and avoid using them a second time. Loosen the bolts in the bedplate and tap gently on the bedplate until it comes off, dropping each pin as you go to avoid breaking it. Remove the crankshaft from the cylinder block, making sure you don't injure the main bearings or journals. Wear, taper and scoring on the crankshaft journals must be inspected and made sure to remain under the limits they were designed for. Any grinding should not exceed 0.305 mm (0.012 in.) below the journal diameter. Do not use a grinder on the thrust faces of No. 3 main bearing or the crank pin or bearing fillets. When you finish grinding, buff away the sharp edges on the oil passages and clean everything to make certain the final polish on the crankshafts faces the normal direction of rotation. While installing, make sure to place the main bearing's upper shells, with the groove facing the cylinder block, so matching oil holes are aligned. Don't get oil on the part of the bedplate where it attaches to the crankshaft, clean the oil off the bearings and journals and then use just the recommended sealer on the bedplate to fix the crankshaft. Put a 1.5 to 2.0 mm (0.059 to 0.078 in.) ribbon of Bed Plate Sealant on the cylinder block, drop in the lower main bearings and carefully make sure the bearing tabs fit into the slots of the bedplate. Put the main bearing/bedplate into the engine block, coat the threads of bolts 11, 17 and 20 using clean engine oil and first tighten the bedplate to the cylinder block block finger tight, then continue until it contacts the block. Correct positioning of the thrust bearing can be assured by moving the crankshaft until the number 4 piston is at TDC. Then, move the crankshaft in both directions to its limits and wedge a suitable tool between the rear of the block and the rear counterweight. Place and secure bolts (1-10) in order, then tighten them to 41 Nm (30 ft. lbs.), remove the wedge tool and tighten the bolts once more to 41 Nm (30 ft. lbs.). After turning each bolt 1/4 turn, fit the main bearing bedplate to bolts 11 and 20 and tighten all 20 of them to 28 Nm (250 in. lbs.). After putting in the main bearing bedplate, make sure the crankshaft turning torque is no greater than 5.6 Nm (50 in. lbs.). Set the connecting rod bearings and caps and make sure not to use the same bolts that were originally on the rods; next, torque them to 27 Nm (20 ft. lbs.) plus a quarter turn. Replace the balance shafts and housing assembly, oil pump and cylinder head if you had to remove them. Put on the timing belt rear cover, crankshaft sprocket, timing belt, timing belt front covers, engine mount support bracket, oil pan, oil filter, crankshaft rear oil seal and flex plate, using Mopar Lock & Seal Adhesive on the bolts and tightening them to 95 Nm (70 ft. lbs.). Next, attach the transaxle to the engine, tighten the bolts to 101 Nm (75 ft. lbs.) and fasten the engine assembly back in its place.

Related Chrysler Voyager Parts
 Chrysler Voyager Camshaft
 Chrysler Voyager Camshaft Seal
 Chrysler Voyager Cylinder Head
 Chrysler Voyager Motor And Transmission Mount
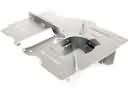 Chrysler Voyager Oil Pan Baffle
 Chrysler Voyager Piston Ring Set
 Chrysler Voyager Timing Belt Idler Pulley
 Chrysler Voyager Timing Chain Guide
 Chrysler Voyager Timing Cover
 Chrysler Voyager Timing Cover Gasket
 Chrysler Voyager Variable Timing Solenoid
 Chrysler Voyager Variable Timing Sprocket