JeepParts
My Garage
My Account
Cart
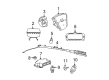
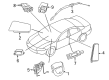
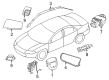
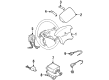
OEM Dodge Avenger Clock Spring
Spiral Cable Clock Spring- Select Vehicle by Model
- Select Vehicle by VIN
Select Vehicle by Model
orMake
Model
Year
Select Vehicle by VIN
For the most accurate results, select vehicle by your VIN (Vehicle Identification Number).
6 Clock Springs found


Dodge Avenger Clockspring Part Number: 5156106AG
$527.85 MSRP: $769.00You Save: $241.15 (32%)


Dodge Avenger Clockspring Part Number: 68003217AF
$241.33 MSRP: $356.00You Save: $114.67 (33%)
Dodge Avenger Clockspring Part Number: 5156133AB
$345.79 MSRP: $504.00You Save: $158.21 (32%)Ships in 1-3 Business Days

Dodge Avenger Clockspring Part Number: 68024154AB

Dodge Avenger Clockspring Part Number: 8619A329
Dodge Avenger Clockspring Part Number: 5156138AC
Dodge Avenger Clock Spring
Choose OEM Clock Spring that meet Dodge factory standards. Dodge designs and tests every component for precision and durability. Each Clock Spring follows strict manufacturing steps to lock in quality and fit. If your Dodge Avenger matters to you, OEM parts make the smart choice. You'll get the exact look, feel, and performance you expect. Shop genuine Avenger parts at the highly competitive prices online. Enjoy a manufacturer's warranty, a hassle-free return policy, and rapid delivery. No more guesswork with off brands. Get genuine parts with exact fit and true factory performance. Shop with confidence today at JeepPartsDeal.com.
Dodge Avenger Clock Spring Parts and Q&A
- Q: How to Remove and Replace a Clock Spring Assembly on Dodge Avenger?A:To start, turn off the air bag system, detach the negative Battery Cable and wait two minutes before you proceed. The service replacement Clock Spring is supplied with a pre-inserted, locking pin. This pin should be in place until the Steering Wheel is fixed. If you take out the locking pin too early, you must perform the Clock Spring centering so that the SAS and steering system are aligned; otherwise, wrong installation can ruin the Clock Spring and lead to the ESP turning off. Always make sure the steering wheel is straight and locked before you begin. During a Clock Spring change, relay the multifunction switch jumper harness from the previous unit or use a new one. Move the Clock Spring onto the steering column upper shaft and then hook up the three instrument panel wire harness connectors to the back of the Clock Spring case. Attach the Clock Spring onto the steering column lock housing and fix it with three screws going lower right, upper left and finally upper right, tightening the screws to 3 Nm (27 in. lbs.). Fasten the left and right multi-function switches onto the Clock Spring and then set the upper and lower shrouds onto the steering column. Raise the steering column as high as it will go and lock it and then install the steering wheel. Once the rest is done, pull out the plastic locking pin from the Clock Spring rotor and leave the battery negative cable unconnected during testing so that you avoid being injured.
- Q: How to Install a New Clock Spring Assembly on Dodge Avenger?A:Before installing the Clock Spring, you must unplug and isolate the battery's negative cable and then wait two minutes for the system capacitor to release its charge. Until the Steering Wheel is in place, the molded plastic pin in the service replacement Clock Spring must stay centered. Move the steering wheel to a straight position and correctly lock it before driving off. When swapping the Clock Spring, either move the multifunction switch jumper harness with the old unit or attach a different one to the new Clock Spring. Take the Clock Spring down over the steering column longer shaft and then secure the three wires from the instrument panel into the case at the back of the Clock Spring. Put the Clock Spring into the notches of the steering column lock housing and hold it there with three screws, put them in lower right, upper left and upper right order and tighten these to 3 Nm. Put the left and right multifunction switches back on the Clock Spring and also replace the upper and lower shrouds onto the steering column. Carry the steering column all the way to the 3 o'clock position and lock it. Reconnect the steering wheel to its mount, then take out the plastic pin that holds the Clock Spring rotor in place to ensure continuing centering. Don't attach the negative Battery Cable until you have conducted the system test to prevent severe danger.


Related Dodge Avenger Parts
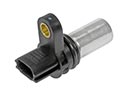 Dodge Avenger Camshaft Position Sensor
 Dodge Avenger Airbag
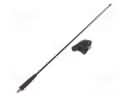 Dodge Avenger Antenna
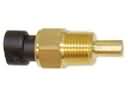 Dodge Avenger Coolant Temperature Sensor
 Dodge Avenger Air Bag Control Module
 Dodge Avenger Air Bag Sensor
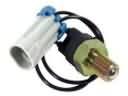 Dodge Avenger Back Up Light Switch
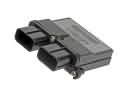 Dodge Avenger Occupant Detection Sensor
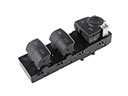 Dodge Avenger Power Window Switch
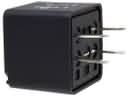 Dodge Avenger Relay
 Dodge Avenger Spark Plug Wire
 Dodge Avenger Turn Signal Flasher