JeepParts
My Garage
My Account
Cart
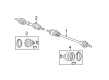
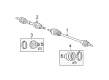
OEM Dodge Caravan CV Boot
Axle Boot- Select Vehicle by Model
- Select Vehicle by VIN
Select Vehicle by Model
orMake
Model
Year
Select Vehicle by VIN
For the most accurate results, select vehicle by your VIN (Vehicle Identification Number).
18 CV Boots found

Dodge Caravan Boot Kit, Outer Part Number: 4641331
$7.10 MSRP: $9.00You Save: $1.90 (22%)Ships in 1-2 Business Days

Dodge Caravan Boot Kit, Inner Part Number: 4641337
$16.81 MSRP: $21.30You Save: $4.49 (22%)Ships in 1-2 Business Days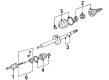
Dodge Caravan Boot Kit, Outer Part Number: 5212868
$19.61 MSRP: $24.85You Save: $5.24 (22%)Ships in 1-2 Business Days

Dodge Caravan Boots, Rear Outer Passenger Side Part Number: 5016941AA

Dodge Caravan Inner Boot, Passenger Side Part Number: 4762484

Dodge Caravan Inner Boot Part Number: 4641339

Dodge Caravan Axle Boots Part Number: 4641245
Dodge Caravan Outer Boot Part Number: 4641164
Dodge Caravan Boot Kit Part Number: 4505907
Dodge Caravan Boot Kit Part Number: 4384825
Dodge Caravan Boot Kit Part Number: 4384704

Dodge Caravan Inner Boot, Front Passenger Side Part Number: 5017781AA
Dodge Caravan Outer Boot, Front Passenger Side Part Number: 5161251AA
Dodge Caravan Outer Boot Part Number: 4778105AB
Dodge Caravan Outer Boot Part Number: 4778108AB
Dodge Caravan CV Boot
Choose OEM CV Boot that meet Dodge factory standards. Dodge designs and tests every component for precision and durability. Each CV Boot follows strict manufacturing steps to lock in quality and fit. If your Dodge Caravan matters to you, OEM parts make the smart choice. You'll get the exact look, feel, and performance you expect. Shop genuine Caravan parts at the highly competitive prices online. Enjoy a manufacturer's warranty, a hassle-free return policy, and rapid delivery. No more guesswork with off brands. Get genuine parts with exact fit and true factory performance. Shop with confidence today at JeepPartsDeal.com.
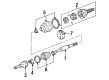
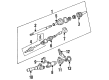
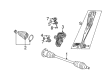
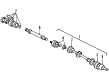
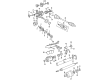
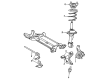
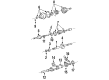
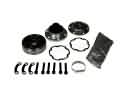
The CV Boot of Dodge Caravan vehicles is an assembly that is meant to shield the Constant Velocity (CV) joints that confer power from the transaxle to the wheels. This flexible rubber or plastic boot hold the required lubricant for the CV joint and also keeps the dirt and dust away from the joint to work perfectly. Different kinds of CV joints are used in Dodge Caravan models, Rzeppa joints for the outer ends while using tripod or double offset joints at the inner ends. Different types of CV joints are used in the car, and each has specific property in the function, the outer CV joints work at higher angles of deflection, while the inboard CV joints deal with changes in length of the CV shaft due to suspension movement. The proper inspection of CV Boot should be conducted frequently because cracking or tearing of the boot may hinder CV joint from operating and hence affecting the functionality of the vehicle.
Dodge Caravan CV Boot Parts and Q&A
- Q: How to Remove a CV Boot from a Driveshaft on Dodge Caravan?A:Before taking sealing boots of driveshafts, the driveshaft assemblies must first be disconnected from the car. Since there are no locks inside the tripod joints, pulling on the interconnecting shaft to free the tripod housing from the stub shaft can damage the sealing boots there. The first task is to take out the driveshaft from the car that needs its boot replaced. Then, take off the large clamp holding the inner tripod joint boot to the tripod joint housing and remove the small clamp securing the boot to the interconnecting shaft shaft as well. After that, pull the boot off the tripod housing and down the shaft. When you take off the tripod joint housing, support the bearings to avoid them falling out. Slide the tripod joint housing off the spider and interconnecting shaft and then take off the ring that locks the spider assembly to the shaft. If the spider assembly does not unscrew by hand, use a brass drift and tap it close to the tripod without contacting its outer bearings. Carefully pull off the sealing boot from the interconnecting shaft, clean and check the whole spider assembly, tripod joint housing and shaft for signs of wear; if parts are excessively worn, replacements must be used because the component parts cannot be serviced. If you are replacing the old sealing boot, choose one that is made from the same type of material; silicone rubber for high heat or Hytrel if it is not for a very hot job. Put the inner tripod joint seal boot retaining clamp around the interconnecting shaft first, then attach the replacement sealing boot over the shaft so its raised bead fits into the specialized groove on the shaft. Install the spider assembly on the interconnecting shaft, moving it forward enough that the retaining snap ring on the spider snaps into the groove at the end of the shaft. The seal boot service package includes grease; apply about half the amount to the tripod housing and the other half to the inside of the seal boot. Placed the tripod housing onto both parts, aligning it with the spider first, then move the shaft over it. Place the inner tripod joint seal boot in position on the interconnecting shaft and tighten it using Special Tool C-4975-A so it remains even and undisturbed. Place the sealing boot in the tripod housing retaining groove, fasten the seal boot clamp and secure it. To release air from the tripod joint socket, place a trim stick between the tripod and the sealing boot, making sure it doesn't touch the sealing boot. Setup the interconnecting shaft in the tripod joint with the help of the trim stick, then remove the trim stick to get both tripod legs to equal height. Put the boot on the tripod base so the three lobes fit properly into the depths in the base. To use a crimp type boot clamp, secure the sealing boot around the tripod housing by closing the jaws with the crimper until everything is secure. For low profile clamps, use the included clamp locking tool to lock the top part of the clamp behind the two tabs at the lower end. Next, secure the driveshaft to its position on the car.
- Q: How to Install a CV Boot on a Constant Velocity Joint on Dodge Caravan?A:You should start with the inner CV joint seal boot retaining clamp and slide it over the interconnecting shaft. Afterward, put on the new inner CV joint sealing boot, pointing out that the raised bead on that end should fit into the matching groove on the shaft. After that, mount the spider assembly onto the interconnecting shaft, leaving some clearance so the spider retaining snap-ring can go on; avoid touching the outer tripod bearings as you insert it. If the spider assembly won't fully install by hand, soft-tap the spider body with a brass drift. After the spider assembly is fitted, slip the retaining snap-ring into the groove at the end of the shaft, making sure it's entirely seated. Install the inner CV joint seal boot clamp around the sealing boot and place C-4975-A over the bridge of the clamp until the sealing boots is crimped and the seal remains unbroken. Place the sealing boot into the tripod housing retaining groove and aim the trilobal boot so that it fits into each tripod housing recess. Use a trim stick to provide a gap between the CV joint housing and the boot insert, so you don't damage the system while letting out fluid. Remember to put the trim stick in place, insert the interconnecting shaft into the tripod joint housing and remove the trim stick to help balance pressure inside the CV joint. After that, attach the CV joint sealing boot firmly to the CV joint using the right process for the type of clamp. When using the C-4975-A crimping tool, cover the bridge of the clamp and squeeze the tool. With the low profile boot clamp, insert the two prongs from the Clamp Locking Tool into the holes, squeeze until the top band latches over the lower band's tabs and let go. Put the half shaft into the boot after securing it and fit it back into the vehicle.


Related Dodge Caravan Parts
 Dodge Caravan CV Joint
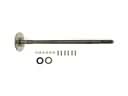 Dodge Caravan Axle Shaft
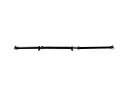 Dodge Caravan Drive Shaft
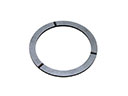 Dodge Caravan Mainshaft Washer
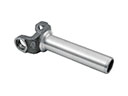 Dodge Caravan Slip Yoke
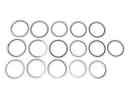 Dodge Caravan Transfer Case Shim
Browse Dodge Caravan CV Boot by Years
2007
2006
2005
2004
2003
2002
2001
2000
1999
1998
1997
1996
1995
1994
1993
1992
1991 1990
1989
1988
1987
1986
1985
1984