JeepParts
My Garage
My Account
Cart
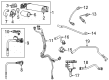
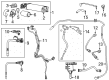
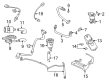
OEM Dodge Charger EGR Tube
EGR Hose- Select Vehicle by Model
- Select Vehicle by VIN
Select Vehicle by Model
orMake
Model
Year
Select Vehicle by VIN
For the most accurate results, select vehicle by your VIN (Vehicle Identification Number).
7 EGR Tubes found


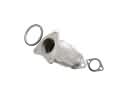
Dodge Charger Purge Line Part Number: 68057481AB
$26.22 MSRP: $38.70You Save: $12.48 (33%)Ships in 1-2 Business Days


Dodge Charger Vent Hose Part Number: 68083928AC
$52.65 MSRP: $78.25You Save: $25.60 (33%)Ships in 1-2 Business Days


Dodge Charger Intake Tube Part Number: 4593580AC
$199.89 MSRP: $297.00You Save: $97.11 (33%)Ships in 1-3 Business Days
Dodge Charger Pressure Sensor Part Number: 68410852AA
$54.51 MSRP: $81.10You Save: $26.59 (33%)Ships in 1-2 Business Days

Dodge Charger EGR Tube Part Number: 4591916AC

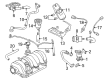
Dodge Charger EGR Tube Part Number: 4591876AE


Dodge Charger EGR Tube Part Number: 4593582AB
Dodge Charger EGR Tube
Choose OEM EGR Tube that meet Dodge factory standards. Dodge designs and tests every component for precision and durability. Each EGR Tube follows strict manufacturing steps to lock in quality and fit. If your Dodge Charger matters to you, OEM parts make the smart choice. You'll get the exact look, feel, and performance you expect. Shop genuine Charger parts at the highly competitive prices online. Enjoy a manufacturer's warranty, a hassle-free return policy, and rapid delivery. No more guesswork with off brands. Get genuine parts with exact fit and true factory performance. Shop with confidence today at JeepPartsDeal.com.
Thus, the Dodge Charger EGR Tube is a crucial part that speaks for the dependability and power of Dodge Charger series. Intended for the re-circulation of exhaust gases to the engine cylinder, the EGR Tube helps to cut down the emission of a further NOx which is positively good for the engine and the environment it says. This feature is essential in some forms of Charger models because of the bluffing of peak in-cylinder temperatures, which make it possible to maximize the operations of the vehicle's engine. Dodge Charger EGR Tube is designed for several generations of chargers and this makes all generations to have the benefits of this part as it increases efficiency and safety. The EGR Tube requires general maintenance, typically the following may signify it is time for replacement ruff idle or check engine light and etc. Such an outlook is not only helpful in increasing the carriage's lifespan but also in optimising its functionality. Besides, the Dodge EGR Tube is unique in automotive and market sector, as the item is well-built and mechanically reliable, which meet the requirements of the Charger users. Thus, focusing on both performance and environmental issues, the Dodge EGR Tube reflects the brand's concern for creating new breakthroughs, as well as the Charger's position as a powerful and efficient car in the automotive industry.
Dodge Charger EGR Tube Parts and Q&A
- Q: How to Properly Service and Repair an EGR Tube Without Causing Damage for Upper Tube on Dodge Charger?A:When servicing or repairing the EGR tube, start by checking the gasket sealing areas and cleaning them, always avoiding to scratch the surface with metal scrapers to prevent a wrong seal. Avoid getting debris into the EGR Valve during cleaning, since this may create leaks within the valve that cause a more uneven engine idle and lower the vacuum within the manifold. Replacing the intake seal each time the EGR tube is taken off, so that the new seal is placed about 17 mm (0.67 in.) from the flange of the tube. Apply Mopar(R) Rubber Bushing Installation Lube inside the EGR mounting tube on the Intake Manifold, but leave the EGR tube and seal alone. Hook the EGR tube into the intake manifold, watching that neither the silicone rubber seals nor their positions are damaged. Before installing the EGR valve, first put the new gasket between the valve and its tube. When installing, tighten the bolts so they measure 15 Nm (11 ft. lbs.). Even when the EGR tube flange is as much as 2 mm (0.08 in.) away from the intake manifold, it can still attain a good seal, since the design allows for this. Secure the connector to the EGR valve on the portion outside of the EGR tube, to prevent anything from touching it. Remove the bolt holding the turbo section in place, loop the purge solenoid cable near where it was, install the purge solenoid on the bracket and then attach the negative Battery Cable back, ensuring the nut is tightened to 5 Nm (45 in. lbs.).

Related Dodge Charger Parts
 Dodge Charger Catalytic Converter
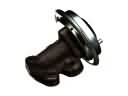 Dodge Charger EGR Valve
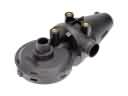 Dodge Charger PCV Valve
 Dodge Charger Vapor Canister
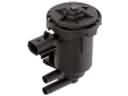 Dodge Charger Canister Purge Valve
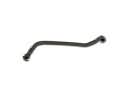 Dodge Charger Crankcase Breather Hose
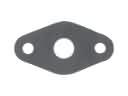 Dodge Charger EGR Tube Gaskets
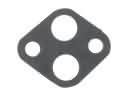 Dodge Charger EGR Valve Gasket
 Dodge Charger Exhaust Clamp
 Dodge Charger Exhaust Flange Gasket
 Dodge Charger PCV Hose
 Dodge Charger PCV Valve Hose