JeepParts
My Garage
My Account
Cart
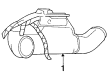
OEM Dodge Distributor
Ignition Distributor- Select Vehicle by Model
- Select Vehicle by VIN
Select Vehicle by Model
orMake
Model
Year
Select Vehicle by VIN
For the most accurate results, select vehicle by your VIN (Vehicle Identification Number).
15 Distributors found


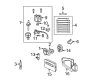
Dodge Distributor Assembly Part Number: 4740339AB
Product Specifications- Other Name: Distributor - Engine; Distributor; Distributor Engine

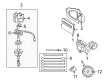
Dodge Distributor Assembly Part Number: 4740338AB
$218.67 MSRP: $322.00You Save: $103.33 (33%)Product Specifications- Other Name: Distributor - Engine; Distributor; Distributor Engine

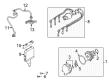
Dodge Distributor Part Number: MD375920
Product Specifications- Other Name: Distributor - Ignition; Distributor Ignition

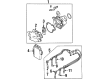
Dodge Distributor Part Number: MD374416
Product Specifications- Other Name: Distributor - Ignition


Dodge Distributor Assembly Part Number: MD345492
Product Specifications- Other Name: Distributor - Engine; Distributor; Distributor Engine

Dodge Distributor Assembly Part Number: MD343019
Product Specifications- Other Name: Distributor - Engine; Distributor; Distributor Engine

Dodge Distributor Assembly Part Number: MD316173
Product Specifications- Other Name: Distributor; Distributor Engine

Dodge Distributor Assembly Part Number: MD314904
Product Specifications- Other Name: Distributor - Engine; Distributor; Distributor Engine

Dodge Distributor Assembly Part Number: MD180936
Product Specifications- Other Name: Distributor


Dodge Distributor Assembly Part Number: MD147874
Product Specifications- Other Name: Distributor
Dodge Distributor Assembly Part Number: MD116211
Product Specifications- Other Name: Distributor
Dodge Distributor Assembly Part Number: R4379233
Product Specifications- Other Name: Distributor - Engine; Distributor; Distributor, Product #4111950-955, Single Pick - Up; Distributor, Service Component Parts
Dodge Distributor Assembly Part Number: R5226575
Product Specifications- Other Name: Distribution Assembly - Single Switch TBI; Distributor; Distributor Assembly, Complete (Single Switch); Ignition Less Cap And Rotor; Turbo (Dual Switch).
- Replaces: R0212146

Dodge Distributor Assembly Part Number: 56027027AC
Product Specifications- Other Name: Distributor - Engine; Distributor
Dodge Distributor
OEM parts sourced directly from Dodge deliver superior quality, long lasting strength, and a precise fit you can trust. Each item goes through strict quality checks to ensure safety, toughness, and performance that matches your factory equipment. At JeepPartsDeal online shop, you'll get top-quality, budget-friendly OEM Dodge Distributor for your vehicle. We focus on giving you a high standard without pushing up the price. Our full selection of genuine factory products comes backed by the original manufacturer's warranty. You'll love our fast delivery, seamless shopping experience, and convenient return policy, saving you all the hassle.
Dodge Distributor strikes match-book speed timed sparks, converting hoarded fuel energy into impetus. Dodge started in a no-nonsense garage and in 1914 they introduced the first series of mass-produced all-steel car bodies that bumped off potholes, dust, and freezing winters. Dodge was able to keep the rough spirit of Dodge alive by fitting the powerplants of the street cars with the HEMI motors and as the car was handed over to ordinary drivers, the grin would be bestowed upon them as is commonly experienced only at the racetrack. It continues to despise silence so its Fratzonic Chambered Exhaust produces a crowd-pleasing roar on its speakers and sound boxes but switches to silence mode when its neighbors seek privacy. Dodge styling remains rude and broad, indicating that the brand prefers to burn rubber, do donuts, laugh at boring commuter chores, and make every weekday commute an act of rebellion. The channels of Distributor transfer high voltage in the coil to each plug precisely when that cylinder requires fire. Breaker points and advance weights were once applied by Distributor, however, solid-state triggers are cleaner and faster now. Distributor carries centrifugal and vacuum advance equipment that varies timing with rising revs and decreasing manifold pressure, and smooths power through the band. Distributor upgrade kits replace wobbling shafts and scalded contacts with more robust internals that reduce the rate of misfires and service life. Such ignition adjustments translate to quicker starts, quicker throttle reactions, higher economy, and time wasted under the hood.
Dodge Distributor Parts and Q&A
- Q: How to overhaul the distributor in 1.5L engine on Dodge Colt?A:To rebuild it for 1.5 L engine, first thread the distributor lightly into a vise with soft cheek. Take out the retaining clips followed by the removal of the distributor cap and the seal ring. Remove the rotor from the rotor shaft and remove two screws of vacuum controller. Disconnect the link of the controller and pull the pin on the breaker base; subsequently the vacuum controller can be taken out. Next, clean the igniter and the black lead wire and take them out from the appliance. You need to unscrew the screw that holds the signal rotor shaft in place and two screws of the breaker plate so as to take off the signal rotor shaft and the breaker plate assembly. Divide the signal rotor shaft from the signal rotor, and take out the two spring retainers and the two governor springs by pliers and, then, remove the two governor weights. Locate the position of the drive gear on the distributor shaft taking special attention not to take it off the wooden block to remove the roll pin using a pin punch. Then before driving housing in, it is necessary to discharge distributor shaft and extract it out of the housing after removing the drive gear and washer from it. To assemble, the distributor shaft should be fitted back into the housing and then the drive gear should be fitted on the shaft at the position indicated by the mark and new roll pin fitted. Replace the governor weights, the governor springs, the spring retainer and then reinsert the signal rotor shaft through the distributor shaft. Insert the breaker plate in a proper manner such that projection 'A' fits into groove 'B' and fasten the retaining screws. Bolt the signal rotor to the rotor shaft with the dowel pin inserted into the groove. Unscrew the igniter and then reinsert the lead wire through the terminal end and screw it back on the igniter attaching screw and the other end should be placed in the breaker plate. Set the air gap between the signal rotor and the igniter pick-up to the said measurement utilizing a flat feeler gauge slid and screw the igniter into its proper position. Last but not the least, solder the vacuum control link on the breaker plate and tighten the two screws of the vacuum controller after that re-install the rotor, seal ring, and the distributor cap.
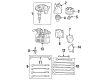
Related Dodge Parts
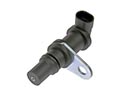 Dodge Crankshaft Position Sensor
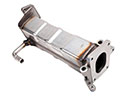 Dodge EGR Cooler
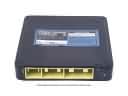 Dodge Engine Control Module
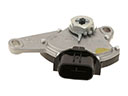 Dodge Neutral Safety Switch
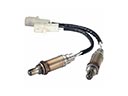 Dodge Oxygen Sensor
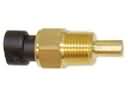 Dodge Coolant Temperature Sensor
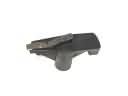 Dodge Distributor Rotor
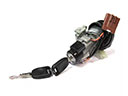 Dodge Igniter
 Dodge Ignition Lock Assembly
 Dodge Ignition Lock Cylinder
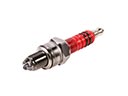 Dodge Spark Plug
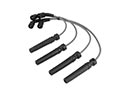 Dodge Spark Plug Wire