JeepParts
My Garage
My Account
Cart
OEM Dodge Grand Caravan Rod Bearing
Engine Connecting Rod Bearing- Select Vehicle by Model
- Select Vehicle by VIN
Select Vehicle by Model
orMake
Model
Year
Select Vehicle by VIN
For the most accurate results, select vehicle by your VIN (Vehicle Identification Number).
8 Rod Bearings found


Dodge Grand Caravan Bearings Part Number: 5174612AA
$14.57 MSRP: $24.10You Save: $9.53 (40%)


Dodge Grand Caravan Connecting Rod Bearing Part Number: 5184111AF
$3.76 MSRP: $5.65You Save: $1.89 (34%)Ships in 1-2 Business Days


Dodge Grand Caravan Connecting Rod Bearing Part Number: 5184113AF
$3.83 MSRP: $5.65You Save: $1.82 (33%)Ships in 1-2 Business Days


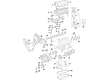
Dodge Grand Caravan Connecting Rod Bearing Part Number: 68002286AC
$18.22 MSRP: $27.05You Save: $8.83 (33%)Ships in 1-3 Business Days


Dodge Grand Caravan Bearings Part Number: 5161294AA
$18.30 MSRP: $27.05You Save: $8.75 (33%)Ships in 1-2 Business Days

Dodge Grand Caravan Rod Bearings Part Number: 4397722
$1.79 MSRP: $2.27You Save: $0.48 (22%)Ships in 1-2 Business Days


Dodge Grand Caravan Connecting Rod Bearing Part Number: 5184112AF
$16.30 MSRP: $23.55You Save: $7.25 (31%)
Dodge Grand Caravan Connecting Rod Bearing Part Number: MD105277
Dodge Grand Caravan Rod Bearing
Choose OEM Rod Bearing that meet Dodge factory standards. Dodge designs and tests every component for precision and durability. Each Rod Bearing follows strict manufacturing steps to lock in quality and fit. If your Dodge Grand Caravan matters to you, OEM parts make the smart choice. You'll get the exact look, feel, and performance you expect. Shop genuine Grand Caravan parts at the highly competitive prices online. Enjoy a manufacturer's warranty, a hassle-free return policy, and rapid delivery. No more guesswork with off brands. Get genuine parts with exact fit and true factory performance. Shop with confidence today at JeepPartsDeal.com.
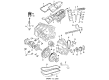
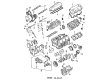
The Rod Bearing of the Dodge Grand Caravan plays the importance of supporting crank shafts and the connecting rod to rotate in a smooth manner with least resistance. These bearings are normally of plain type which their construction can be either bi-metal or tri-metal type. Bi-metal bearings are lined with aluminum alloy whereas tri-metal bearings consist of a copper bearing alloy and a lead-tin-copper overlay which offers additional strength and durability. Year after year, Dodge Grand Caravan models have incorporated both bi-metal and tri-metal Rod Bearings, while performance models frequently introduced complex materials and coatings in an effort to enhance the film's compression strength. These bearings are designed in such a way that would allow it to have an oil clearance which is very important for both engine efficiency and durability. Misalignment of the Rod Bearings or poor installation may lead to a lot of wear and tear hence affecting the working of the Dodge Grand Caravan's engine.
Dodge Grand Caravan Rod Bearing Parts and Q&A
- Q: How to measure Rod Bearing Clearance on Dodge Grand Caravan?A:Mark each of the bearing caps when you take them off, as they cannot be used for different positions. The bearing shells should be fitted onto the machine parts so that the tangs from the caps remain on the same side as the rods. Set up all of your rods on the same side of the riverbank until all are ready to cast. Standard and undersized versions of connect rod bearing are sold at 0.025 mm (0.001 in.) and 0.250 mm (0.010 in.). When installing bearings, use pairs, never combine new and old halves and do not attempt to sharpen the rods or bearing covers. Test the rod journal to see if it has taper and is circular. After rotating the Crankshaft until the connecting rod is at the lowest point, wipe away any oil from its surface, put a strip of Plastigage onto the full width of the bearing in the rod cap 6.35 mm (1/4 in.) from the oil hole, install the bearing cap with Plastigage in position, tighten it to specification, unmount the rod cap and measure the flatted Plastigage against the scale on the Plastigage package. Record each reading you take, because Plastigage marks both inch and metric figures. Should the bearing be past its wear limit, you should replace it.
- Q: How Can Rod Bearing Caps Be Marked and Installed to Prevent Interchangeability Issues on Dodge Grand Caravan?A:After removing the bearing caps, mark them so they are in the correct place after assembly, because they cannot be changed. While installing the shells, place the tangs into the machine-made grooves on the rods and caps, both tangs on the same side as the rod. Arrange all of the rods on the same bank until all are fitted. The industry provides connecting rod bearings in both standard and undersize formats of 0.025 mm (0.001 in.) and 0.250 mm (0.010 in.). You should install pairs of bearings, never mix old and new halves and don't touch the bearing caps or rods with a file or sharp tool. Check the journal on the connecting rod for signs of taper and roundness. You should measure connecting rod bearing clearances using Plastigage or a similar method. First, turn the Crankshaft so that the connecting rod under inspection is at the lowest point in its movement and afterward wipe away the oil from the surface being checked, because Plastigage dissolves in oil. Use Plastigage to measure across the width of the bearing shell in the cap and place some where you suspect a problem as well. First, put the Plastigage on the rod cap and screw on the cap to the proper torque by not turning the crankshaft to make sure Plastigage is not smeared. After opening the bearings, take off the cap, check the Plastigage and look at the readout on the package to get the oil clearance. Any difference between the ends of the Plastigage shows taper in the bearing. Jot down all readings and whenever the recorded results show the bearing clearance is beyond the wear limit, you should change it.


Related Dodge Grand Caravan Parts
 Dodge Grand Caravan Camshaft Seal
 Dodge Grand Caravan Crankshaft Pulley
 Dodge Grand Caravan Crankshaft Thrust Washer
 Dodge Grand Caravan Cylinder Head Gasket
 Dodge Grand Caravan Intake Valve
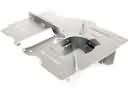 Dodge Grand Caravan Oil Pan Baffle
 Dodge Grand Caravan Piston
 Dodge Grand Caravan Rocker Arm
 Dodge Grand Caravan Timing Chain
 Dodge Grand Caravan Timing Cover
 Dodge Grand Caravan Transmission Mount
 Dodge Grand Caravan Valve Cover Gasket